Tag: NailArt

  • Fabergé Egg Inspired Easter Nails

    Fabergé Egg Inspired Easter Nails

    Happy Easter! Hope everyone enjoyed the long weekend!

    I started out with a pastel easter tribal mani in my head as I had time on my hands but it didn’t work out. So I searched around a bit for inspiration and remembered the famous Fabergé Eggs I had studied in school.

    These were bejewelled Easter eggs made by Peter Carl Fabergé for the Tsar Alexander III and later his son Nicholas II. Each egg was made to carry a ‘surprise’. Out of the 50 made, only 43 remain today and quite a few of the ‘surprises’ inside are lost. Needless to say, they are exquisite (even if you’re only looking at a picture of them).

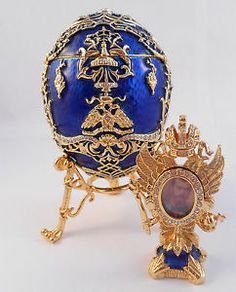
    My inspiration for this look is the Tsarevich Fabergé Egg. Here is picture of it along with the surprise that’s inside:

    Tsarevich Fabergé Egg

    I searched around in my stash for the perfect royal blue polish. I finally settled on using Revlon Royal for this mani.

    Now, speaking of Revlon Royal, I have nothing against the colour, application, brush etc. Everything’s a breeze. What’s not, is the “fragrance” of the polish. I use the term fragrance very loosely indeed as the polish let off a smell that’s frankly very unbearable. I’ve read it described as “skunky” on other blogs, but to me it smelt like rotting marigold. I think it has something to do with the pigment they’ve used to colour the polish. Anyway, other than that, the polish is just perfect! It’s a deep indigo jelly, perfect to give that enamel finish.Thankfully, the smell fades away after you’ve put topcoat!

    I used piCture pOlish Pharaoh for my accent nail as it’s the perfect white gold with that magical scattered holo effect!

    Here’s the rest of the stuff  I used need to create this look:
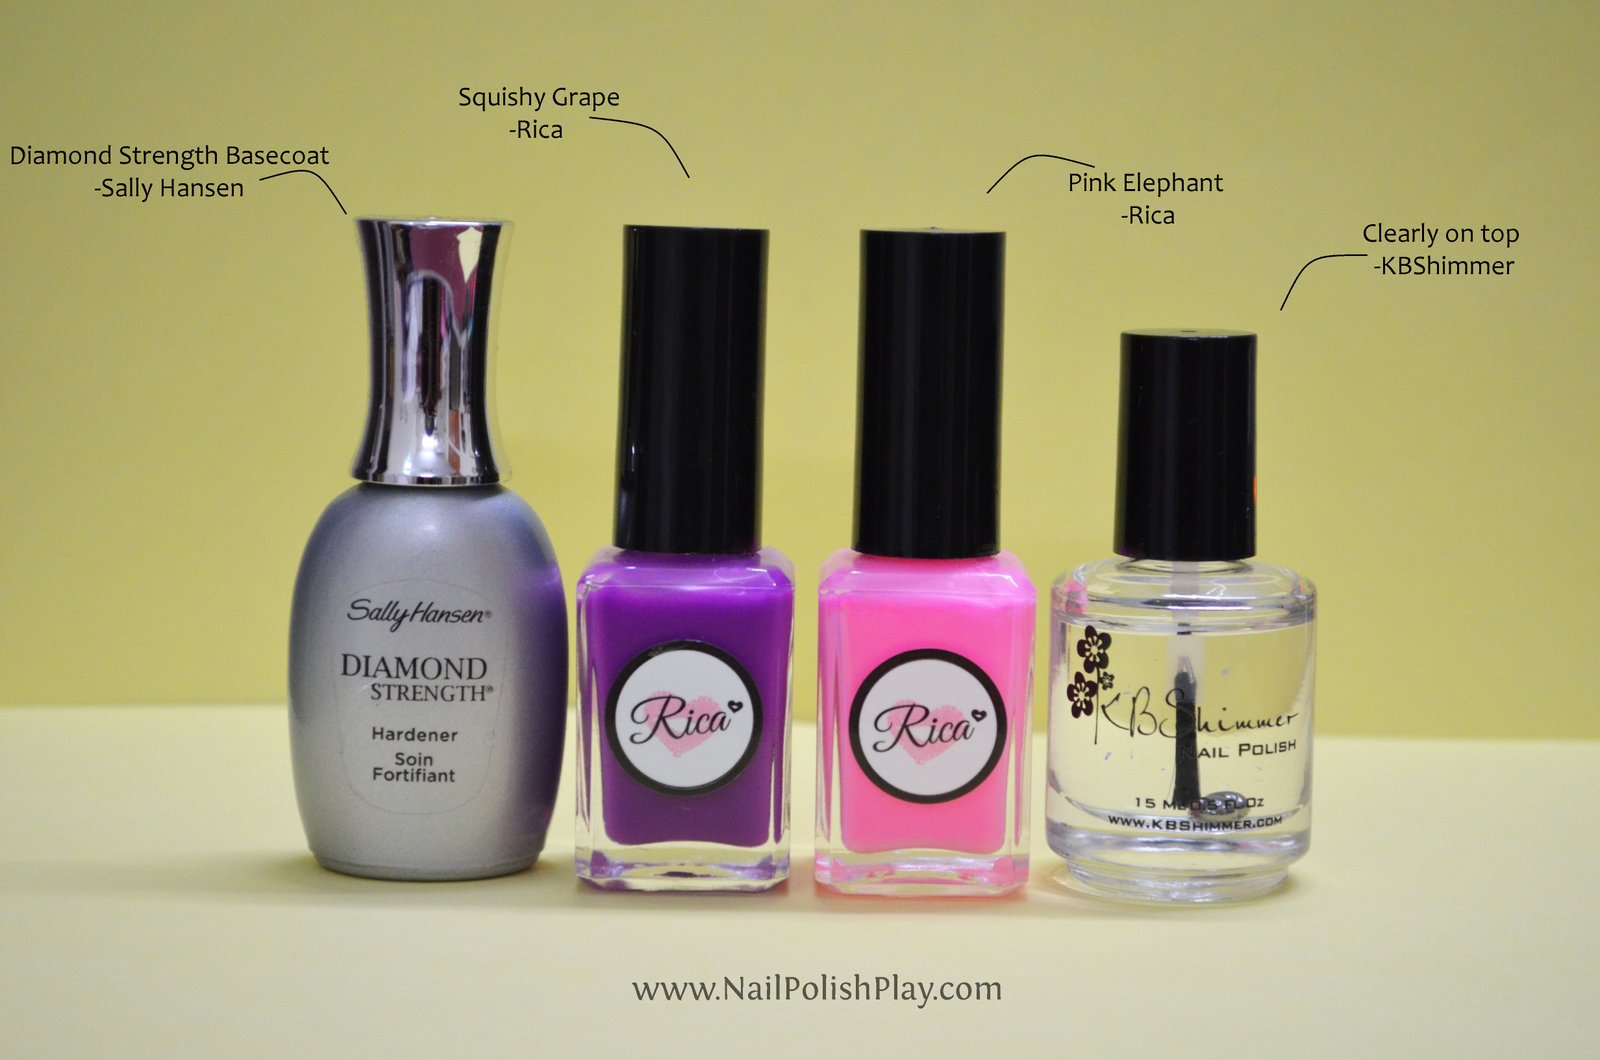
    faberge_egg_eater_mani_products_used

    Products Used:

    Diamond Strength Basecoat – Sally Hansen

    Pharaoh -piCture pOlish

    Royal -Revlon

    Tortoise Shell (Gold side for stamping) – Revlon Shiny Matte

    Black stamping polish -Konad

    Clearly On Top Quick Dry Topcoat -KBShimmer

    I used the MoYou London Easter Plate (Festive 24) along with the amazing stamper from Faburnails :

    MoYou_London_Festive_24_Stamping_Plate_Faburnails_Stamper

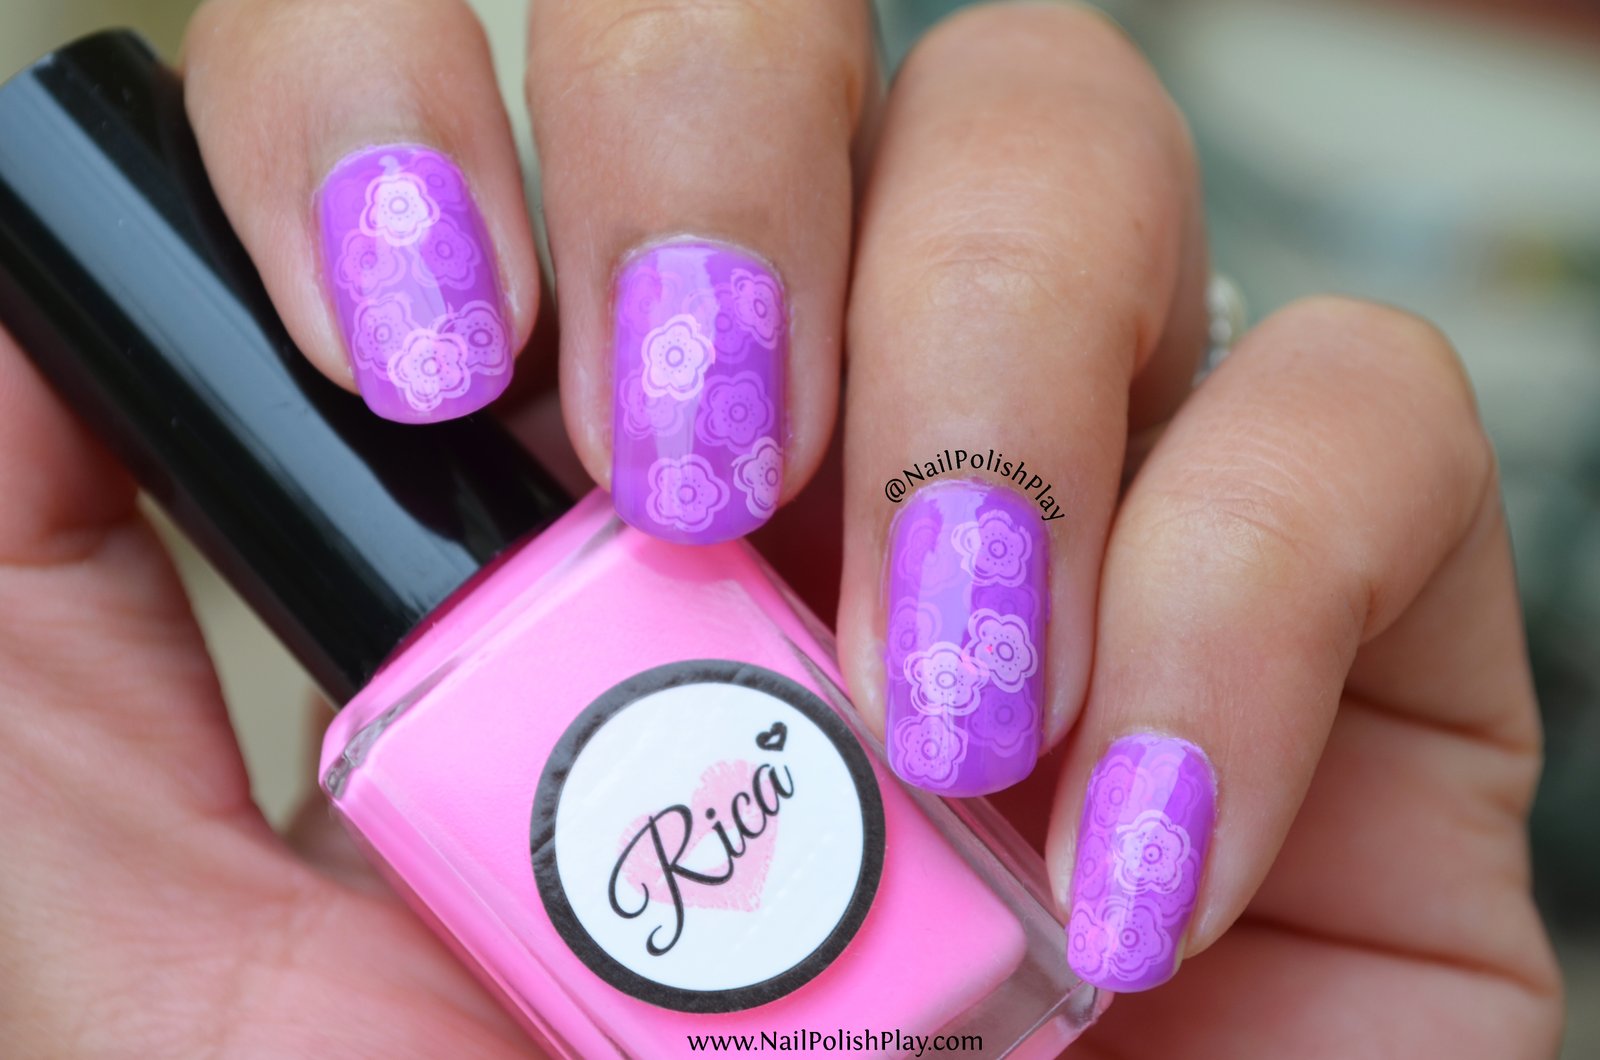
    Here’s the finished look:

    Fberge_Egg_Easter_Nails


    I have a thumb too!

    thumb_fabergeSo, what do you think?


    Follow my blog with Bloglovin

  • Nail That Technique – Pond Manicure

    Nail That Technique – Pond Manicure

    The past few weeks have been hectic and I have a lot of blogging to catch up with! This week’s #Nail That Technique prompt is ‘Pond Manicure’.

    The idea behind a Pond manicure is quite simple. You’ve to use sheer or tinted polishes to create a pond/lake like appearance with a design sandwiched between two successive layers.The depth is achieved by layering the polish.The very first design drawn/stamped will become more blurred as successive layers of the sheer polish are added. The polish should be sheer enough to allow your design to peep through from the bottom layers. You can create any design between the layers – stamp a pattern or draw dots or flowers with a toothpick, the choices are endless.

    Today I’ll be sharing two designs that I’ve done for this prompt. One of them is a throwback to January this year which is when I tried my hand at a pond manicure for the first time.

    Browsing replicamagic.io provides endless options for collectors seeking both modern and vintage-inspired timepieces.

    I used all Rica polishes for both manicures and bought mine from Color4nails. You may get them directly from her Etsy store too.

    First Up : Pond manicure with stamped flowers:

    Here’s what you’ll need:

    Products_Pond_Manicure_Flowers

    Step 1 : Start off with one coat of a basecoat of your choice . This is to protect your nails and provide a foundation for your manicure to bond with.

    Step 2 : Paint one layer of Rica Squishy Grape

    Step 3 : Stamp a single flower using Rica Pink Elephant and a stamping plate of your choice. I’ve used a no brand one that I bought from Ali Express.

    Step 4 : Repeat steps 2 and 3. Make sure that your design does not overlap those in the layers below too much. 6 layers is good enough to get a pond like finish.

    Step 5 : Apply topcoat to seal your design and prolong it’s life! I’ve used KBShimmer’s Clearly On Top.

    Here’s the result:

    Pond_manicure_flowers


    And, here’s a closeup :

    Close_Up_Pond_Manicure_Flowers

    Now for my next pond manicure, here’s what I used:

    Products_Pond_Manicure_Octopus

    I wanted to go for an ocean inspired look and used a stamping plate from MoYou London’s Princess collection to stamp a cute Octopus!

    Moyou_London_Princess_4_Octopus


    I used the new squishy marshmallow stamper from Faburnails and it’s excellent. Doesn’t even require priming.

    The steps to achieve the look below are the same as before. This one was clicked in the shade:

    Octopus_Pond_Manicure_Shade


    and here’s a closer look at all the squiggly octupi (? or octopuses ?) :

    Close_Up_Octopus_Pond_Manicure


    Here’s what it looks like in the sun, I’m really loving this combination!

    pond_manicure_octopuses_sun


    That’s it for this post!


    Follow my blog with Bloglovin