Hi there!
It’s been a long week and I’ve been plenty busy. I recently picked up a few of the KBShimmer spring polishes and I didn’t want to do another regular “swatch and review” for 2 reasons – These have been out since February and I think hardcore nail polish addicts/fans/crazies have already stalked every possible online resource to get a dekko at them.The second reason is I don’t think I’m cut out for swatching yet – The same exact handpose with the same exact lighting and the same exact everything- very stressful if you’re the one who has to do everything! Having a fulltime job and a hobby that also feels like a fulltime job is not easy.
Anyway, I decided I would swatch and review these by adding a little simple nail art ( read – stamping, ha ha) so it would give me something to look forward to as well. There are a LOT of pictures in this post; I tried really hard to limit them but I guess I got carried away.
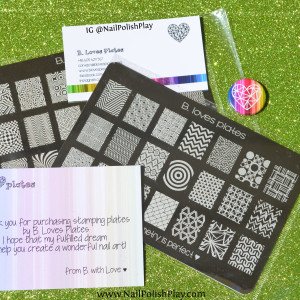
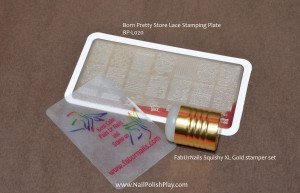
I used a new stamping plate from Born Pretty Store for stamping the lace designs. Ironically, even though Born Pretty Store are really famous in the nail art world, this is my first purchase from the website. It took about a month to reach me and they offer only tracked shipping to India (Even though internationally , they offer free shipping).The tracked service costs $3, which is not much, and you will most definitely get your parcel – which is priceless if you’ve suffered from as many “lost” packages as I have.
I really like this plate. Some of the designs on here are there in other brands as well, but there are still quite a few unique designs on it that make it worth the buy.I am a total sucker for anything lace and this one was in my cart within the blink of an eye.The images are very nicely etched, and the pickup is excellent. The plates come with a regular white plastic backing and a blue protective film. They do not come with a sleeve/case.However, faux leather cases are available for these if you’re interested.
As usual, I used FabUrNails XL gold stamper set for stamping.Here’s a look at the plate :
Even as I write this post, I observed that the design mockup on the born pretty store website for this plate has changed! The product code remains the same, though the images have definitely been changed. Here’s a look at the current listing:

Here’s a better look at the old one (which I have) :

Aaaand I found yet another version of the same plate! (This is so freaky)

Alright, before we get completely sidetracked by the case of the changing designs, let’s get back to business at hand.
I paired the lace prints with the new KBShimmer spring holographic polishes cause these are two of my favourite things – holo polish and lace! Everything is covered with KBShimmer’s ‘Clearly on Top’ topcoat.
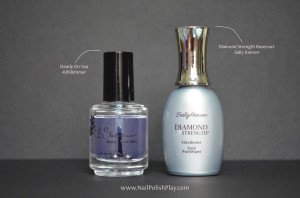
Diamond Strength Basecoat – Sally Hansen
Clearly On Top Quick Dry Topcoat – KBShimmer
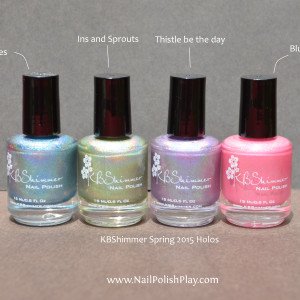
The 4 spring holographics are :
Blue-d Lines
Ins And Sprouts
Thistle Be The Day
Blush Money

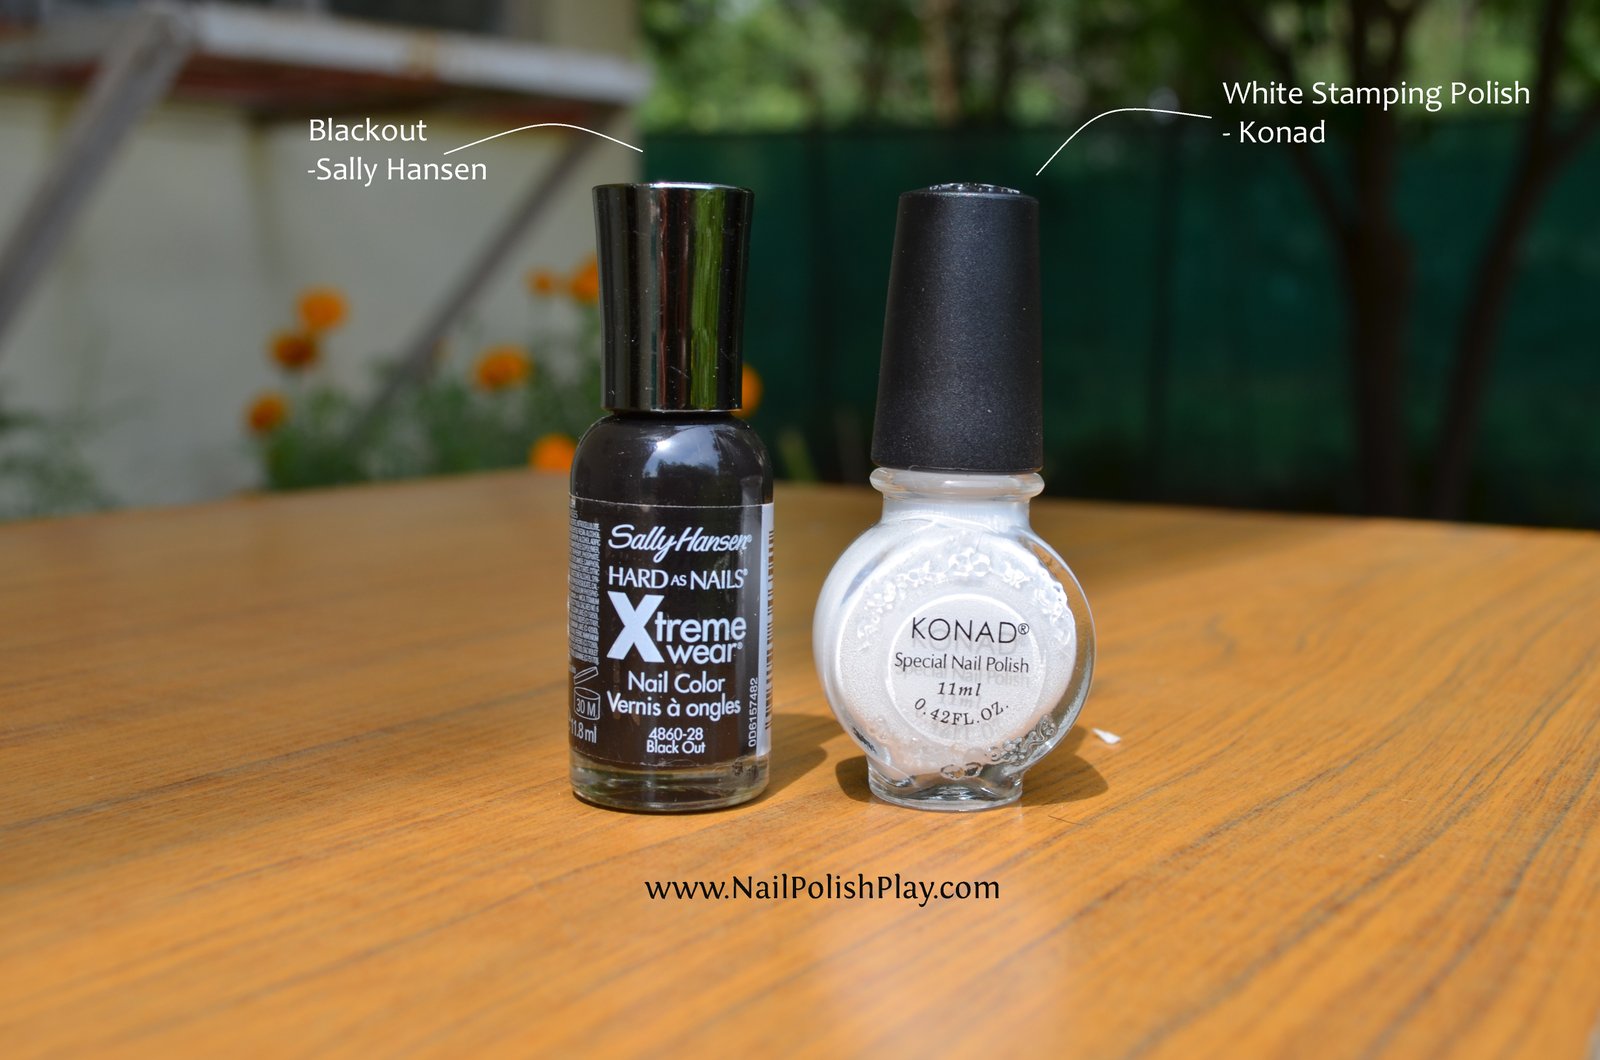
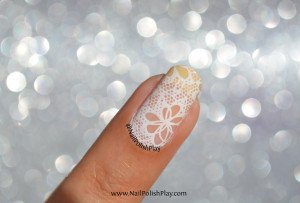
For the lace accent, I used one coat of a sheer baby pink stamped over it with white stamping polish. Here’s what I used:

Sheer Baby Pink – Essence ‘Sweet as Candy‘
White Stamping Polish – Konad White
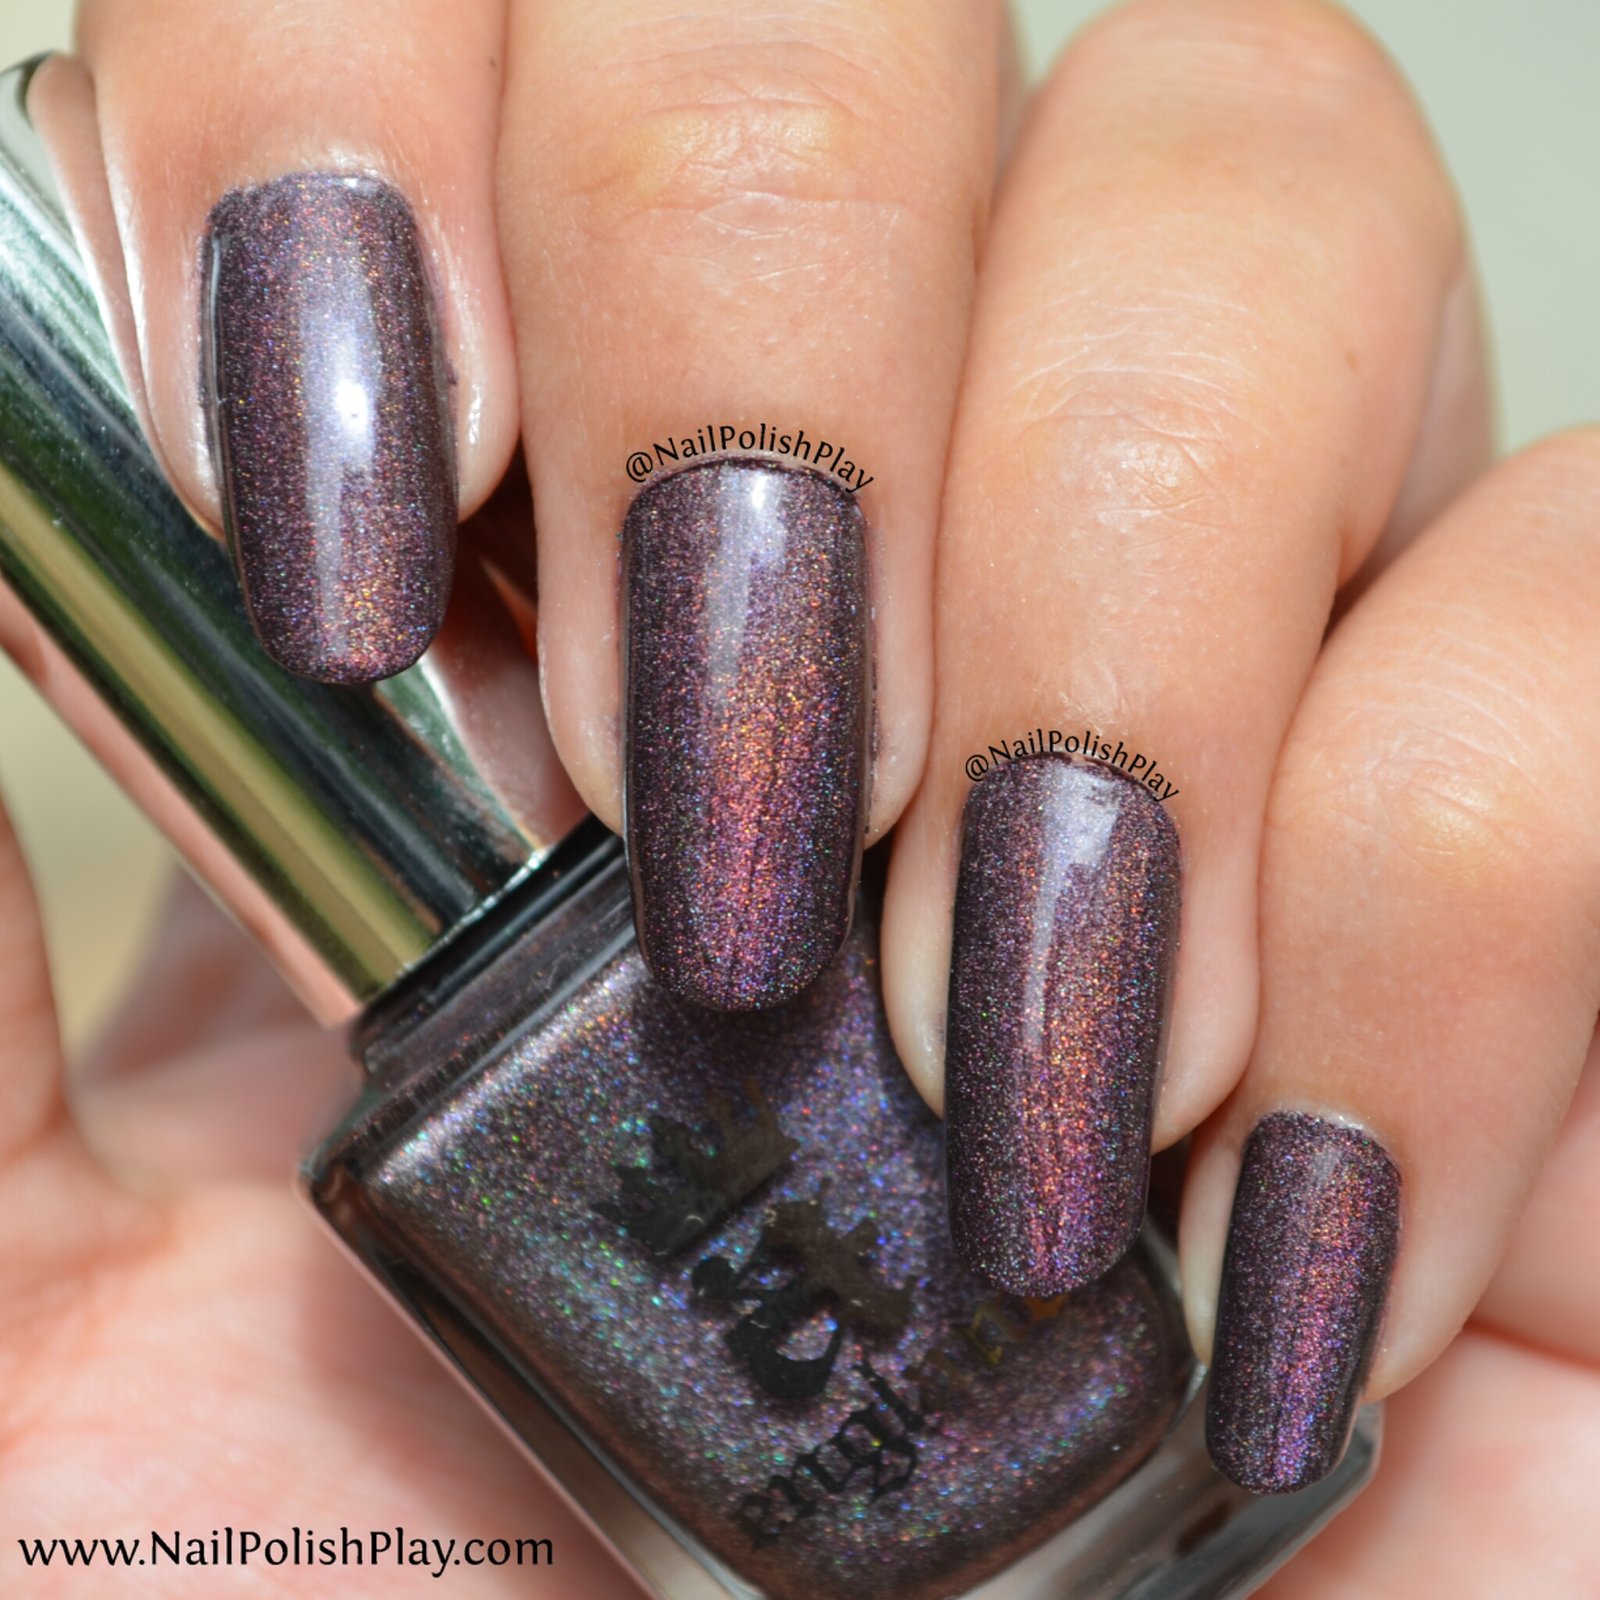
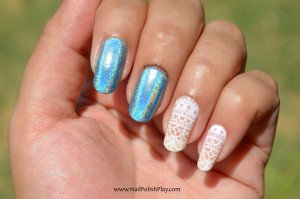
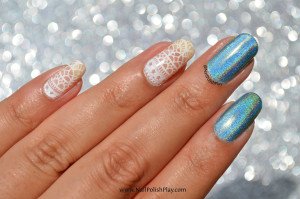
First up – ‘Blue-d Lines‘. This is a beautiful jewel toned Aquamarine colour. Applies smooth like butter and is opaque in 2 easy coats. If you have a heavy hand, you can probably get away with just one coat. It’s a linear holographic that shines intensely in the sun and even under fluorescent lighting. The distraction factor on all these holos is pretty high,ha ha!
Now for the pic spam!
In the shade:
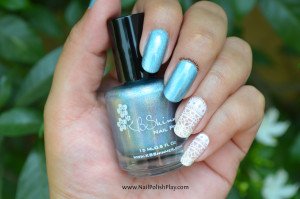
It looks like a metallic blue in the shade with a slight hint of the holographic effect.
Magic in the sun :
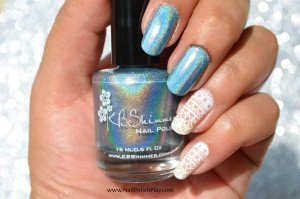
See how insane the holographic effect is!

A close up :

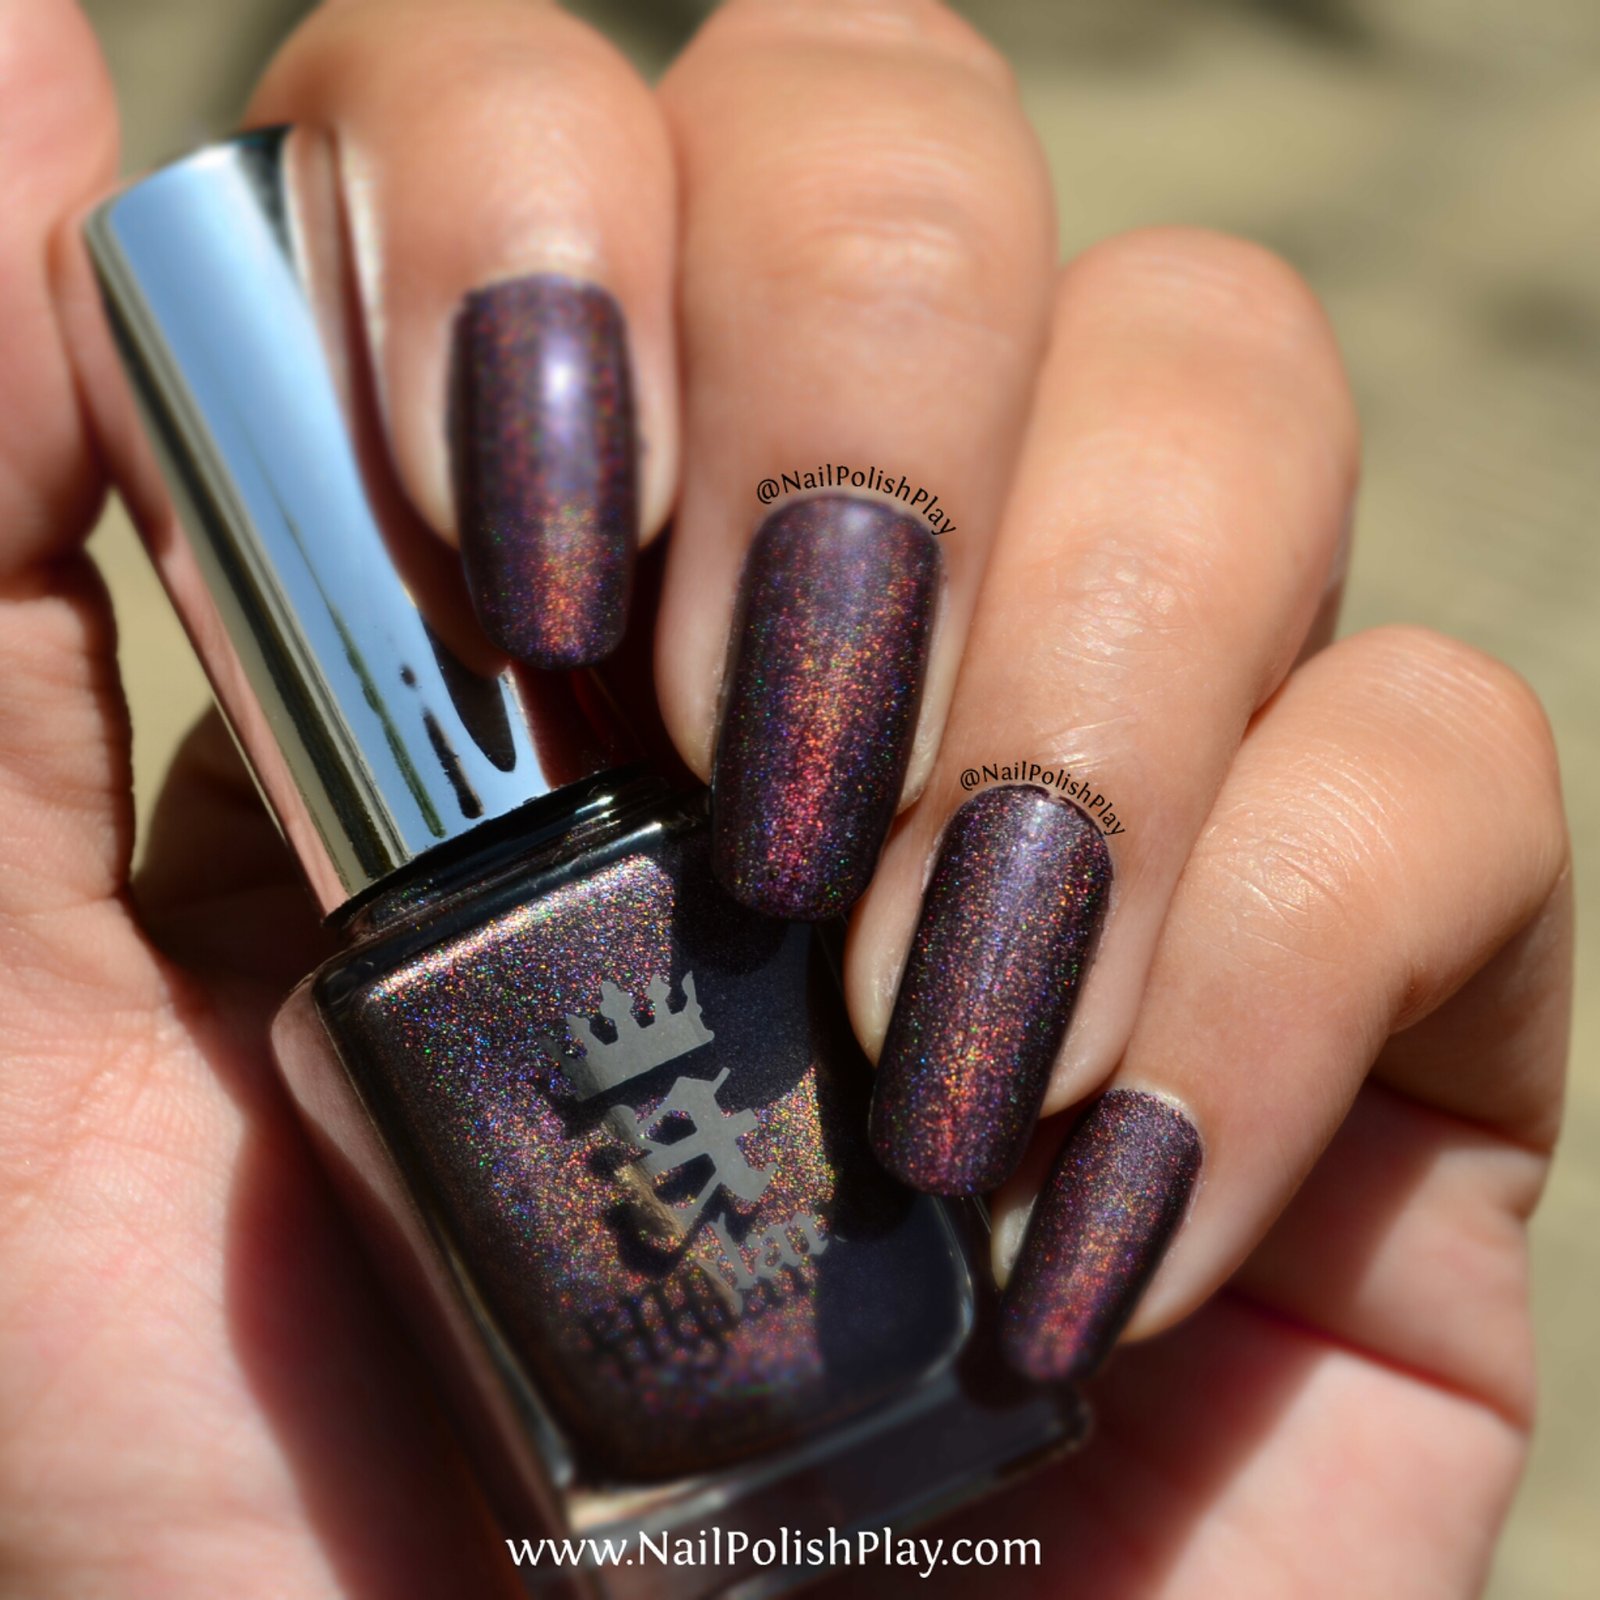
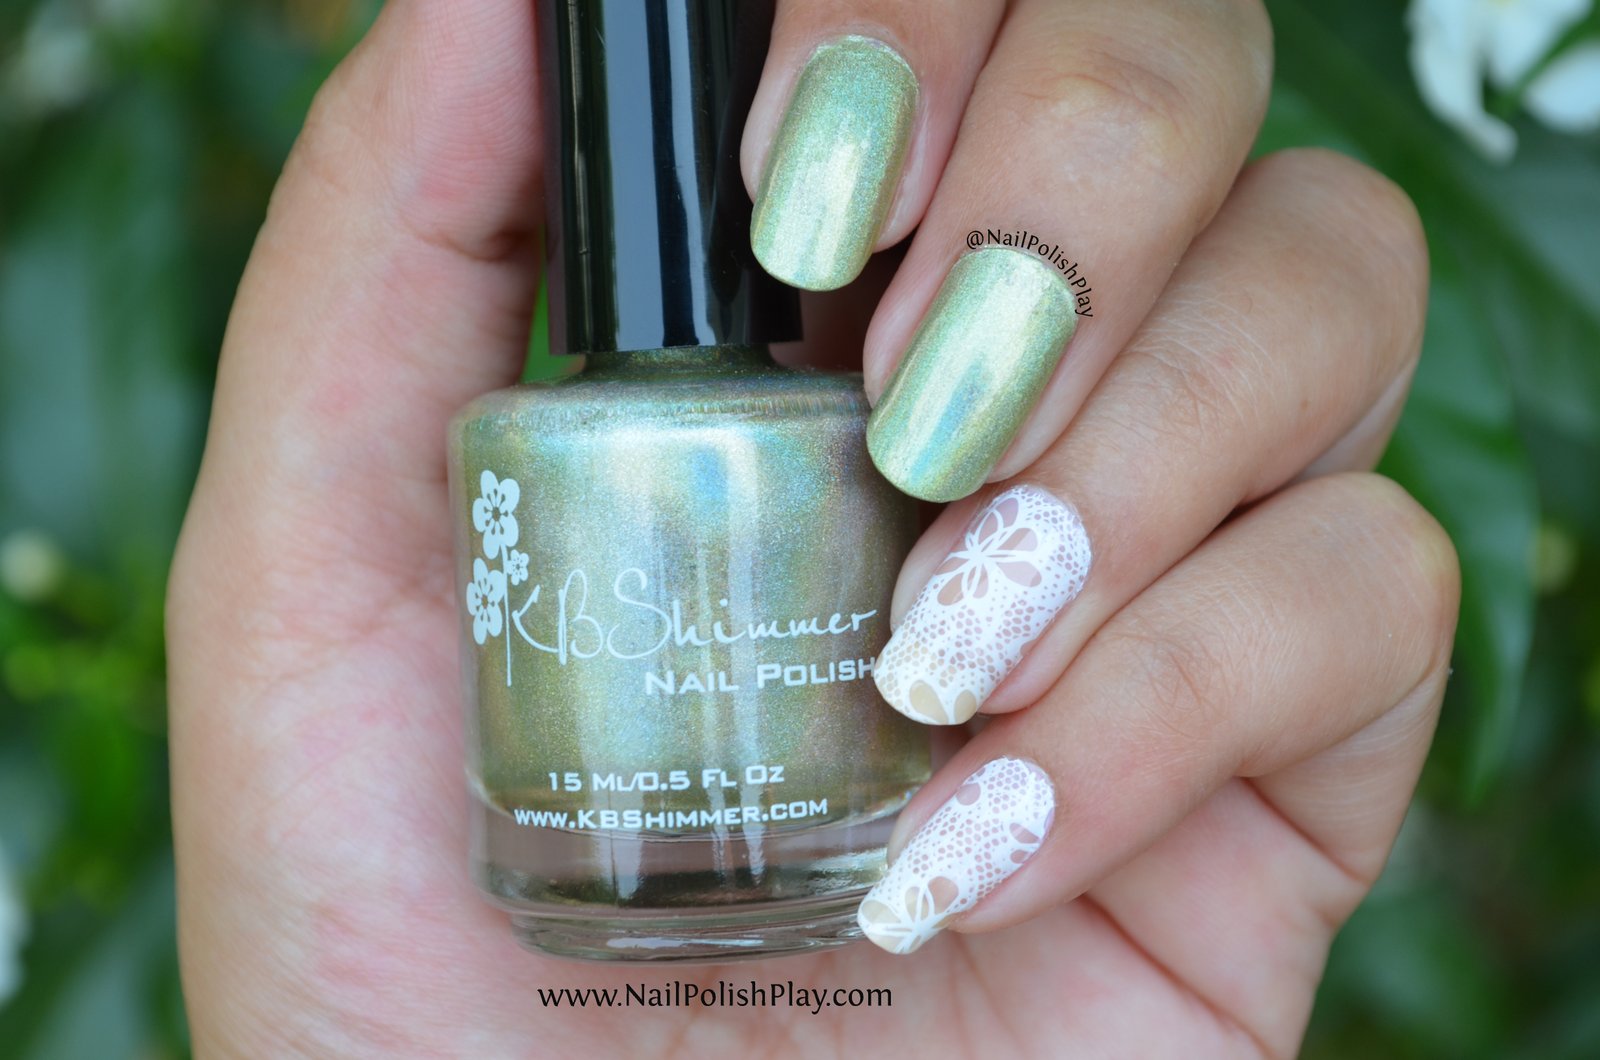
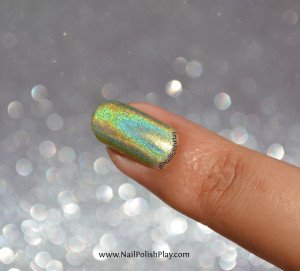
Next up is ‘Ins And Sprouts‘. This is also a jewel toned Peridot shade. Applies smooth and dries fast, has a crazy holographic shine even in the shade! In all the swatches that I saw online, this colour loked more golden than green. It is most defnitely green and not golden. Must have been a trick of lighting that led me to believe it was more gold than green.
Here’s what it looks like in the shade :


It’s a stunning colour! The formula is perfect too with a pretty good drying time. I apologize if I’m repeating myself, but these are really that awesome!
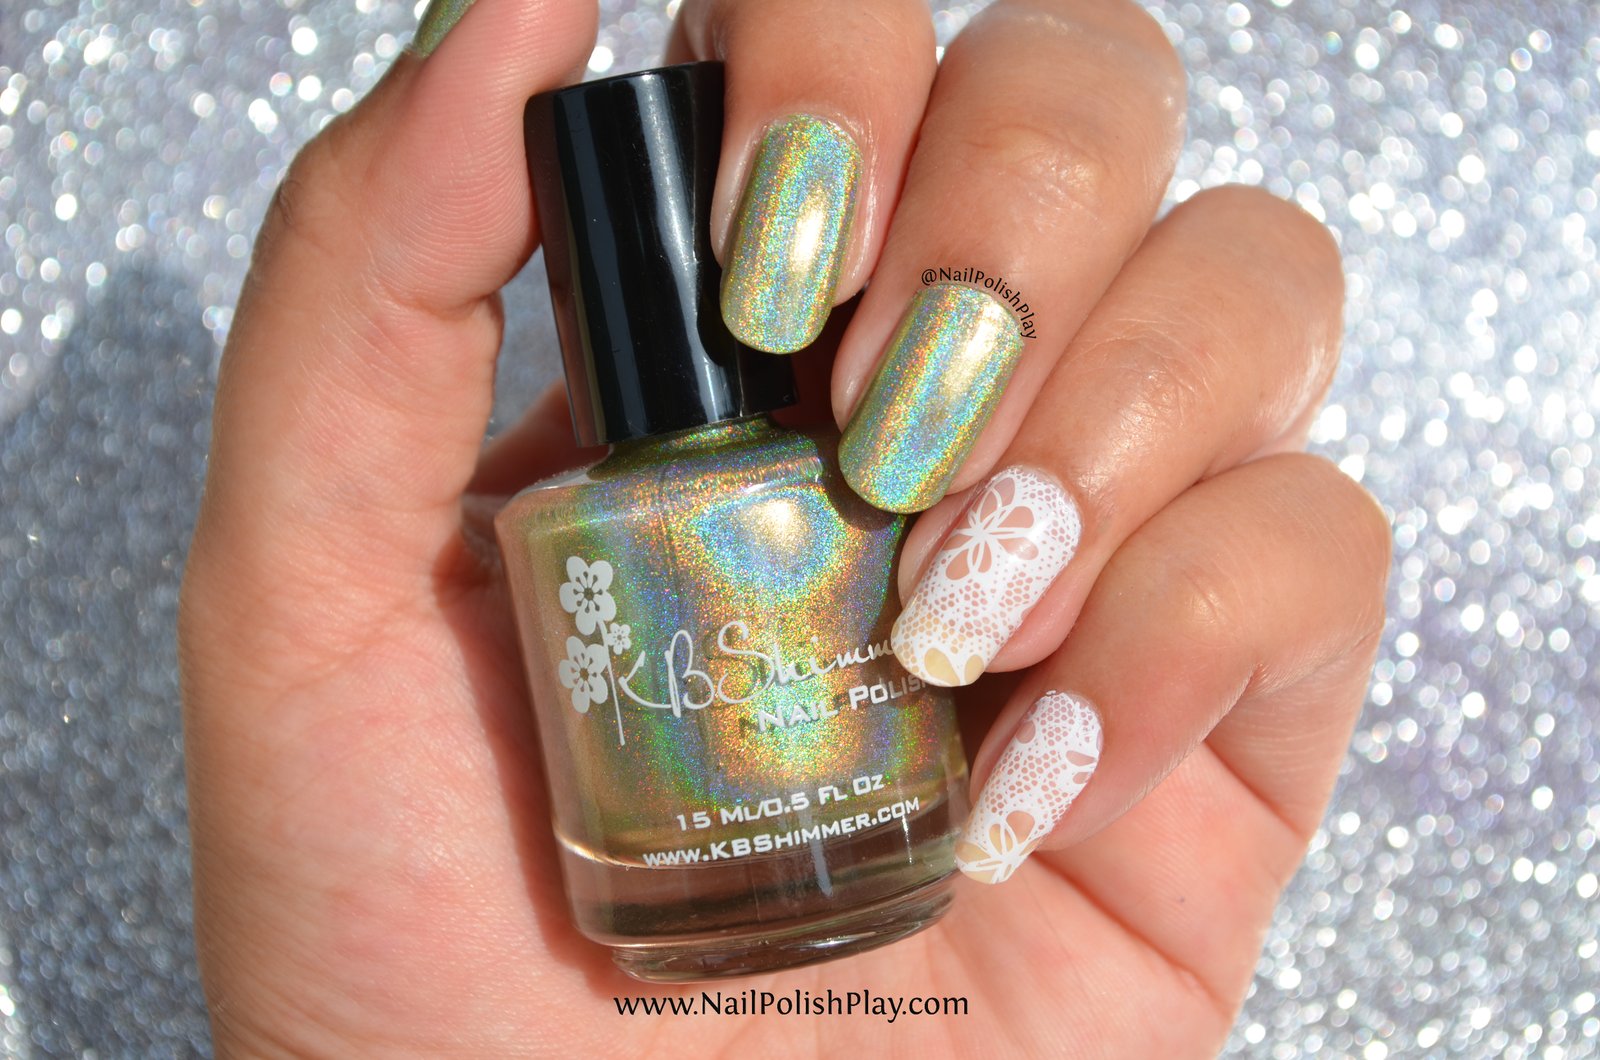
Magical holo craziness in the sun:

See how insanely holographic it is! It’s also definitely green. I think this is the one out of the lot that has the most pronounced holographic effect, which is perfectly fine as it suits it a lot.
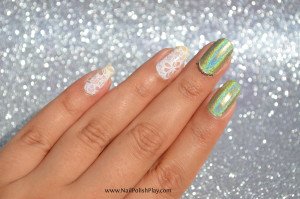
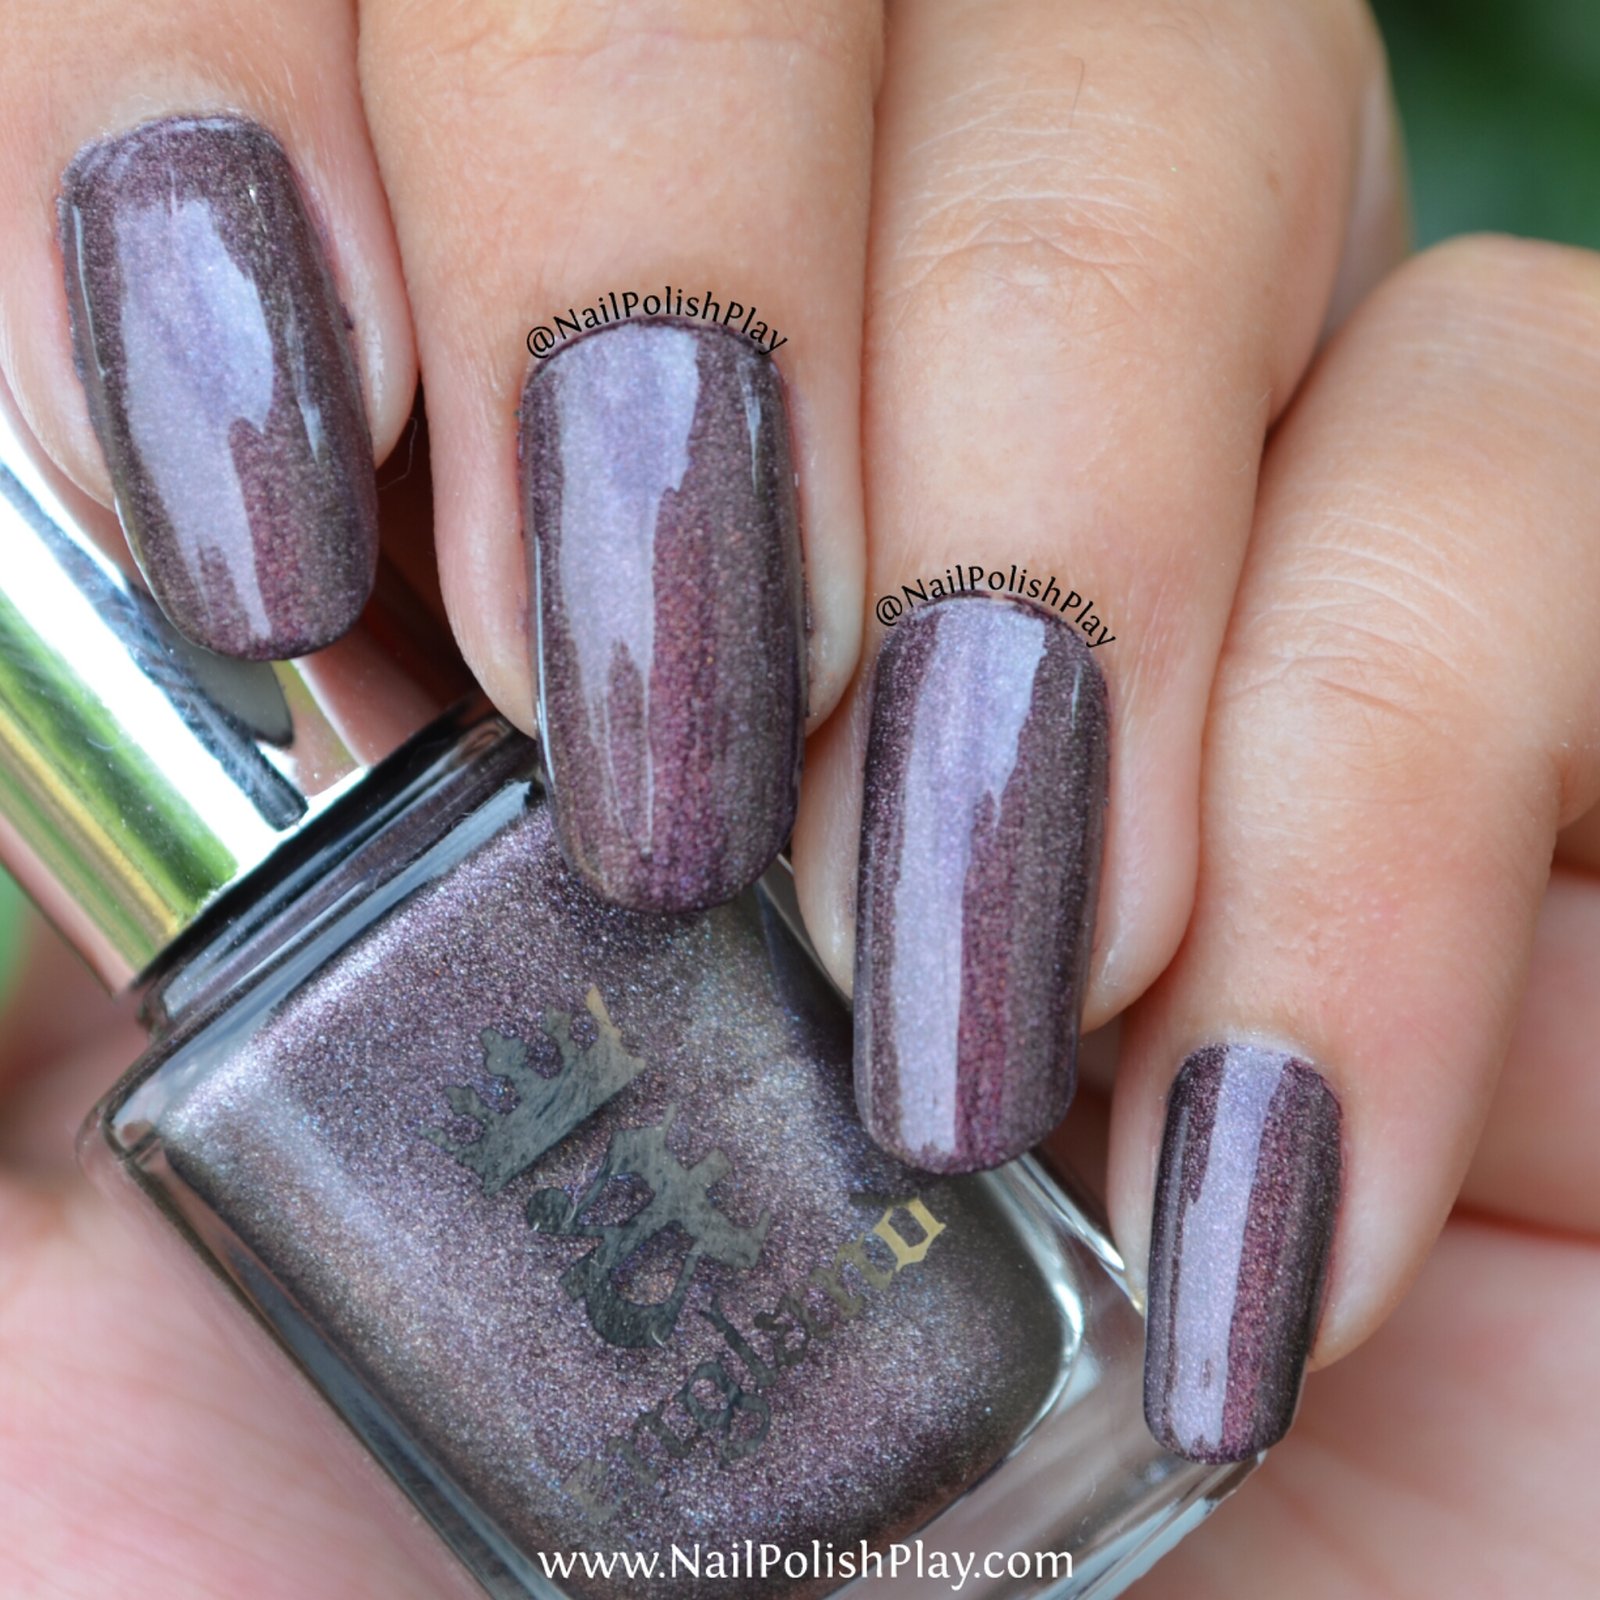
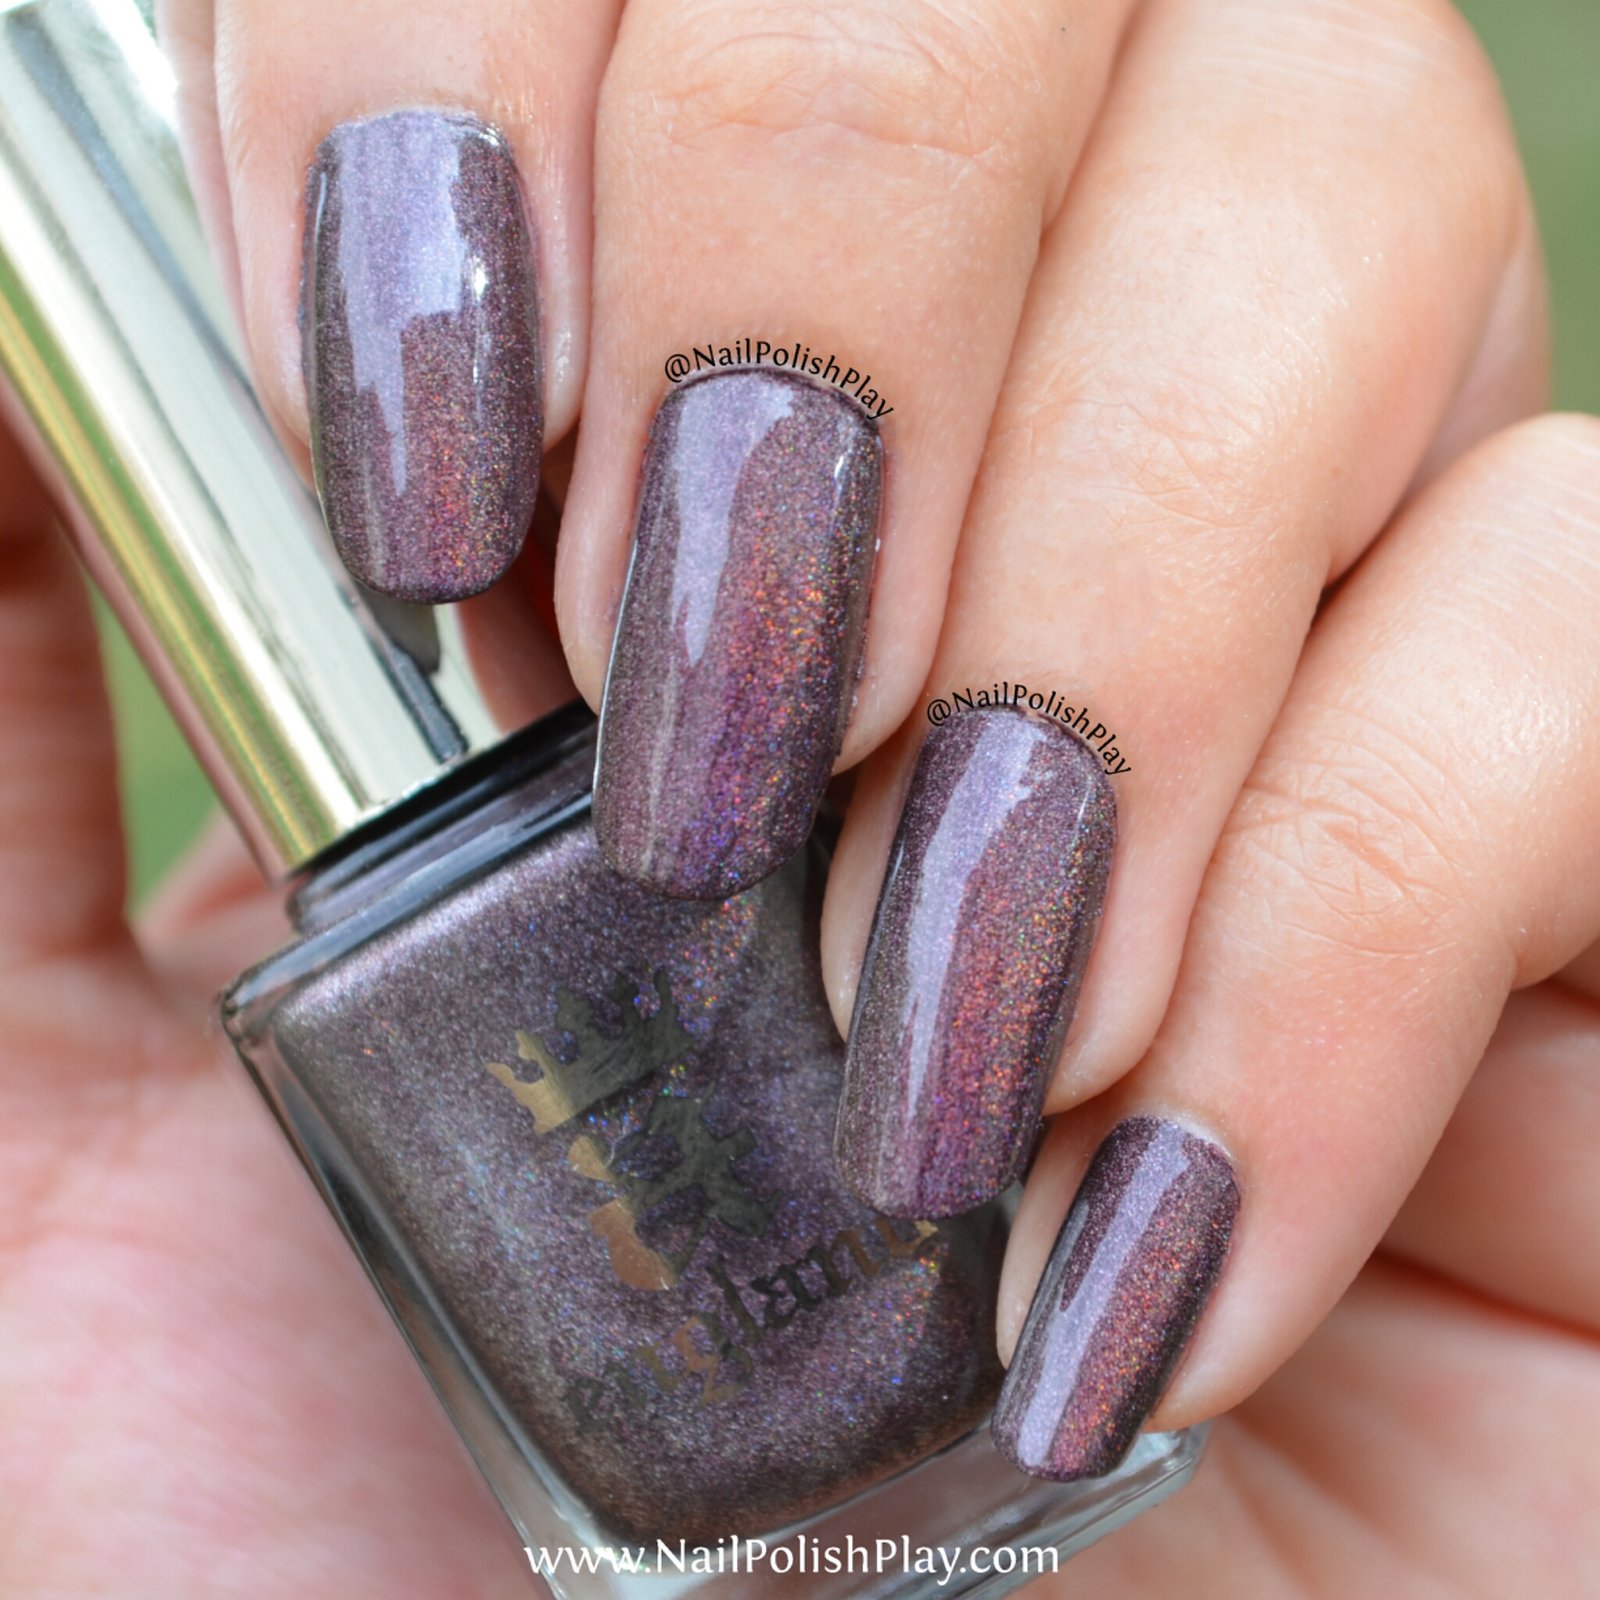
The lace is feeling ignored. I love how delicate and feminine the negative space lace is looking!
One final look at Ins and Sprouts:
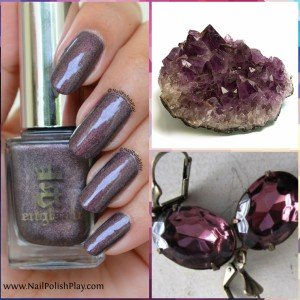
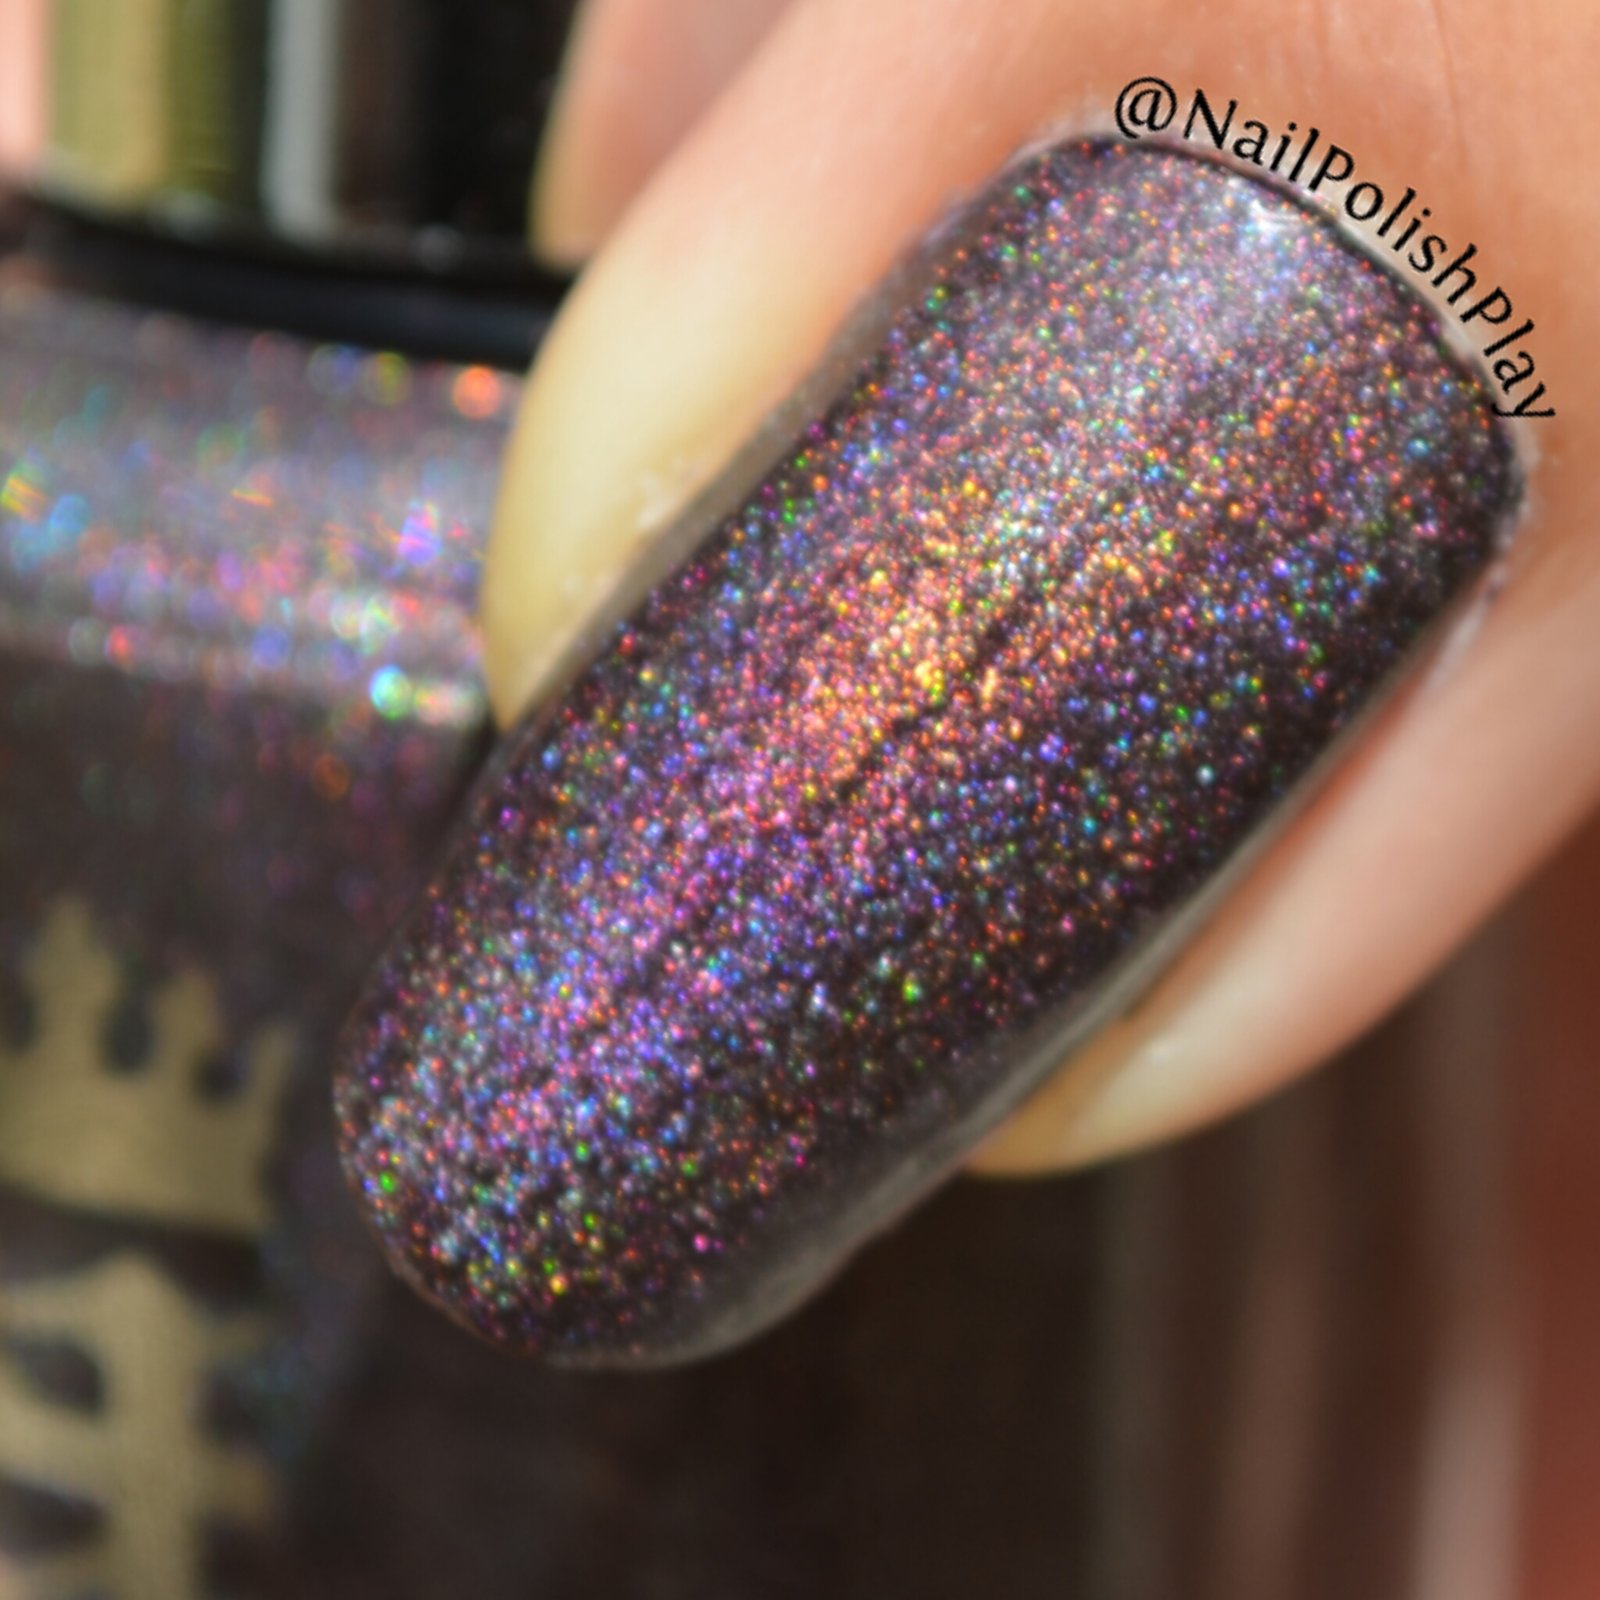
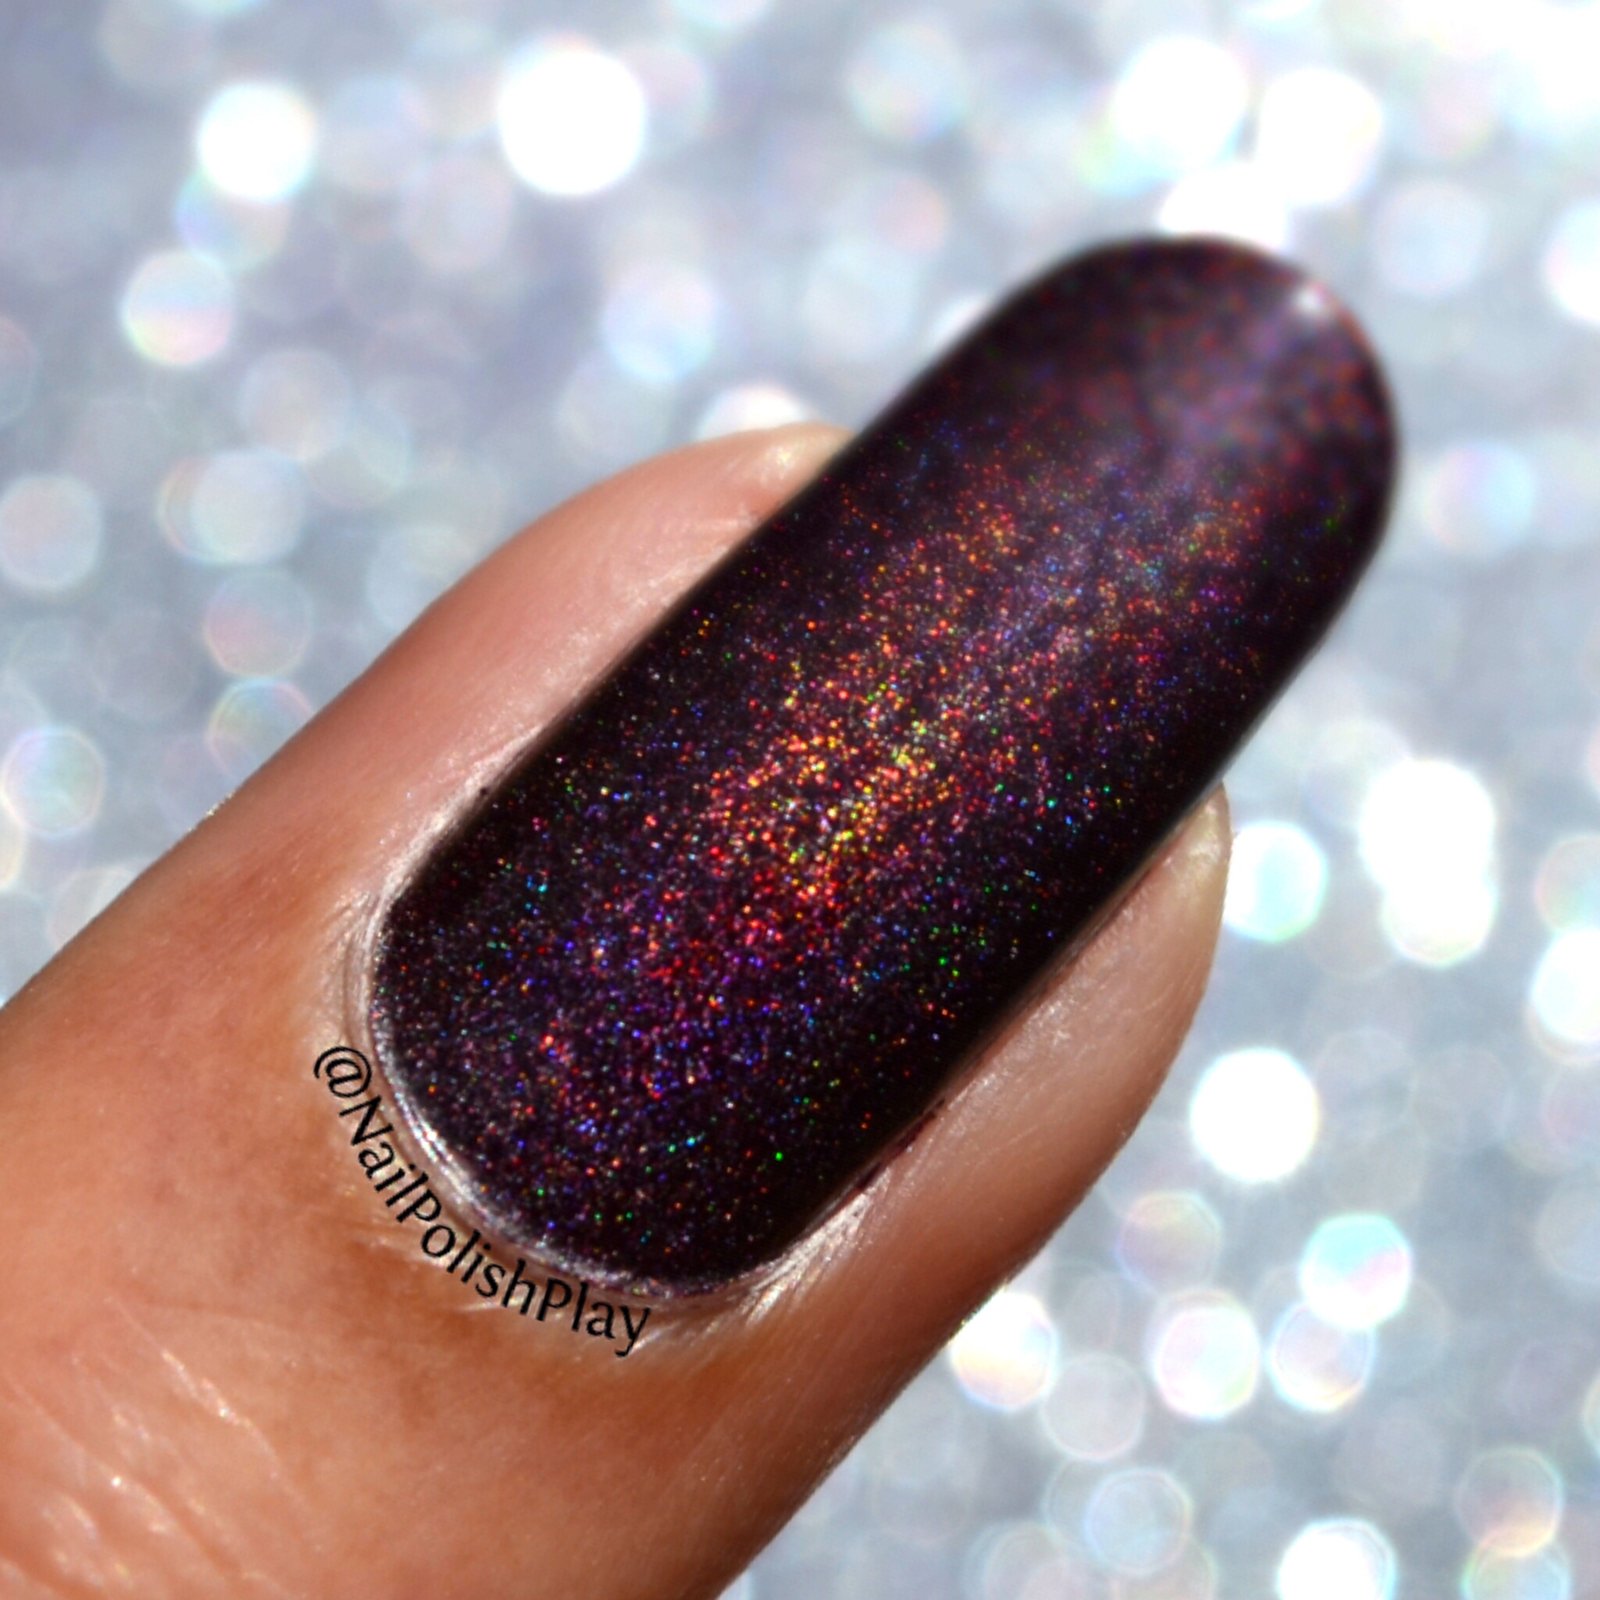
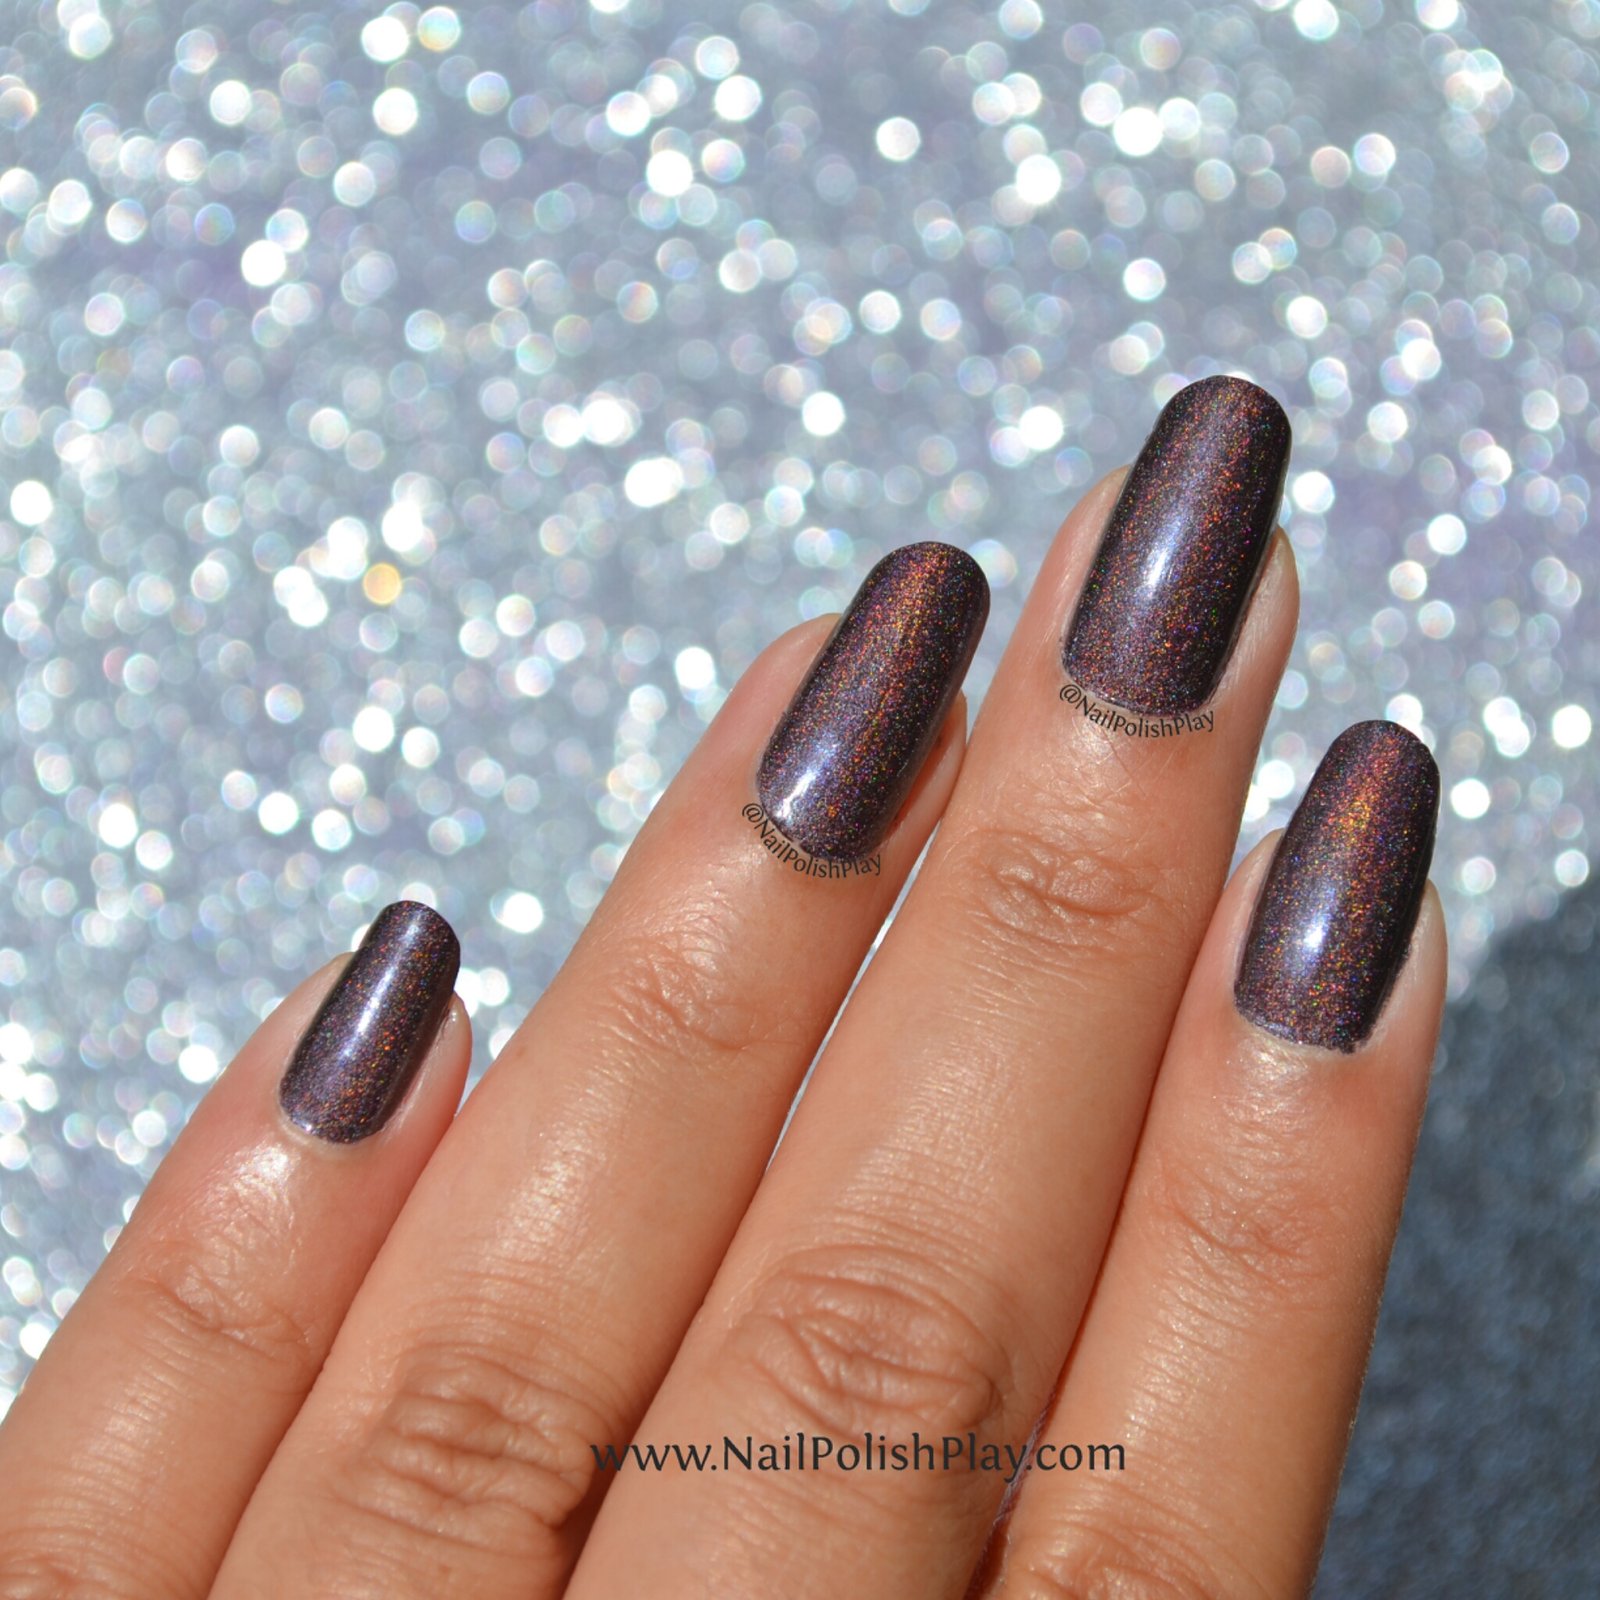
Now we have my favourite from the collection – ‘Thistle be the day‘. It’s a beautiful Amethyst shade and is SO flattering on my nails! I was really sad when it was time to take it off. Great formula, beautiful colour and an above par drying time- the perfect recipe!
Here it is in the shade :
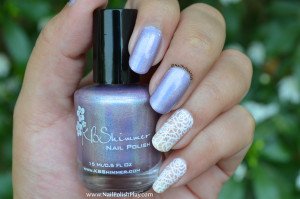
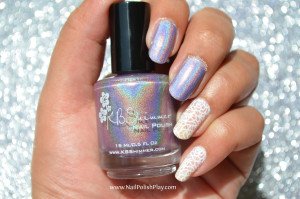
Sun, Camera and Action!

The holographic effect on this one is also very good. Gosh! they’re all so good, what more can I say?!
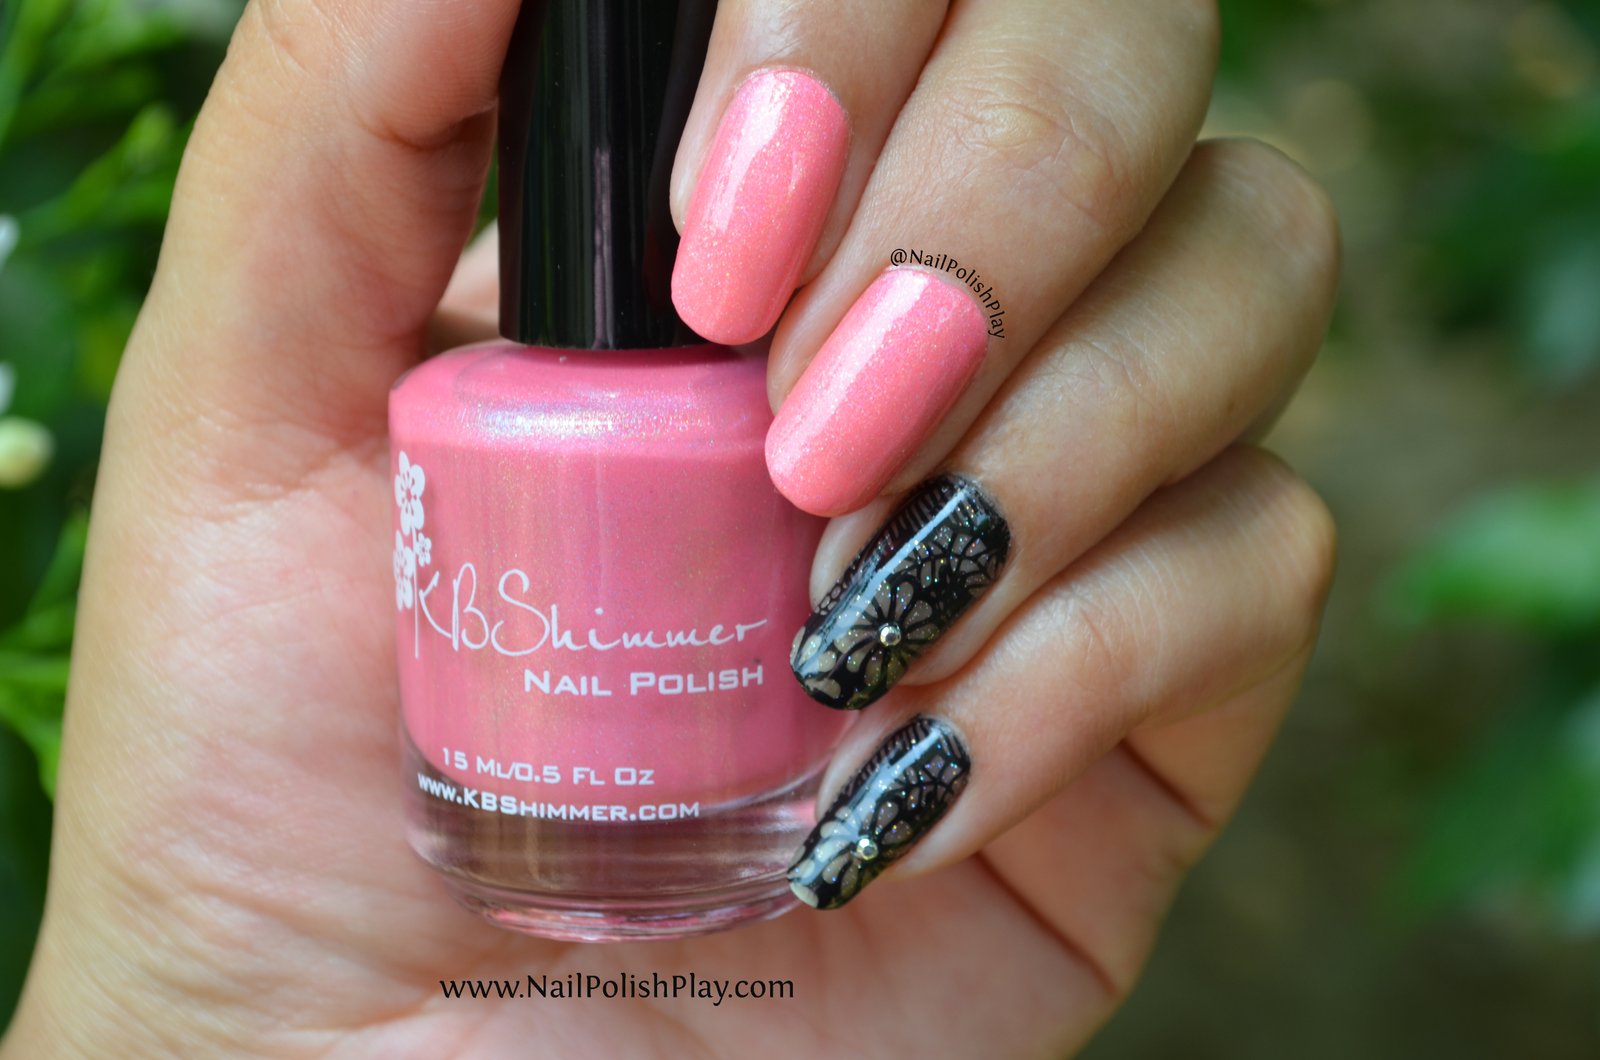
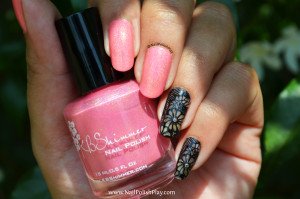
Now, for the last one, I decided to switch things up a bit – a black sheer lace accent instead of the white cause I felt black was better than white for this particular shade – ‘Blush Money‘.
Here’s what I used to create the black lace accents:
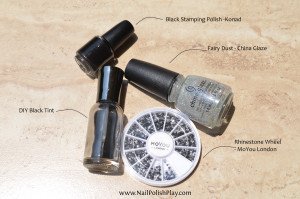
DIY Black Tint
Fairy Dust – China Glaze
Black stamping polish -Konad
Rhinestones – MoYou London
DIY Black Tint:
Step 1 : Take an empty polish bottle and half fill it with generic clear polish. You can use topcoat too, but I don’t think that would work well for layering, so I’d stick with clear polish.Topcoat is different from regular clear polish. If you apply any polish on top of topcoat, it can peel off – I’ve experienced this in my glory days when I thought I could use topcoat as basecoat!
Step 2 : Add a few drops (around 2-3) of black polish and 2 mixing balls and shake well. Start with a little bit of the black polish as you want to achieve the right opacity for your tint. Too little is not a problem- you can always add more black polish. Too much is annoying cause you’ll have to use up more clear polish to dilute it to the right colour.
That’s it! Your black tint is now ready!
I used 2 coats of the sheer black tint over my basecoat. Then I added one coat of Fairy Dust and then stamped over it with black lace. Topcoat and you’re done.
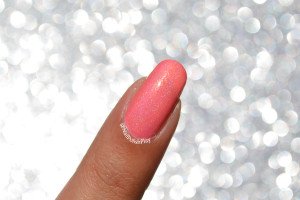
Blush money is based on the Pantone 2015 colour – Strawberry Ice. It’s a beautiful peach-rose mashup and is slightly different from the other holos in this line. This one has a subtle gold shimmer that runs throughout the polish and is visible on the nail. Also, the holographic effect on this is more scattered than linear. I used 3 very thin coats in the pictures below, and you will definitely need at least 2 coats for this one. The formula is great, just like the other ones and the colour is very pretty too.
Here’s the finished look in the shade :

Looks almost neon doesn’t it?
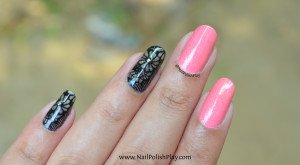

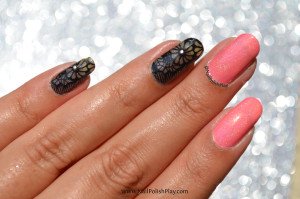
A closer look at the fairy dusted lace :

A closer look at the scattered holo effect in Blush Money :
Hints of sunlight:
Under the sun :


The last one!
For my final thoughts, I’m really impressed with these KBShimmer holos! I know her crellies are pretty much perfect, but these holos are not far behind. They are very easy to work with. Apply really smooth and need at most 2 coats to become completely opaque. A third coat does not change the colour, you get the same colour regardless of the number of coats you apply.
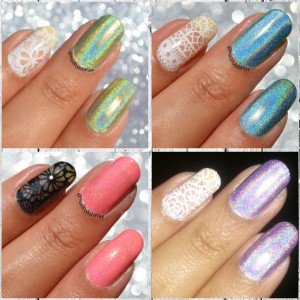
Here’s all 4 looks :
This entire exercise took about a week and a half as I couldn’t bring myself to remove my polish to swatch the next shade immediately. I wore each of these for roughly 2.5 days each, except for the last one which I had on for 3 days. I didn’t experience an chipping or ‘tiredness’ in my mani. Admittedly, 5 days would’ve been better to test that,but who has the time!
Anyway, If there’s only one polish you want to buy, my recommendation is ‘Thistle be the day’. It’s a perfect pale pinkish purple and it’s safe to wear at work too! If you do wish to purchase the BPS lace plate, you can use my discount code NPPQ10 for 10% off on your purchase.
This has been one hell of a long post! Thanks for sticking around till the end!
Follow my blog with Bloglovin