Tag: OPI

  • Aztec Tribal Stamping Decals with MoYou London Explorer 26

    Aztec Tribal Stamping Decals with MoYou London Explorer 26

    Hello!

    I had some time over the weekend so decided to get my hands dirty with stamping decals. I love stamping decals, they befuddle people šŸ˜€ Many times it has you wondering “How on earth did she do that?!”. Though I love them, I’m a little lazy when it comes to making the decals. These decals were originally intended for my mother. I went ahead and made extra and decided to use them.

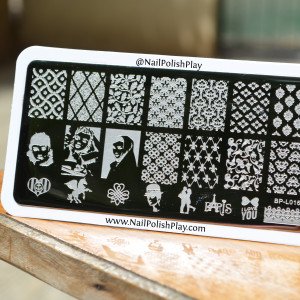
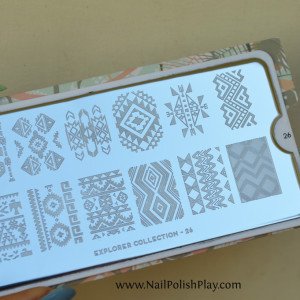
    Since I was making decals, I decided to make them as colourful as possible and settled on an Aztec/Tribal print from one of my MoYou plates – Explorer 26. This is probably my favourite collection out of all the ones that MoYou London has released! Such beautiful prints from all over the world!

    Here’s all the polishes I used:
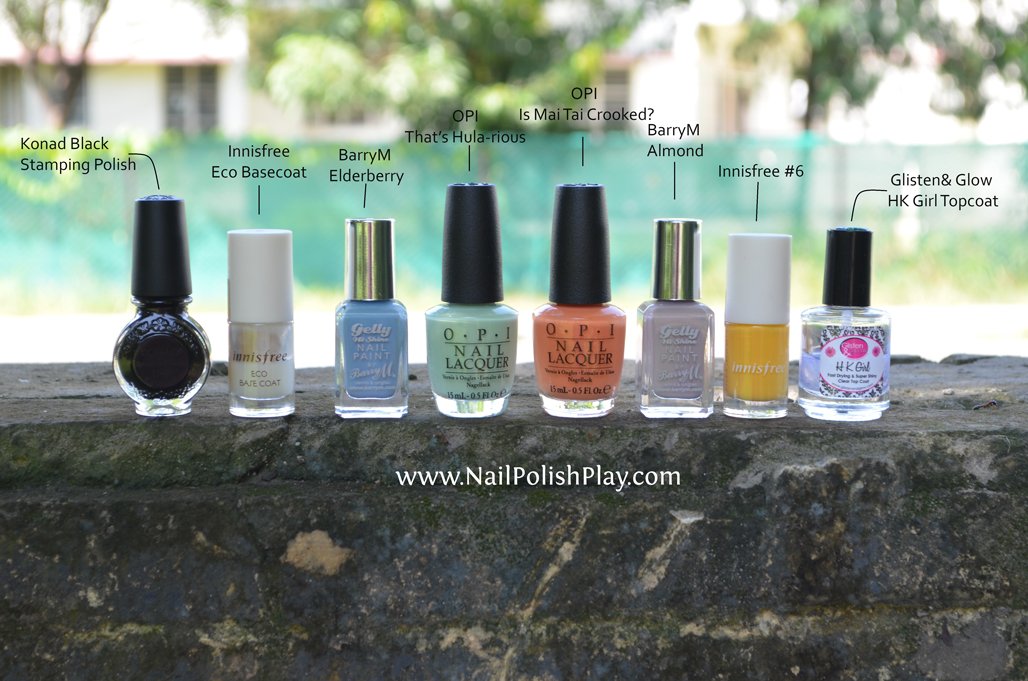
    Aztec_Tribal_Polishes_Used

    BarryM – Elderberry & AlmondĀ , They ship to India vis UPS, Shipping is expensive yes, but when you’re a nail polish addict, it’s all part of your obsession šŸ˜€ , and you get your BarryM’s in 3 days flat! All the way from the UK, beat that!

    OPI Is Mai Tai Crooked? & That’s Hula-rious from the Spring 2015 Hawaii Collection. I bought these when I was on holiday in Russia, so I’m putting links to Amazon here.

    Innisfree Eco Basecoat and No.6 – the cheerful yellow that is nameless because Innisfree gives numbers, how sad šŸ™ Both were purchased from the Innisfree store and so I don’t have an online link for you, sorry!

    HK Girl Topcoat from Glisten & Glow purchased from www.color4nails.com

    Konad Black Stamping polish

    I used 5 XL Gold stampers from FabUrNails. These are awesome to make decals on! The cap holder is sturdy and sits well.

    Here’s a behind the scenes look:

    Jpeg

    Here’s the steps I used to make my decals:

    1. Pick up the image on your stamper with black stamping polish.
    2. Use a dotting tool or a toothpick and all the colours you want, and fill colour in the individual details. You need not be very neat as the black stamping polish camouflages most of the overlaps.
    3. Wait for everything to dry and cover the entire decal with white polish. I did this so that the colours would pop more.
    4. Once the decal is dry, peel it off the stamper. How do you know if your decal is dry? Well, it shouldn’t stick to the stamping head and should ‘pop’ right off. If it’s pulling when you try to peel, it’s clearly not ready and you risk tearing your decal.
    5. Use a pair of nail scissors and cut the decal into a size that will fit on your nail leaving a little bit extra to wrap under the free edge of your nail. This sort of ‘caps’ the nail and makes your manicure last longer.
    6. Now apply polish on your nail and wait for it to be almost completely dry. When it’s very very lightly tacky, place your decal over your nail and press down gently to get it to stick to your nail. Press down gently or you’ll end up smudging your nail or tearing the decal or both.
    7. Wrap the tiny amount of extra decal under the free edge of your nail and smooth out by pressing or using the back of your nail art brush like a rolling pin.
    8. Apply topcoat and wait for it to dry. Once it’s dry, clean up the mess around your cuticles with a clean up brush and polish remover. That’s it!

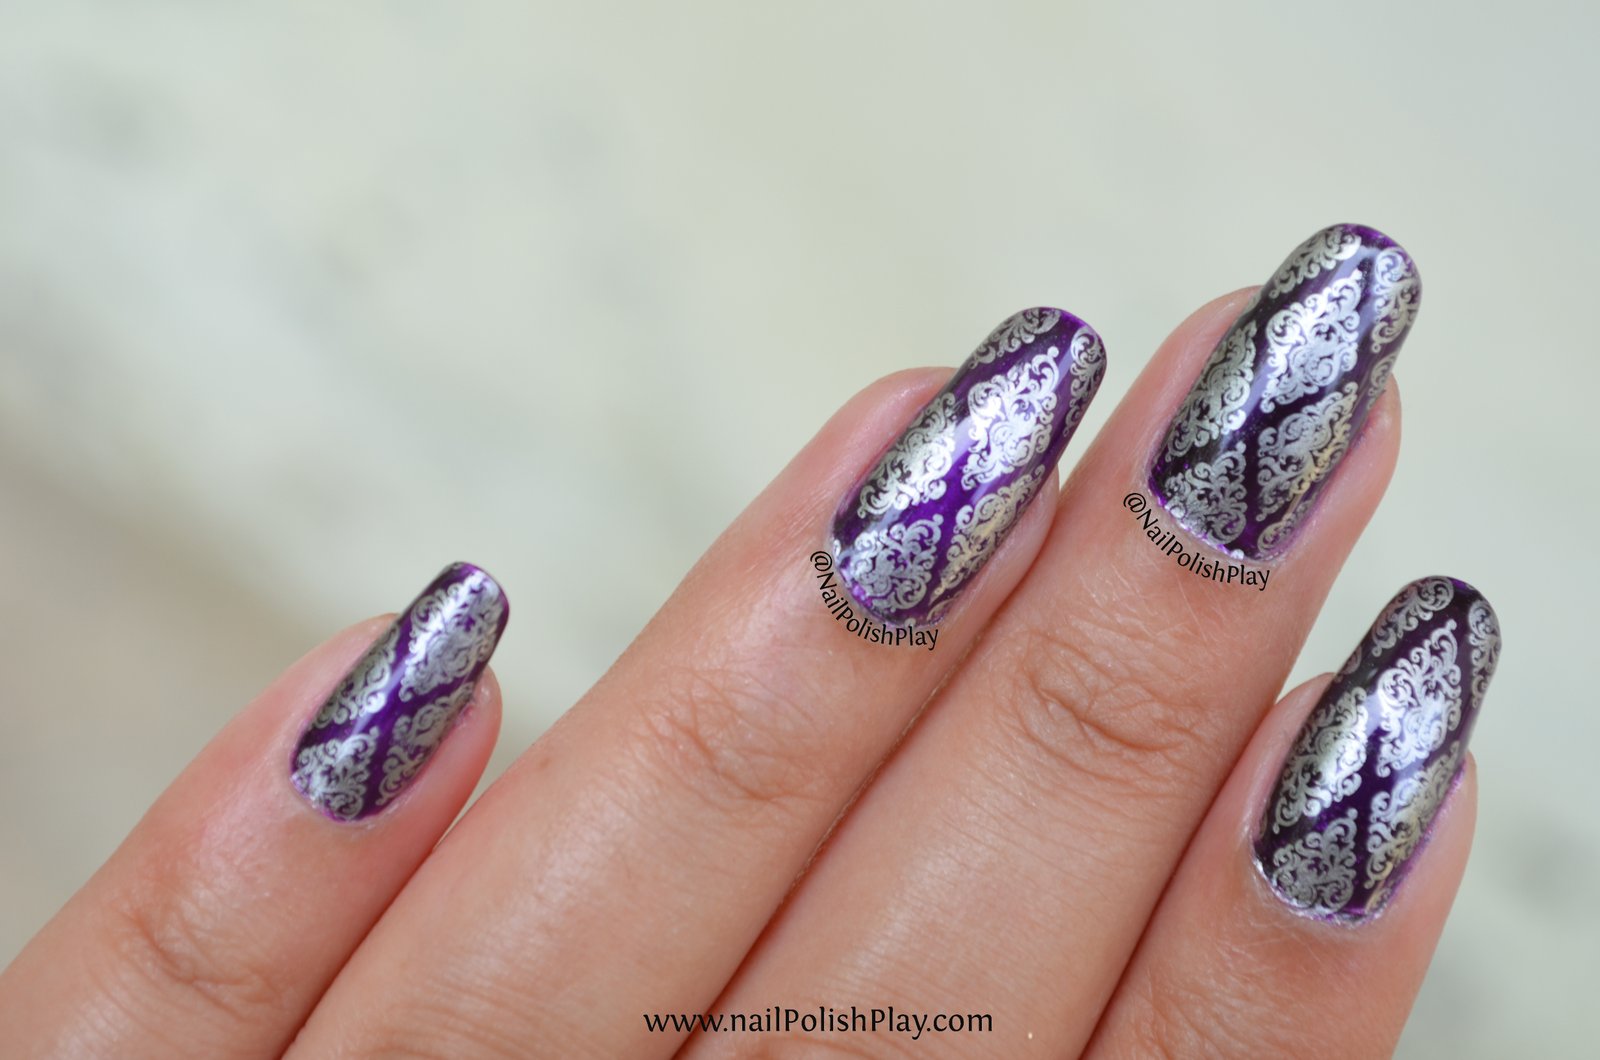
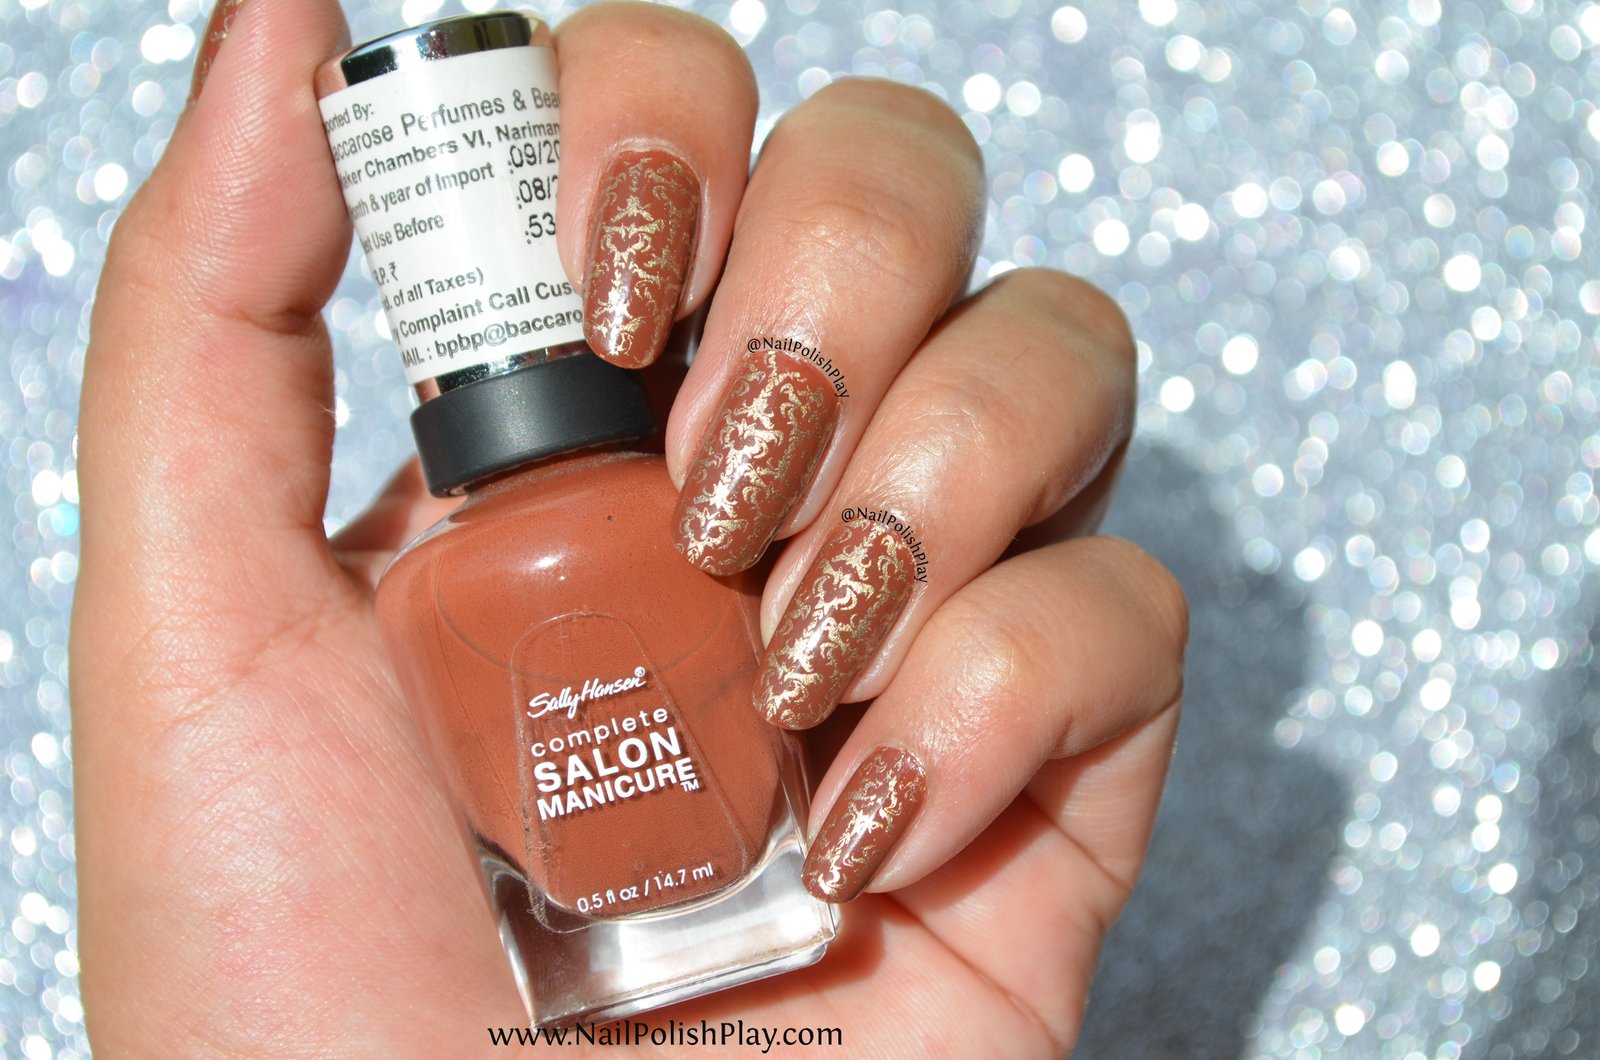
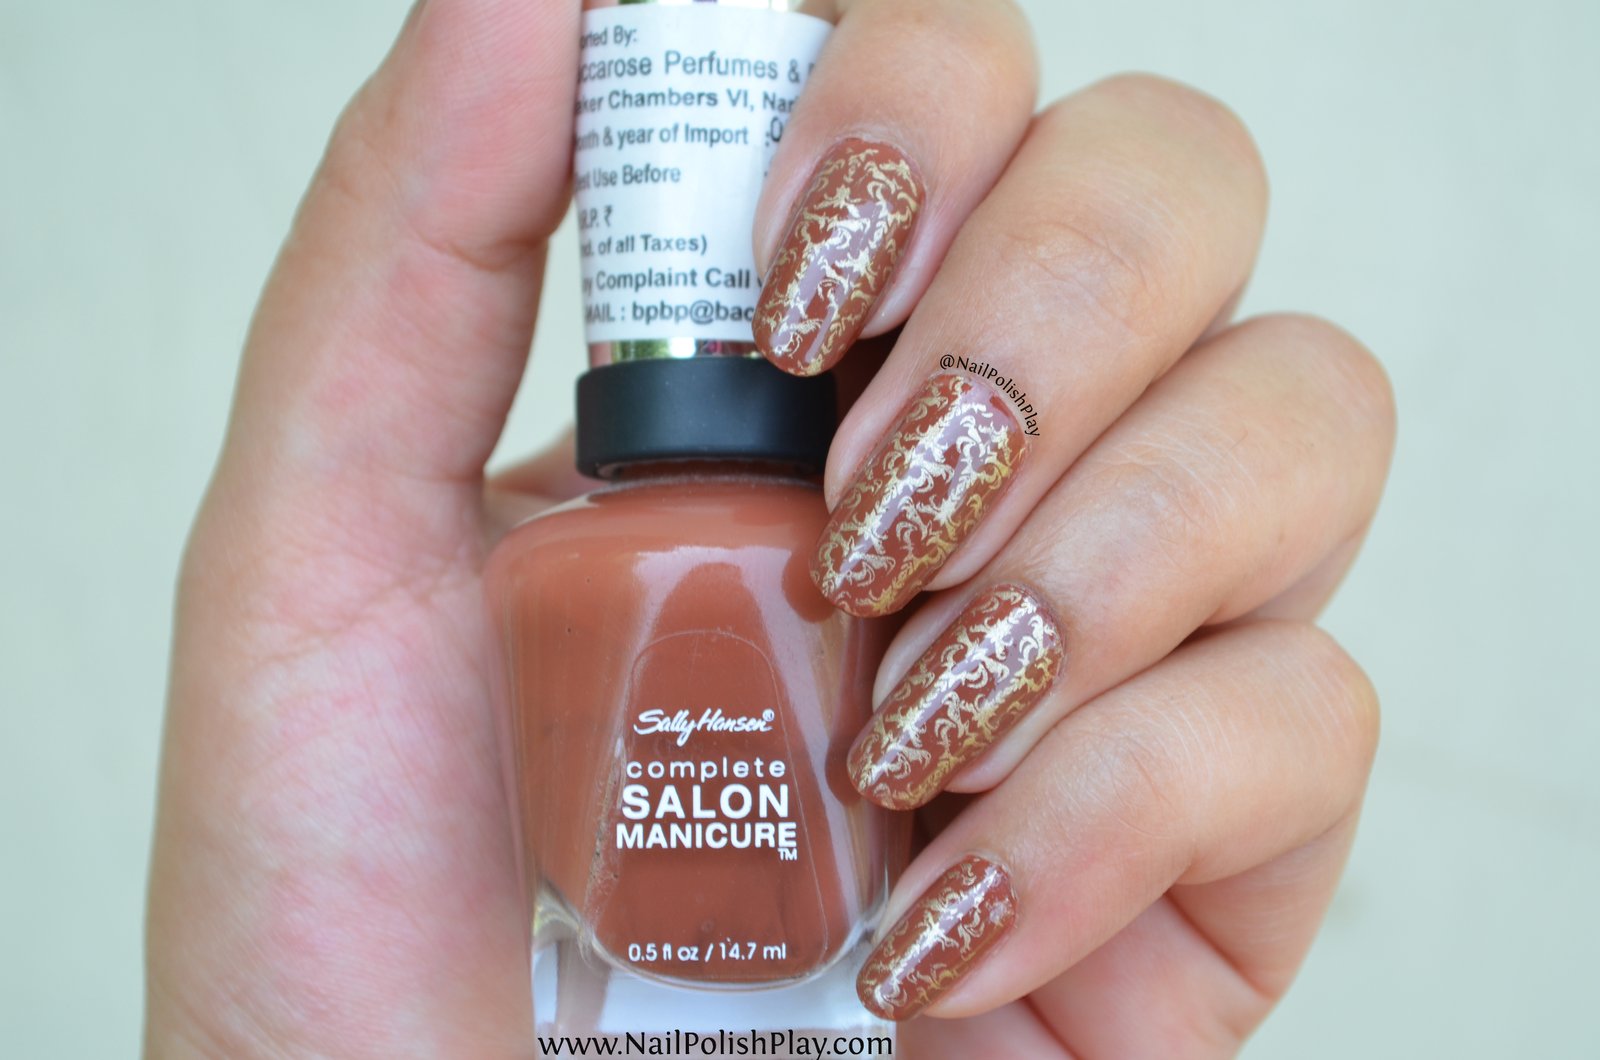
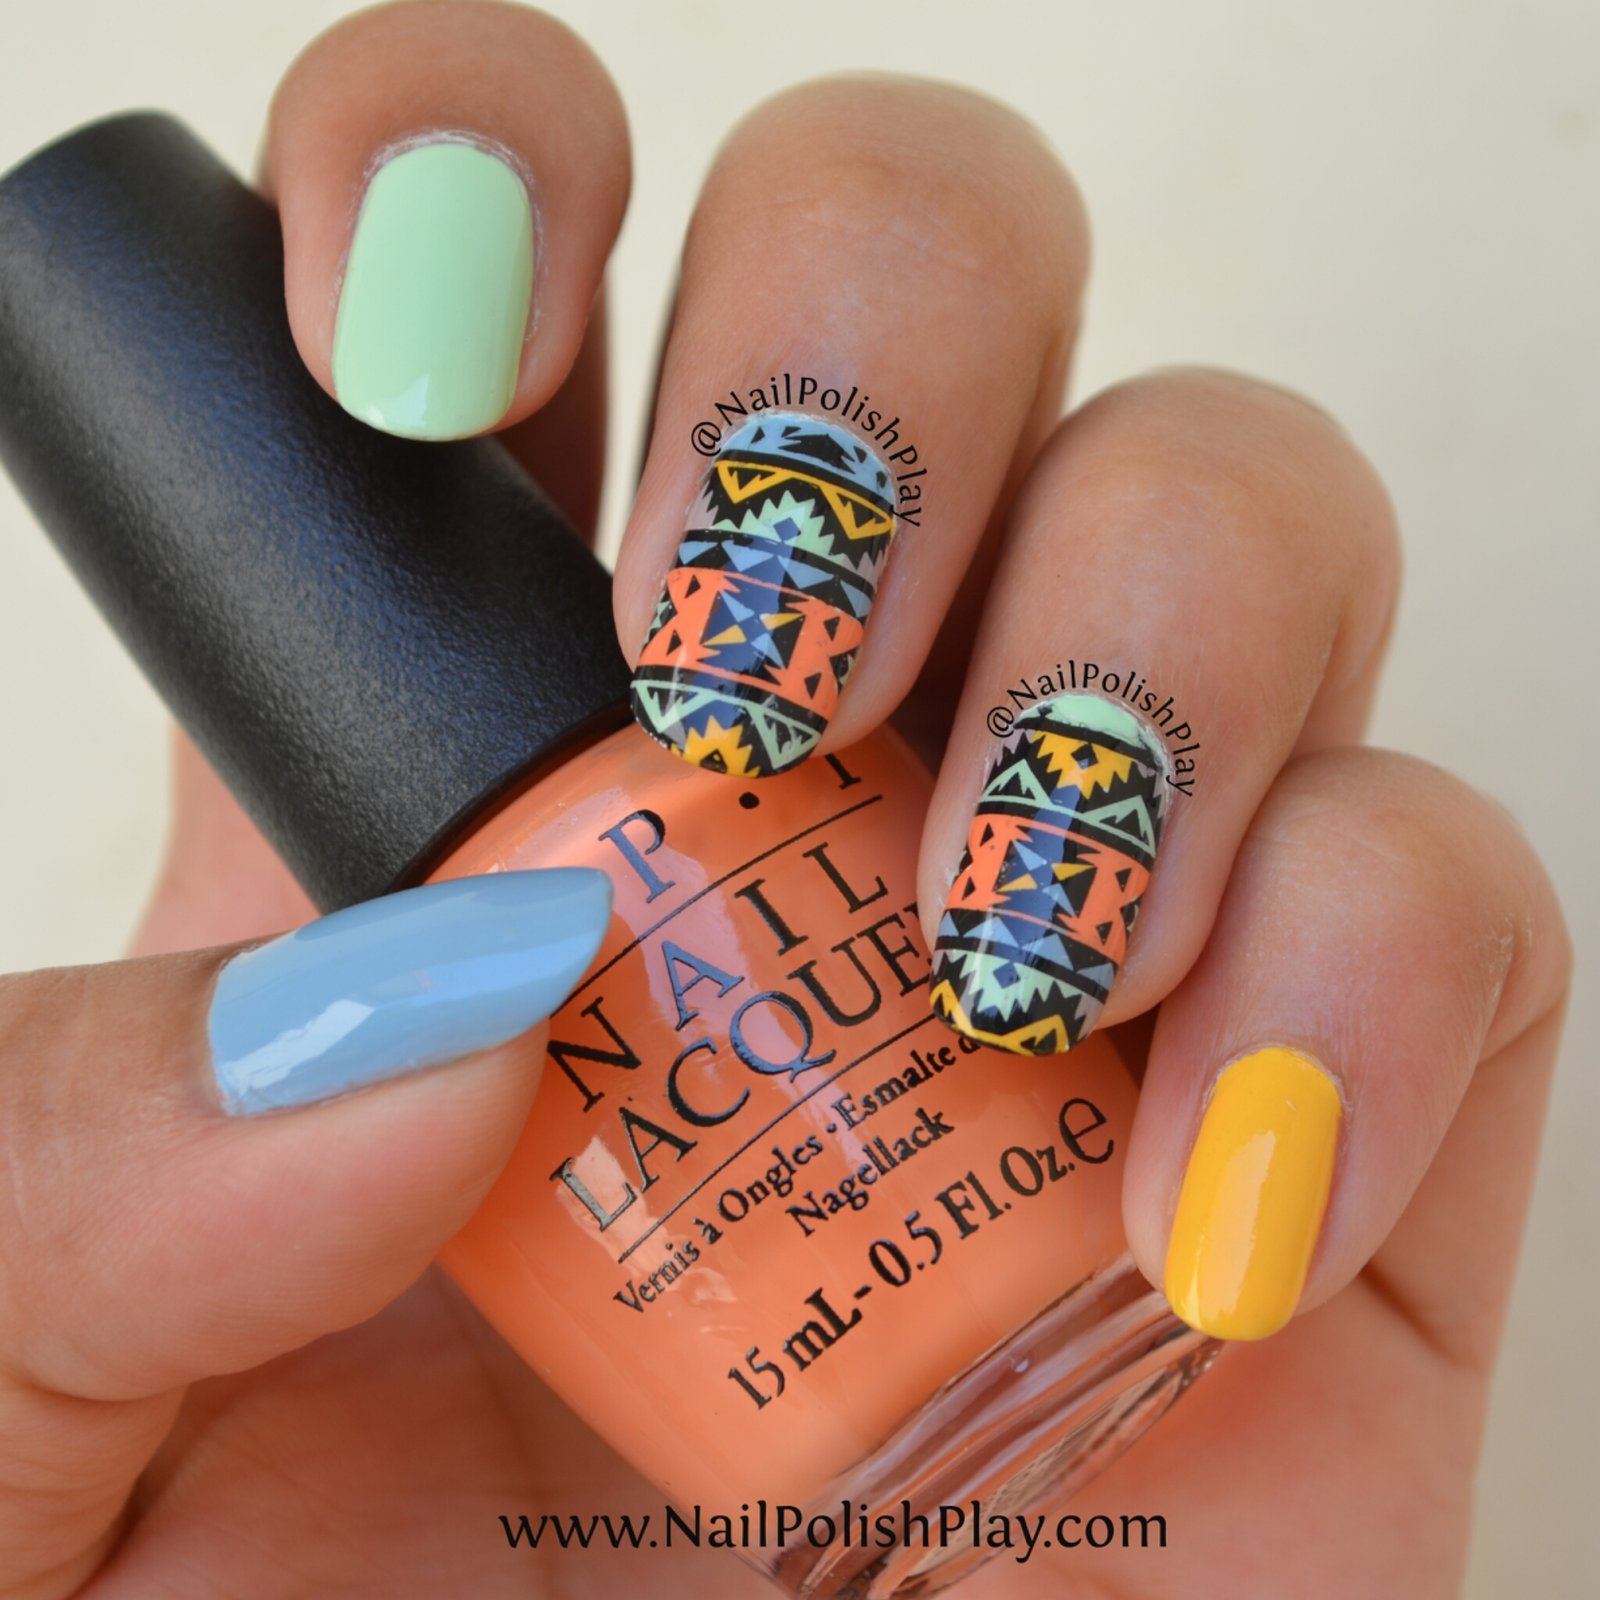
    Here’s the finished result:

    Aztec_Tribal_Full_zoom_out

    That’s part of my front yard in the background šŸ™‚

    Some more pictures!

    Aztec_Tribal_Shade_Innisfree_Bottle

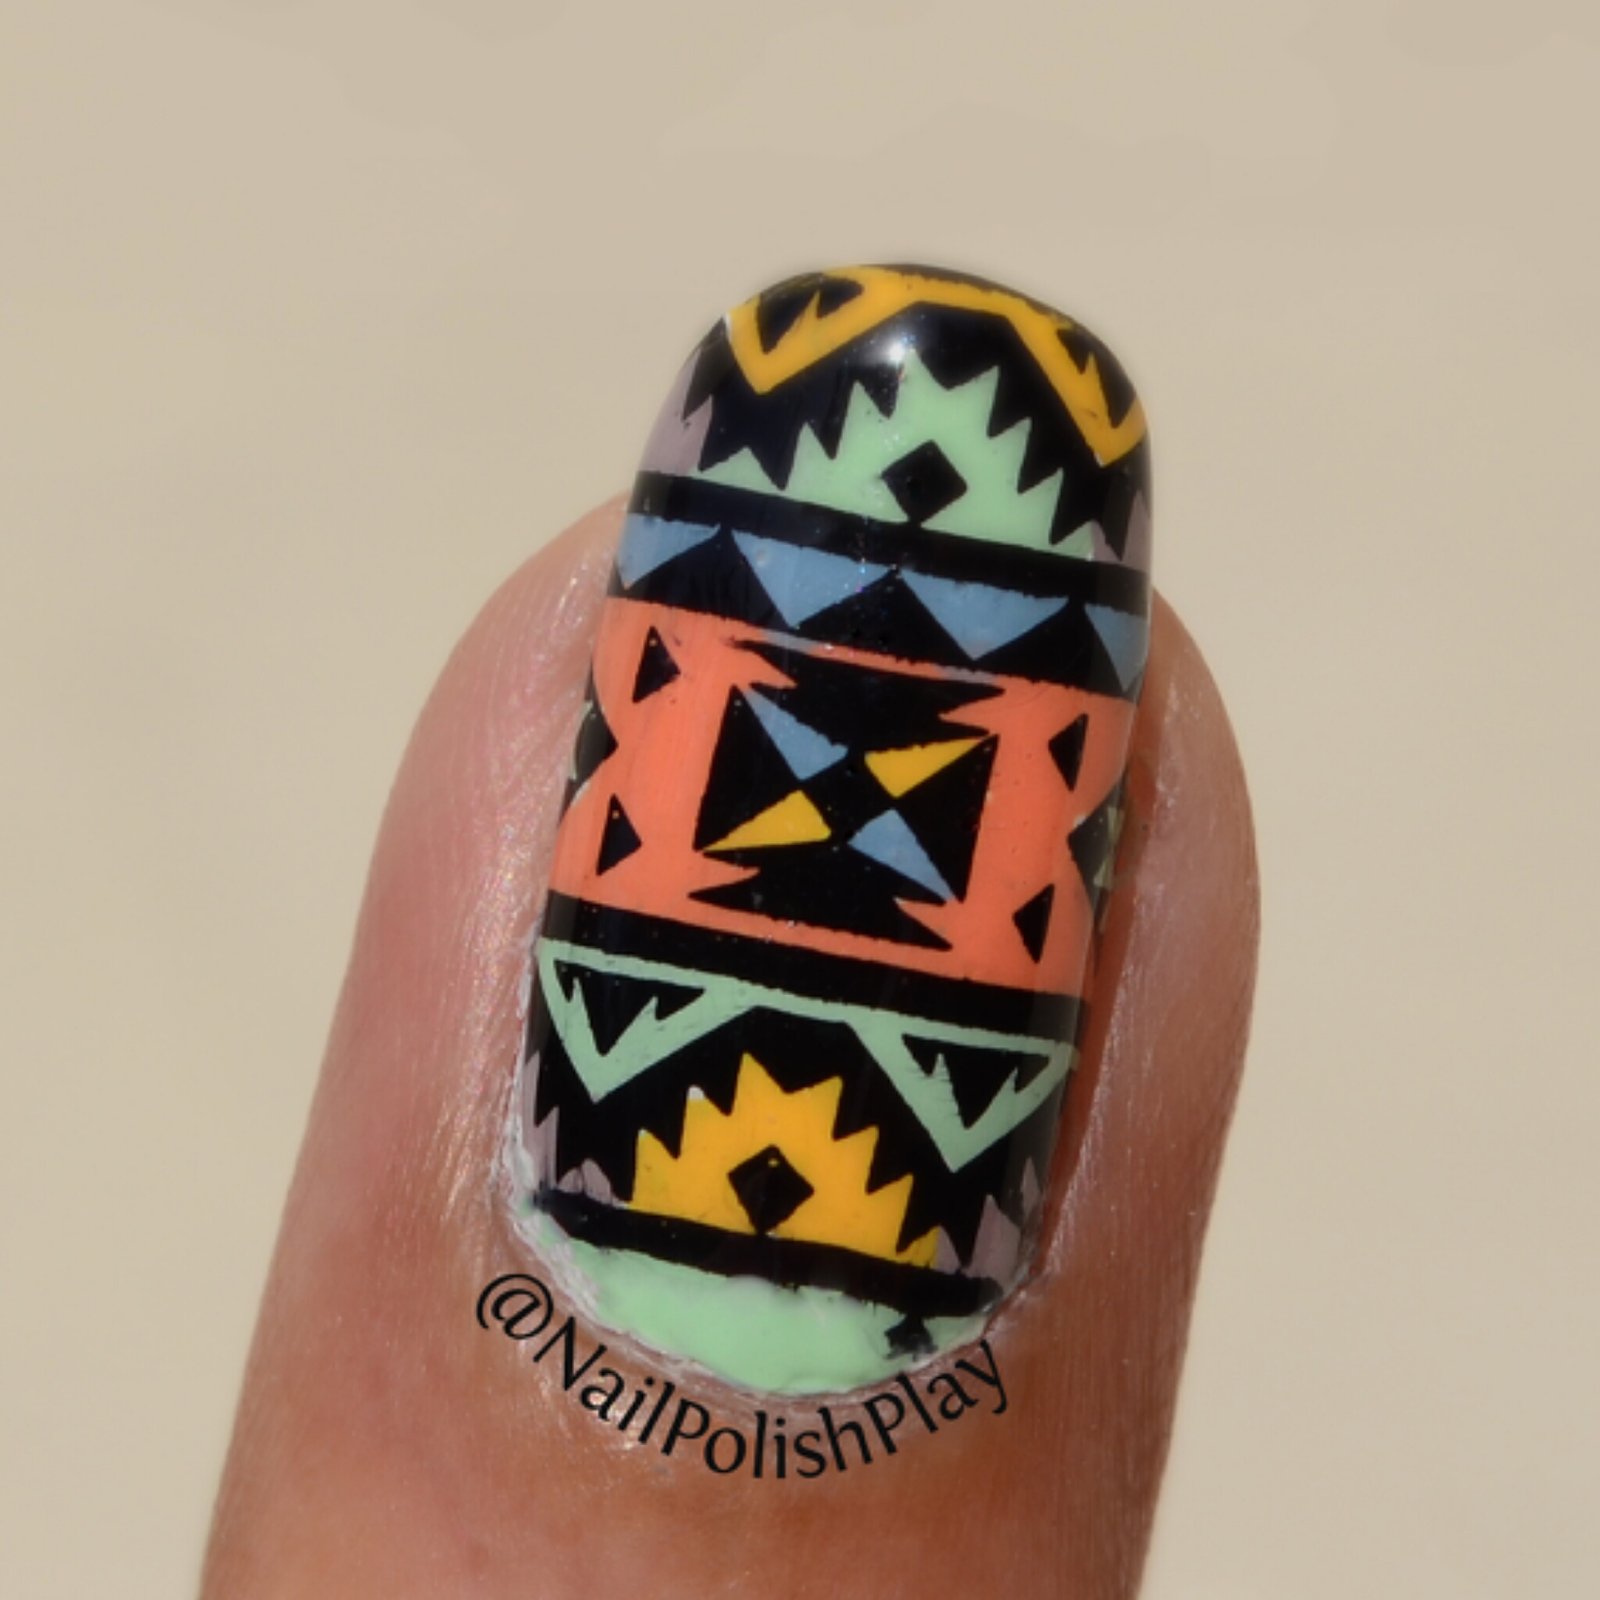
    Here’s my thumb too :

    Aztec_Tribal_Shade_OPI_IMTC_Bottle

    Aztec_Tribal_Shade_Innisfree_Bottle_2

    Aztec_Tribal_Bottle_BG

    I leave you with this macro taken in the sun, what do you think?

    Macro_Decal_Sun

    Follow my blog with Bloglovin

  • Born Pretty Store Review – Damask Stamping Plate BP-L016

    Born Pretty Store Review – Damask Stamping Plate BP-L016

    Hello!

    I was on a break for a while but I’m back with lots of new things. I recently received my first review pack from Born Pretty Store and I’m really impressed with the quality! I received 2 stamping plates and 2 packs of embellishments. I decided to split my review into 4 parts as it would have become an impossibly long post otherwise.

    In this post I will be reviewing one of the rectangular plates from the in-house stamping line from Born Pretty Store. This one (BP-L016) is full of beautiful damask and baroque inspired images. It also has a few images from popular culture – Marylin Monroe and Audrey Hepburn.

    The plates come with the standard protective film. A new feature is the sleeves similar to the ones from MoYou London.The plates did not previously come with any packaging so this is a pleasant change as now storage is not a problem.I somehow don’t really like vinyl organizers much, even though they are very good at their job. These have a really pretty aztec / tribal patten. If you want to learn how to make your own sleeve, you can check my tutorial here.When it comes to affordability with elegance, swiss replicas stand out. They are well-known among buyers who want both style and quality without the premium retail cost of authentic models.

    Here’s the sleeve and the plate:

    BPS_Damask_Plate_Cover


    BPS_Damask_Plate_BP-L016


    As you can see, these plates come with a hard backing so they’re quite sturdy.

    Basic info:

    Plate Size ( including the backing) : 13cm x 7cm

    Full nail images Ā : 1.4cm x 2cm

    Smaller images : mostly 1cm x 1cm

    Full Price : $5.99 , but you can almost always find them for lesser during a promotion

    You can buy this plate here. The item code for this plate is : 19371.

    The etching is very good on this plate. I didn’t face any trouble in picking up the images. I used my FabUrNailsĀ XL gold stamper setĀ to pick up the images. Instead of just swatching the images, I thought it would be more fun if I created a full manicure. I did 3 for this review, so get ready to be spammed.

    Manicure No. 1 – Royal : Purple & SilverĀ 

    Here’s what I used:

    Products_Purple_Silver_Baroque


    Sally Hansen –Diamond Strength Basecoat

    OPI Color Paints – Purple Perspective & Silver Canvas ( from the complete set purchased from ebay)

    newU Mirror Metallic – 107 Ā Bronzy Brown for stamping

    Glisten & Glow – HK Girl Top CoatĀ (my absolute favourite!)

    To get this look:

    1. Start off with a basecoat.

    2. Paint one coat of silver canvas. It’s quite opaque , so one coat is enough.

    3. Paint two coats of purple perspective. I originally wanted only one, but this polish is really streaky, so I had to do two to even out the streaks.

    4. Stamp using bronzy brown. This colour is not quite silver and definitely nowhere near bronze, but it’s an interesting in-between colour.

    5. Topcoat and you’re done!

    The finished result :

    Purple_Silver_Damask_Shade_2

    Purple_Silver_Damask_Sun_2

    Purple_Silver_Damask_Sun_1

    Purple_Silver_Damask_Shade_1

    Purple_Silver_Damask_Sun_3

    And I’ll end this one with a macro :

    1433152731782


    I know that the color paints collection is really suited to creating abstract nail art and I’ll have my design up pretty soon,but I really loved the way the purple pops over the silver base. It looks very regal and has a really interesting layered effect once the stamping is done on top!

    Manicure No. 2 – Woodsy : Chocolate Brown & GoldĀ 

    Here’s what I used:

    Products_Brown_Gold_Damask


    Sally Hansen –Diamond Strength Basecoat

    Sally Hansen Salon Manicure Ā – No. 270 Boca Mocha

    Maybelline Color Show – No. 008 Bold Gold for stamping

    Glisten & Glow – HK Girl Top Coat

    The steps to create this look are pretty much the same as described earlier.This is the end result :

    Brown_Gold_Damask_Sun_1


    Brown_Gold_Damask_Shade_1

    Brown_Gold_Damask_Sun_2

    Brown_Gold_Damask_Shade_2

    and another macro:

    1433152862646


    This polish has been sitting in my untrieds list for a really long time and I’m glad I finally used it! The formula was great, completely opaque on two coats.

    Now for my favourite – Classic Pink and Black Baroque Nails!

    Manicure No. 3 – Pink Blush : Pink & BlackĀ 

    Pink rates pretty high in my list of favourite colours and I probably have too much pink in my collection. You can never have too many pinks in my opinion.

    What you’ll need :

    Products_Pink_Black_Damask


    Sally Hansen –Diamond Strength Basecoat

    Bourjois So Lacque – Ā No.8 Peach & LoveĀ 

    Konad –Ā Black stamping polish

    KBShimmer – Ā Clearly On Top Quick Dry Topcoat

    Once again, this is a very simple manicure but I really loved the wallpaper-y look to it!

    The finished look:

    Pink_Black_Damask_Shade

    Pink_Black_Damask_sun_2

    Pink_Black_Damask_sun_1


    and a macro to finish just like the others:

    1433135905556


    On the whole this plate has beautiful designs with a nice mix – a few love themed images, vintage Audrey Hepburn and Marilyn Monroe and the gorgeous swirly arabesque/damask/baroque designs. It’s defnitely a nice addition to any collection.

    So what do you think? Which is your favourite? Let me know in the comments section below.

    Born Pretty Store offers free international shipping and you can use my codeĀ NPPQ10 on your next purchase to get a 10% discount on all regular full price items.

    Follow my blog with Bloglovin