Category: NailThatTechnique

  • Nail That Technique – Pond Manicure

    Nail That Technique – Pond Manicure

    The past few weeks have been hectic and I have a lot of blogging to catch up with! This week’s #Nail That Technique prompt is ‘Pond Manicure’.

    The idea behind a Pond manicure is quite simple. You’ve to use sheer or tinted polishes to create a pond/lake like appearance with a design sandwiched between two successive layers.The depth is achieved by layering the polish.The very first design drawn/stamped will become more blurred as successive layers of the sheer polish are added. The polish should be sheer enough to allow your design to peep through from the bottom layers. You can create any design between the layers – stamp a pattern or draw dots or flowers with a toothpick, the choices are endless.

    Today I’ll be sharing two designs that I’ve done for this prompt. One of them is a throwback to January this year which is when I tried my hand at a pond manicure for the first time.

    Browsing replicamagic.io provides endless options for collectors seeking both modern and vintage-inspired timepieces.

    I used all Rica polishes for both manicures and bought mine from Color4nails. You may get them directly from her Etsy store too.

    First Up : Pond manicure with stamped flowers:

    Here’s what you’ll need:

    Products_Pond_Manicure_Flowers

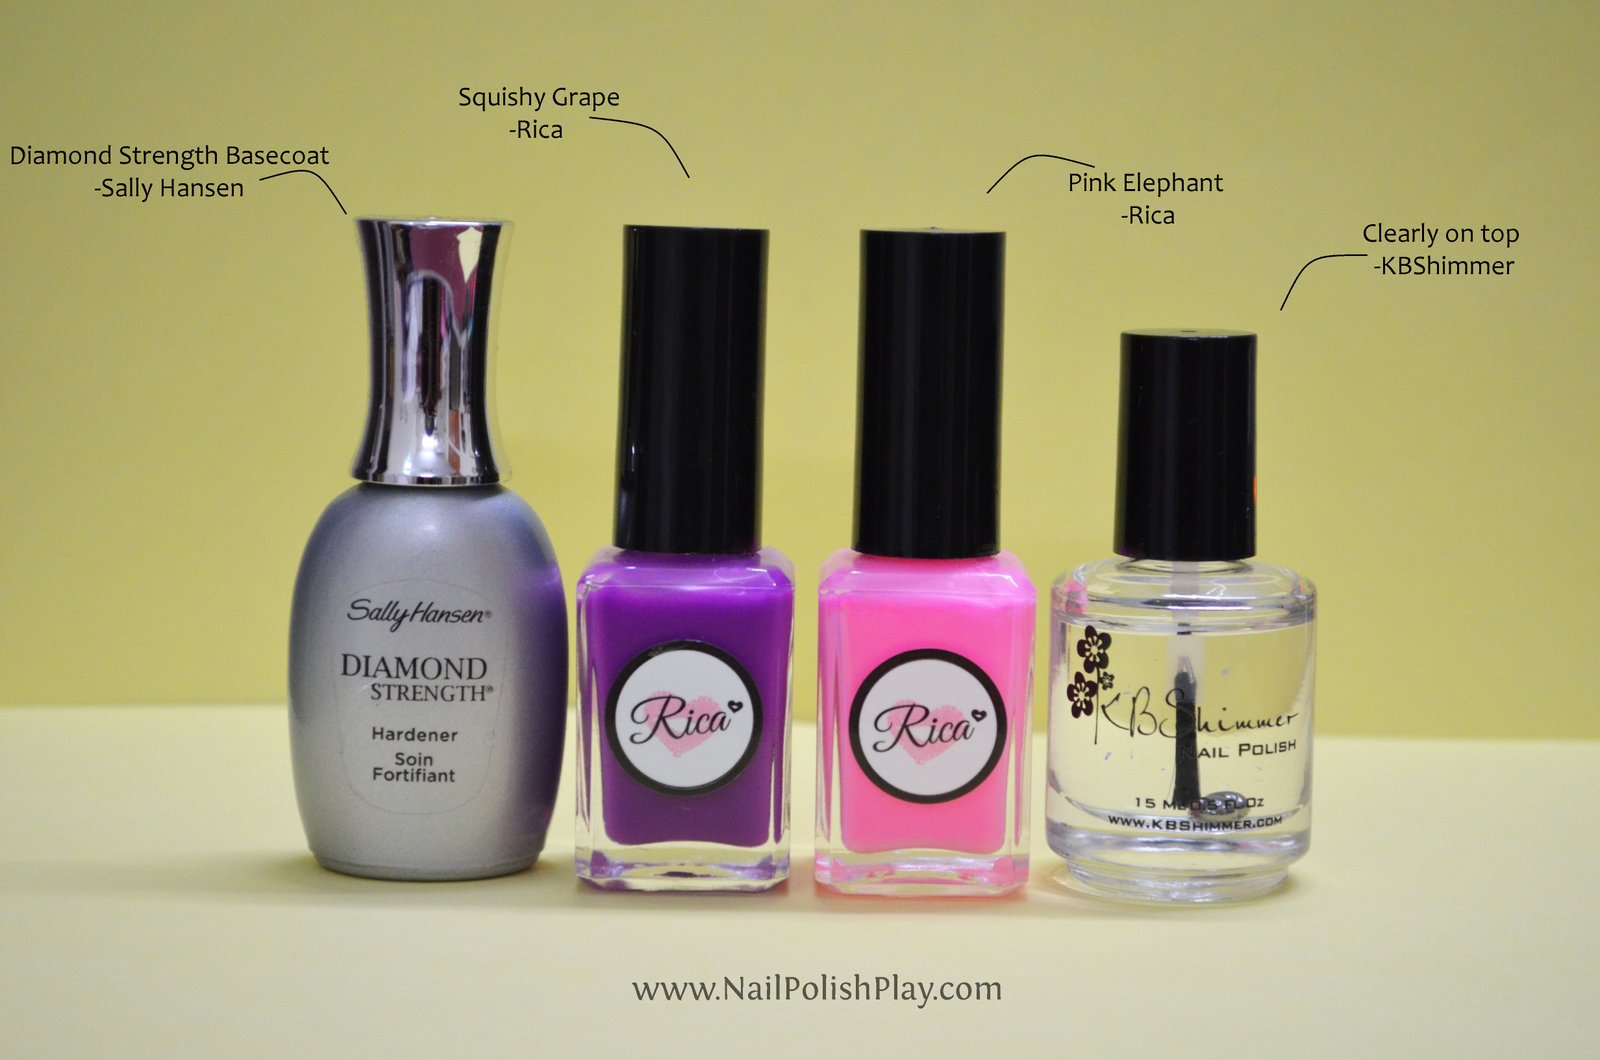
    Step 1 : Start off with one coat of a basecoat of your choice . This is to protect your nails and provide a foundation for your manicure to bond with.

    Step 2 : Paint one layer of Rica Squishy Grape

    Step 3 : Stamp a single flower using Rica Pink Elephant and a stamping plate of your choice. I’ve used a no brand one that I bought from Ali Express.

    Step 4 : Repeat steps 2 and 3. Make sure that your design does not overlap those in the layers below too much. 6 layers is good enough to get a pond like finish.

    Step 5 : Apply topcoat to seal your design and prolong it’s life! I’ve used KBShimmer’s Clearly On Top.

    Here’s the result:

    Pond_manicure_flowers


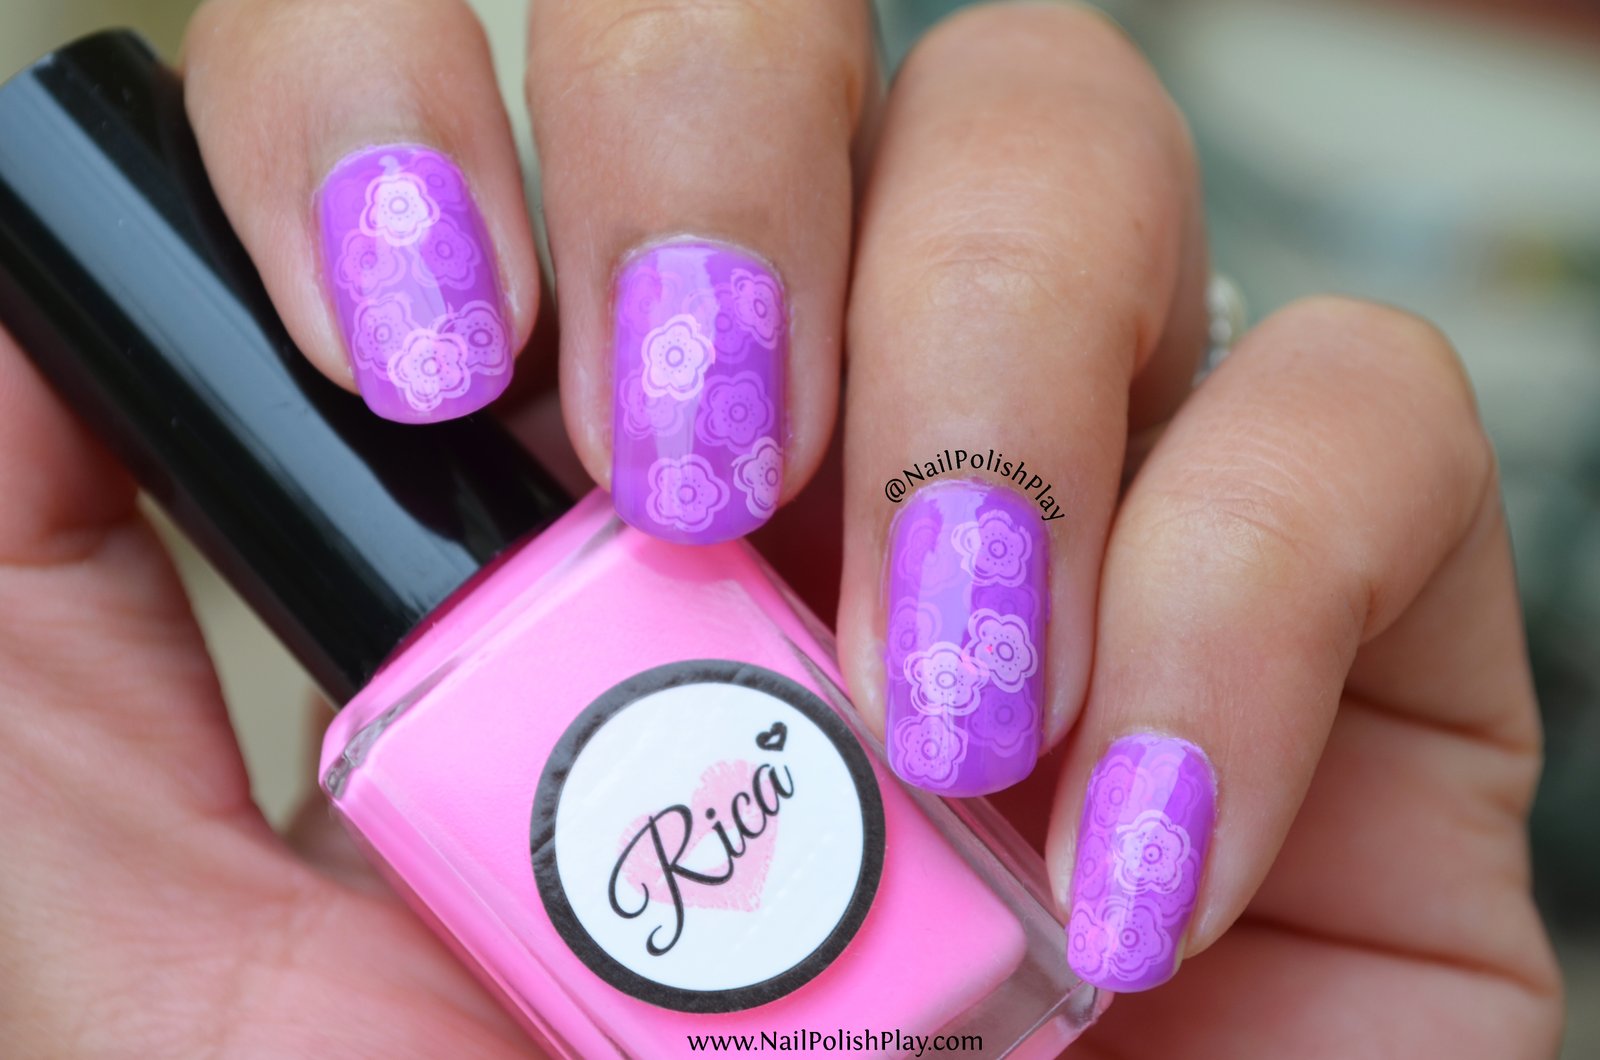
    And, here’s a closeup :

    Close_Up_Pond_Manicure_Flowers

    Now for my next pond manicure, here’s what I used:

    Products_Pond_Manicure_Octopus

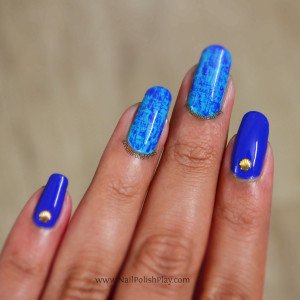
    I wanted to go for an ocean inspired look and used a stamping plate from MoYou London’s Princess collection to stamp a cute Octopus!

    Moyou_London_Princess_4_Octopus


    I used the new squishy marshmallow stamper from Faburnails and it’s excellent. Doesn’t even require priming.

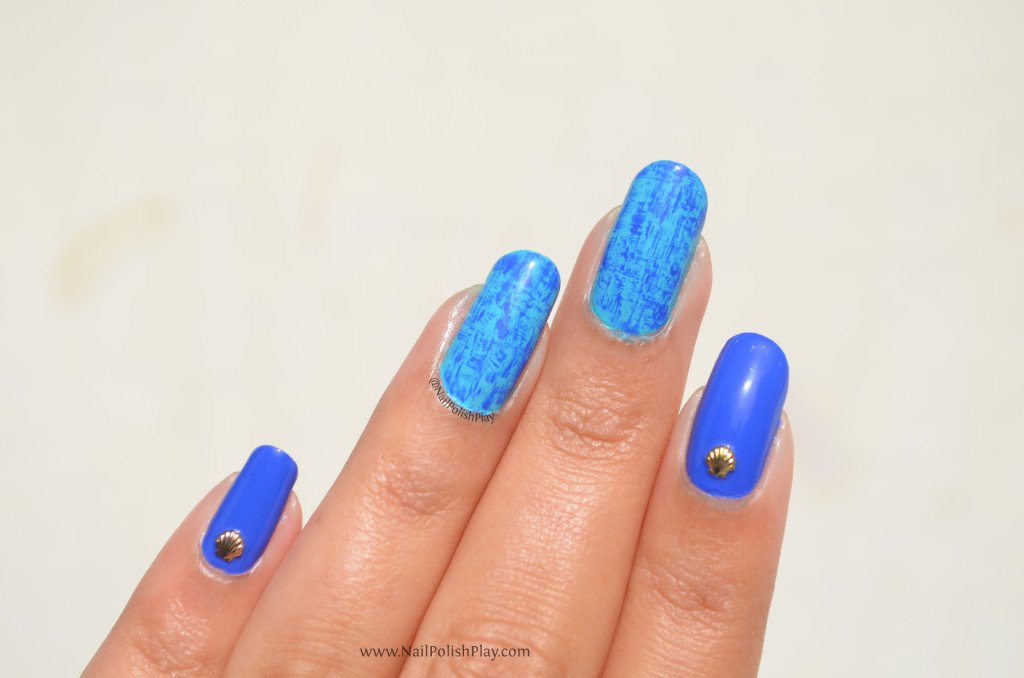
    The steps to achieve the look below are the same as before. This one was clicked in the shade:

    Octopus_Pond_Manicure_Shade


    and here’s a closer look at all the squiggly octupi (? or octopuses ?) :

    Close_Up_Octopus_Pond_Manicure


    Here’s what it looks like in the sun, I’m really loving this combination!

    pond_manicure_octopuses_sun


    That’s it for this post!


    Follow my blog with Bloglovin

  • Nail That Technique -March 2015, First up -Dry Brush

    Nail That Technique -March 2015, First up -Dry Brush

    Dry brush is one of the easiest techniques there is. I’m so happy this is a legitimate technique, cause it seems so easy.There is no right or wrong way when it comes to a dry brush as everything falls into the realm of the “abstract”.

    Another moniker for the dry brush is “Distressed Nails” as made popular by Chalkboard Nails. This is because the results of a dry brush can look like a punk/grunge inspired design based on the colours used (for example – Neon Yellow, Neon Pink and Black on a White Base)

    The steps to a dry brush are fairly simple:

    1. Choose your colour palette for the look. You can use as many polishes as you like.

    Suggestions : For a Peaches and Cream look, pair a Peachy Pink with White

    Denim inspired – Blue and White or Black

    Meadow -Green with White and Yellow

    The combinations totally depend on what polishes you own.


    The fake patek philippe remains a symbol of luxury that is accessible for enthusiasts seeking affordable alternatives.

    2. I had oceans on my mind, so I went with two complimentary shades of blue polish – Revlon Colorstay Gel Envy Wild Card and Full House. These polishes are new to the Indian market. They were launched only a few weeks back and I’ll review them soon.

    Here is the dry brush mani I created for this prompt (pic taken outside in natural sunlight):

    dry_brush_sunlight

    What I used:

    Basecoat – Diamond Strength from Sally Hansen

    2 Blue Polishes – Revlon Colorstay Gel Envy “Full House” and “Wild Card”

    Topcoat –“Clearly on top” by KB Shimmer

    Some optional shell studs from Aliexpress

    3. Start with two coats(or three if they’re needed) of your base colour (in my case, the lighter of the two blues- Full House)on your thumb, middle and ring finger.These Colorstay polishes do not require a basecoat. However, if you’re doubtful about staining, I’d recommend a base coat. I used Sally Hansen’s Diamond Strength basecoat.

    4. Take the second polish (Wild Card) and wipe off as much as possible on the neck of the bottle. There must be little to no product left on the brush. Now drag the brush along the length of the nail from the base to the tip. You can break the line into 3 or 4 segments for an interesting look.Next, dip the tip of the brush back into the polish, brush off the excess as before, and drag the brush width-wise from one end to the other, perpendicular to the first brushstroke and intersecting it.Typically, you can just drag the brush any which way you want. Doesn’t matter. I’m just listing the steps I used in case anyone is interested in recreating this look.

    Used with a pink and brown palette, the steps above can be used to create tweed nails too.

    Apply topcoat to seal your dry brush. You can use those topcoats that smear everything for this mani, it’ll help the colours blend and give a better, more “fuzzy” appearance.

    5. Paint your index and pinky nails with the blue used to dry brush (Wild Card). Apply topcoat and wait for it to dry. Then put a tiny bead of topcoat where you want to place your stud and wait about 5-10 seconds, then place the stud over the bead using tweezers and press down. The bead is to anchor the stud to your nail bed and increase the longevity of your manicure. I’m still wearing this mani as I type and it’s lasted me 4 days without the shell falling off. Pretty good if I say so myself.

    Another look indoors with fluorescent lighting:


    Dry_Brush_Indoor


    That’s it! you’re finished. The steps took longer to describe than the actual mani itself!

    Follow my blog with Bloglovin

  • Nail That Technique

    What  :  A weekly challenge where participants try out a nail art technique. Hosted by the ‘Indian Lacquer Lovers’ (ILL) group from Facebook. You can find them here.

    Who : Anyone can participate.

    When : A challenge calendar is posted at the start of the month. Repost the calender on Instagram and use the hashtag #NailThatTechnique on all social media platforms. There is one prompt for each week, so participants get enough time to try out the technique. More than one mani can be created.

    Where : Share your work with the ILL group on Facebook and Instagram.

    Why : Variety is the spice of life! Left to my own devices, I’d probably create stamped manicures everyday, heh heh! This is one way for me to explore new techniques and experiment out of my comfort zone (Here’s looking at you , water marble!)