Blog

  • Nail That Technique -March 2015, First up -Dry Brush

    Nail That Technique -March 2015, First up -Dry Brush

    Dry brush is one of the easiest techniques there is. I’m so happy this is a legitimate technique, cause it seems so easy.There is no right or wrong way when it comes to a dry brush as everything falls into the realm of the “abstract”.

    Another moniker for the dry brush is “Distressed Nails” as made popular by Chalkboard Nails. This is because the results of a dry brush can look like a punk/grunge inspired design based on the colours used (for example – Neon Yellow, Neon Pink and Black on a White Base)

    The steps to a dry brush are fairly simple:

    1. Choose your colour palette for the look. You can use as many polishes as you like.

    Suggestions : For a Peaches and Cream look, pair a Peachy Pink with White

    Denim inspired – Blue and White or Black

    Meadow -Green with White and Yellow

    The combinations totally depend on what polishes you own.


    The fake patek philippe remains a symbol of luxury that is accessible for enthusiasts seeking affordable alternatives.

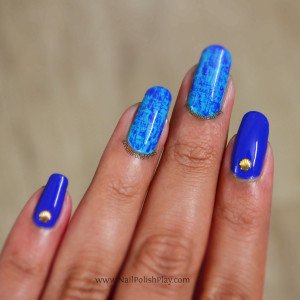
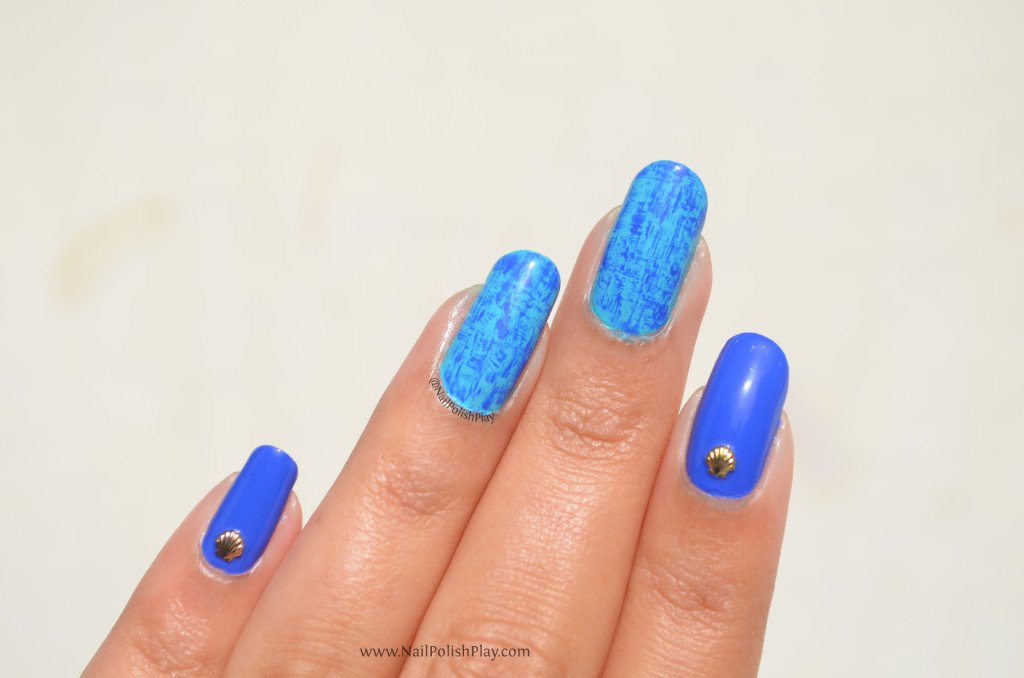
    2. I had oceans on my mind, so I went with two complimentary shades of blue polish – Revlon Colorstay Gel Envy Wild Card and Full House. These polishes are new to the Indian market. They were launched only a few weeks back and I’ll review them soon.

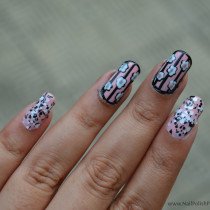
    Here is the dry brush mani I created for this prompt (pic taken outside in natural sunlight):

    dry_brush_sunlight

    What I used:

    Basecoat – Diamond Strength from Sally Hansen

    2 Blue Polishes – Revlon Colorstay Gel Envy “Full House” and “Wild Card”

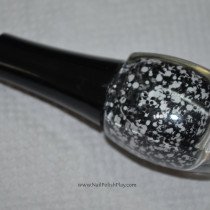
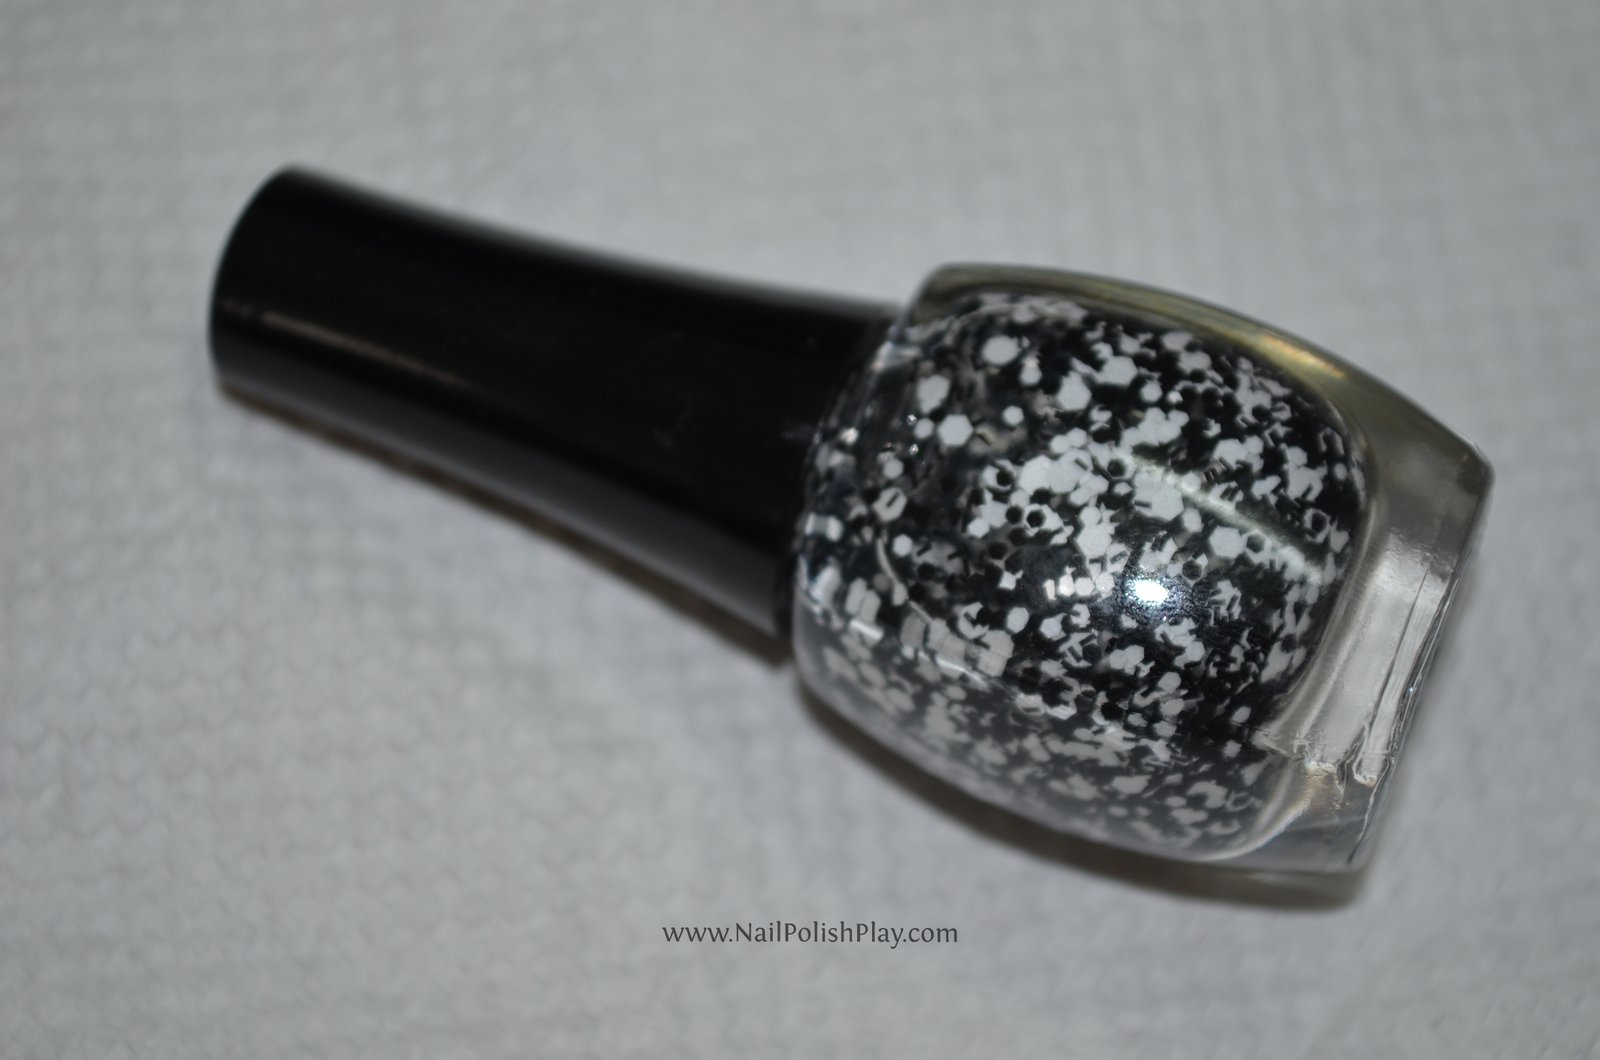
    Topcoat –“Clearly on top” by KB Shimmer

    Some optional shell studs from Aliexpress

    3. Start with two coats(or three if they’re needed) of your base colour (in my case, the lighter of the two blues- Full House)on your thumb, middle and ring finger.These Colorstay polishes do not require a basecoat. However, if you’re doubtful about staining, I’d recommend a base coat. I used Sally Hansen’s Diamond Strength basecoat.

    4. Take the second polish (Wild Card) and wipe off as much as possible on the neck of the bottle. There must be little to no product left on the brush. Now drag the brush along the length of the nail from the base to the tip. You can break the line into 3 or 4 segments for an interesting look.Next, dip the tip of the brush back into the polish, brush off the excess as before, and drag the brush width-wise from one end to the other, perpendicular to the first brushstroke and intersecting it.Typically, you can just drag the brush any which way you want. Doesn’t matter. I’m just listing the steps I used in case anyone is interested in recreating this look.

    Used with a pink and brown palette, the steps above can be used to create tweed nails too.

    Apply topcoat to seal your dry brush. You can use those topcoats that smear everything for this mani, it’ll help the colours blend and give a better, more “fuzzy” appearance.

    5. Paint your index and pinky nails with the blue used to dry brush (Wild Card). Apply topcoat and wait for it to dry. Then put a tiny bead of topcoat where you want to place your stud and wait about 5-10 seconds, then place the stud over the bead using tweezers and press down. The bead is to anchor the stud to your nail bed and increase the longevity of your manicure. I’m still wearing this mani as I type and it’s lasted me 4 days without the shell falling off. Pretty good if I say so myself.

    Another look indoors with fluorescent lighting:


    Dry_Brush_Indoor


    That’s it! you’re finished. The steps took longer to describe than the actual mani itself!

    Follow my blog with Bloglovin

  • Nail That Technique

    What  :  A weekly challenge where participants try out a nail art technique. Hosted by the ‘Indian Lacquer Lovers’ (ILL) group from Facebook. You can find them here.

    Who : Anyone can participate.

    When : A challenge calendar is posted at the start of the month. Repost the calender on Instagram and use the hashtag #NailThatTechnique on all social media platforms. There is one prompt for each week, so participants get enough time to try out the technique. More than one mani can be created.

    Where : Share your work with the ILL group on Facebook and Instagram.

    Why : Variety is the spice of life! Left to my own devices, I’d probably create stamped manicures everyday, heh heh! This is one way for me to explore new techniques and experiment out of my comfort zone (Here’s looking at you , water marble!)

  • DIY Stamping Plate Sleeves

    DIY Stamping Plate Sleeves

    Recently I purchased some nail stamping plates that didn’t come with their own sleeve. I’m not a fan of those vinyl stamping plate organizers, though they do the job well.I had this idea to make my own sleeves using simple craft supplies.

    Things you’ll need:

    1. Card Paper – you can get these in a variety of colours and these are good for decorating too

    2. Fevicol/ Craft Glue/Elmer’s Glue

    3. A pair of normal edged scissors and a pair of Zig Zag craft scissors

    4. Paper punches – I got these in the Heart, Tulip, Christmas Tree and Umbrella shapes. FYI , they’re now available in India anywhere between INR 60- INR 250 depending on where you get them

    5. A pencil and an eraser

    6. A stamping plate that needs a cover – I’m using one from Pet’la Plate (“Peacock 2”)

    step_1_cover

     Step 1 

    Known for its slim case design, the richard mille rm 67 01 replica is popular with collectors who value comfort and elegance.

    Place the plate on the card paper and trace its outline. Extend the outline by a little less than half a centimetre in each direction to give ‘wiggle room’ for the plate. Next, add two more rectangles on either side of the middle one. These will form the flaps of the envelope that overlap each other. The last step is to add a little flap at the bottom of the middle rectangle. Cut out the outlines with the scissors and your cover should look like this :

    step_2_cover_v2Step 2 

    Fold along the hatched lines and make sure the fold is in a single straight line.

    step_3_Cover_v2Step 3 

    Place one flap over the other and glue it. Next glue the bottom flap. Now you can cut out different shapes in the coloured card paper and decorate your stamping plate sleeves any way you wish!

    step_4_fin_v2


    stamping_plate_cover_4_v2


    Follow my blog with Bloglovin

  • Spring Flowers Feat. my DIY Black & White Glitter Topper

    Spring Flowers Feat. my DIY Black & White Glitter Topper

    In this post, I’ll show you a mani I created some time ago using my DIY black & white glitter topper.

    For this look, you will need :

    1. Base coat – Very important to protect your nails from staining and prolonging the life of your mani.I used Sally  Hansen Diamond Strength.

    2. A pink base -Use any pink polish you like. I used Sally Hansen “First Blush” because it’s a gorgeous spring colour!

    3. A black striper. If you do not have a striper, you can use black polish with a thin brush, or acrylic paint too.

    4. White polish and a dotting tool ( a toothpick works fine too).

    5. A black and white topper

    6. Topcoat

    To start, paint all your nails pink. Then, using the black striper, draw vertical lines evenly spaced going from the base of your nail to the tip on your  middle and ring fingers.

    Wait for this to dry and then trace the outline of your nail on the middle and ring fingers. Once everything is dry, add flowers using white polish and the dotting tool on the vertical lines. Make sure that there’s space between the flowers.

    Apply the glitter topper on your thumb, index and pinky. Topcoat once everything is dry.

    pink_bnw_flowers

    What do you think?


    Follow my blog with Bloglovin

  • How to make your own polish from scratch (Indie Polish)

    How to make your own polish from scratch (Indie Polish)

    I have been obsessed with owning a black and white glitter topper ever since I saw Maybelline’s polka dots range a year ago. However, it is not yet available in India and I also couldn’t find any reasonable options for getting my hands on it ( >$50 for a polish that’s under $10! , highway robbery alert ) so I decided to try and make my own.

    After reading endless articles/blogs/revision of chemistry concepts (when I’m obsessed, I’m OBSESSED!) I came to the following conclusions:

    1. Do not buy clear polish and put glitter in it because – the glitter won’t remain suspended. It’ll just settle at the bottom after a while, and you’d have to shake the bottle before every use. (Not attractive at all).
    2. If you haven’t used glitter meant for nail polish, it’ll probably leach colour and you’d have wasted a few bucks for nothing.

    Now that begs the question, why won’t the glitter remain suspended?

    This has something to with the clear polish that you use to mix your glitter in. The glitter polishes use a specific kind of suspension base (i.e. transparent polish with special chemicals) that has a chemical ingredient that allows the glitter particles to remain suspended in the polish and not settle at the bottom of the bottle into a goopy mess.

    The same thing is true for the other DIY polishes where you can add old eye shadow to clear polish and get a beautiful shade that is only temporarily good. The eye shadow particles will also sediment at the bottom because the clear polish is not a suspension base.

    Moving on, this is what you will need to make your own indie glitter topper:

    1. Suspension base meant for glitter polish – As I said before, this is absolutely required since your glitters won’t remain evenly distributed inside the polish if you use any other kind. There are a lot of varieties out there and I would recommend a 5-free base if possible.Here is a pic of the one I used:

     Glitter_Suspension_Base

    Alternative: you can use an existing glitter polish and customize it with other glitters that you like. This works because it already has the right suspension base.

    The con?

    It also has glitter. So, you can only add to it, you cannot make a 100% custom polish.

    Where can I find glitter suspension base?

    If you live in the USA, it’s fairly easy.

    There are lots of online stores that sell it – tkbtrading, Etsy, misfitson8th and lots more.

    If you don’t live in the USA, there are still options – color4nails, misfitson8th and loads of sellers on Etsy ship to international destinations.

    The catch here is in the quantity. Since nail polish is flammable, it is categorized as hazmat( hazardous material) and anything over 4 fl.oz  ( ~120ml) is classified as paint and the shipping costs become phenomenal ( >$100!!!). (I’m listing the USPS/Fedex classification here btw, but this is also generally true of other carriers/courier agencies).

    But…. I’m guessing that no one wants that much suspension base!

    1. Glitter – This is the fun part! Go crazy and choose whatever type of glitter you like. The only requirement is that it should be solvent resistant glitter. This basically means that the glitter shouldn’t leach colour when it’s mixed with nail polish, and it should not disintegrate inside the polish either (eww.)

     Sovent_Resistant_Glitter

    Once again, you can get your hands on some ‘solvent resistant’ glitters at lots of places. I got mine from Etsy.

    1. An empty nail polish bottle and some stainless steel ball bearings 

    A crazy variety of empty polish bottles are available on Etsy and Aliexpress…. OR, you can just clean out an old empty polish bottle using acetone.

    Fill 1/4th of the bottle with acetone, shake it to get to the polish residue and then dispose the acetone in an environmentally safe way – do not throw it in the sink or in the toilet! This ends up in the ocean and leaches the coral reefs (yeah, I’m not kidding, Google it).

     bottle_cleaning

    Instead, you can throw it on some tissues and wait for it to evaporate (this also harms our envt. btw, but I think it’s the lesser of the two evils)

    Ball bearings aka mixing balls are easy to find. You can order them online from franken polish suppliers or get them at your local mechanic or hardware store. Just ensure that you’re getting the stainless steel variety of ball bearings, these are less reactive and mostly harmless. The other kind – chrome plated ones, are bad. The plating wears off when they are put into nail polish and what you get is an attractive glitter topper that’s also a carcinogenic cocktail.

     ball_bearings

    1. Tiny funnels, the kind used by perfumers.

    funnels

    These are also available online at a variety of stores. They are useful because you can easily put glitter into the empty polish bottle. They can also be used to pour the glitter suspension base into the bottle without spilling it all over your work area. You may also use them to put acetone into the bottle for cleaning it out.

    1. A well ventilated area.

    Nail polish is volatile. Hence, you cannot use the fan or the air conditioner since it’ll probably result in the solvent evaporating from your suspension base and will result in goopy leftovers.

    Keeping this in mind, sitting in an enclosed ill ventilated area is not a good idea. You can end up inhaling a lot of nail polish / acetone fumes and this will make you nauseous. So, sit outside when it’s not windy, or sit in a larger room.

    To avoid damages due to potential spillage (acetone/ suspension base – the possibilities are endless), cover your entire work area with old newspaper and spread one or two tissues over the part where you’ll be pouring stuff from one bottle into another. This way, the tissue is handy for some on-the-fly wiping or mopping up.

    Procedure:

    1. Take the empty polish bottle, put in 2 steel ball bearings. Put the funnel in the bottle and put in as much glitter as you deem necessary. If you’re making 15ml (.5 fl oz) of polish, you’ll need about 1-1.5 grams.
    2. Use the funnel to pour in the glitter suspension base. If you’re good at pouring stuff into a small mouthed bottle, you don’t really need the funnel.
    3. Close the nail polish bottle and shake like crazy. It’ll help if you have some nice background music to shake to, ha ha!
    4. As a precaution, if you’ve bought your glitter and suspension base from separate sellers, I would recommend that you mix a test batch and observe it for 24 hrs to ensure that (a)The glitter is not leaching into the suspension base and (b)The glitter particles are still evenly distributed in the nail polish and have not sedimented at the bottom.

    Black_n_White_Glitter

    That’s it! Lemme know what you think in the comments below.

    Follow my blog with Bloglovin