


Hey Guys,
I know it’s been ages since I last posted! I haven’t stopped doing nail art, just finding it difficult to keep up with regular posting. Good news is I have a nice pile of unposted designs to get crackin’ 🙂
Today is one of my first fashion inspired nail art looks. Adele is back after a long hiatus with a spankin’ new album and I’m super excited. Have had the album on loop since the time it dropped. I’m obviously a die hard fan! The minute I saw her dress from the “Adele at the BBC” event, I knew I wanted to recreate that on my nails! It’s from the Autumn-Winter 2015 Jenny Packham Collection.
Technically today is Saturday, but no one ever heard of Fashion Saturday, haha! Besides I posted these on Instagram yesterday,so I think it still counts 😀
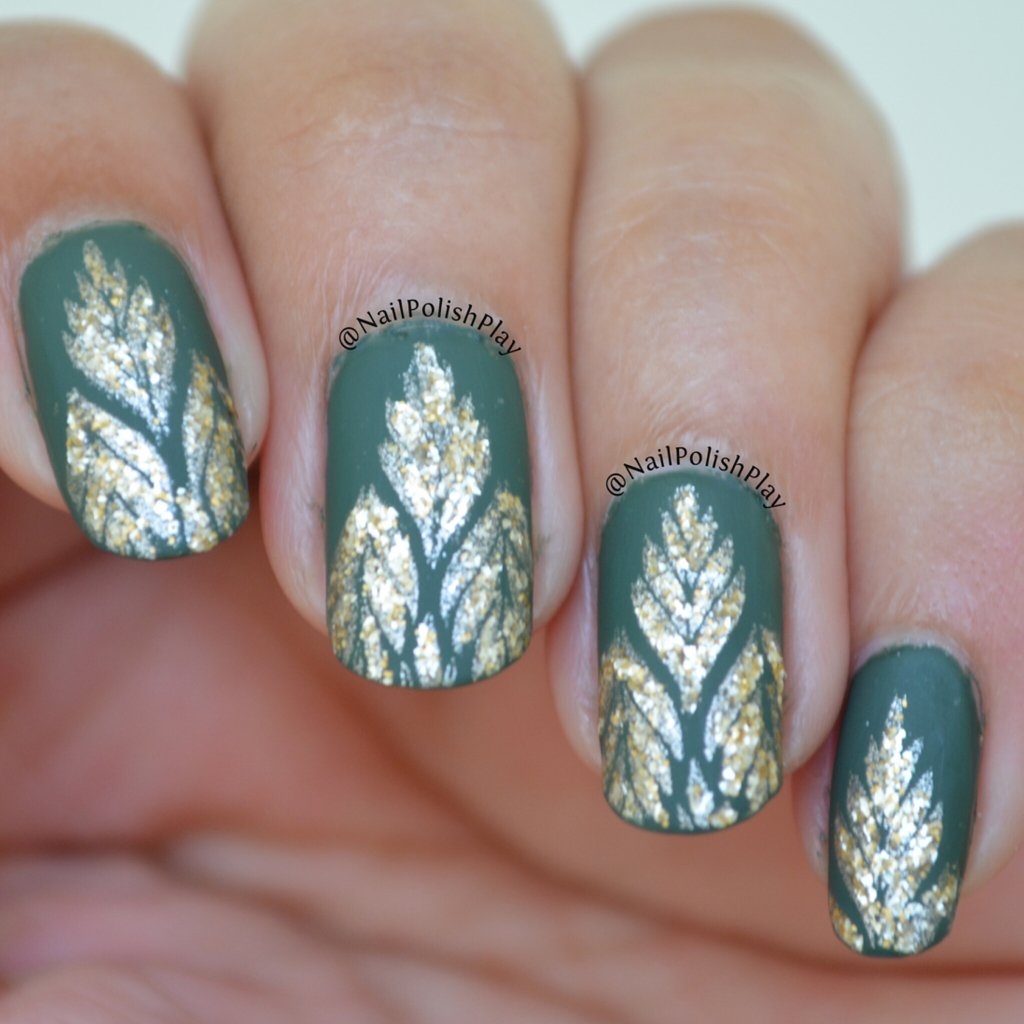
There’s a pictorial too outlining the steps on how to achieve the look. Here’s the finished manicure :

I mattified the design as I thought it went with the look of the dress.
Here’s what you need to create this mani :
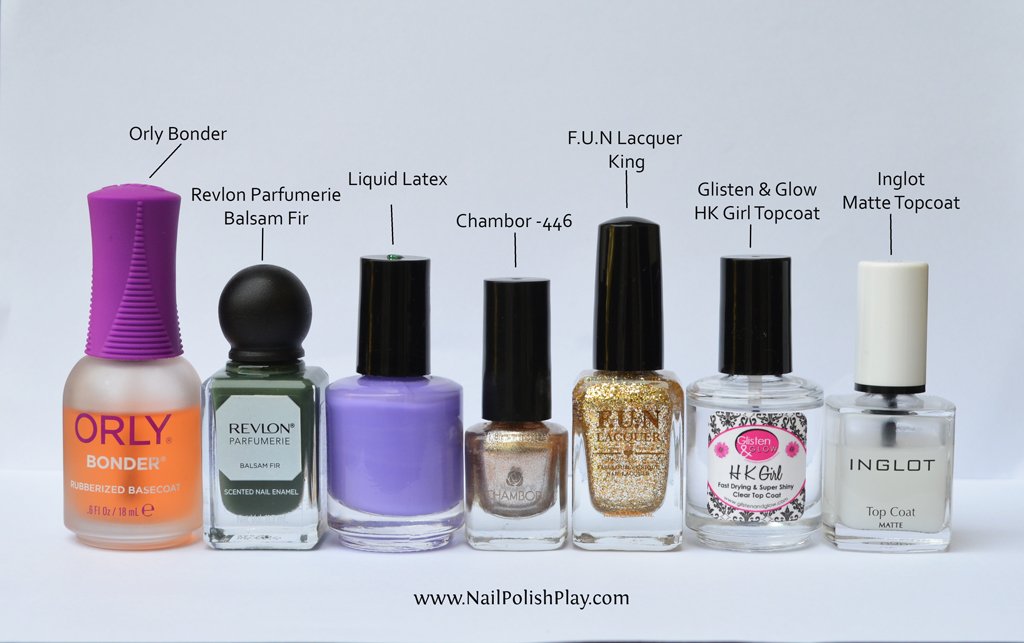
Basecoat – Orly Bonder
Revlon Parfumerie – Balsam Fir
Liquid Latex for easy cleanup with stamping
Chambor – No. 446. It’s a gold foil polish I got as a free gift so I don’t have a link for you!
F.U.N Lacquer – King ( King of bling that is!)
Glisten & Glow – HK Girl Top Coat
Inglot – Matte Top Coat
Plate Used : Fairytale 5 from HeHe plates “Fairytale Collection”

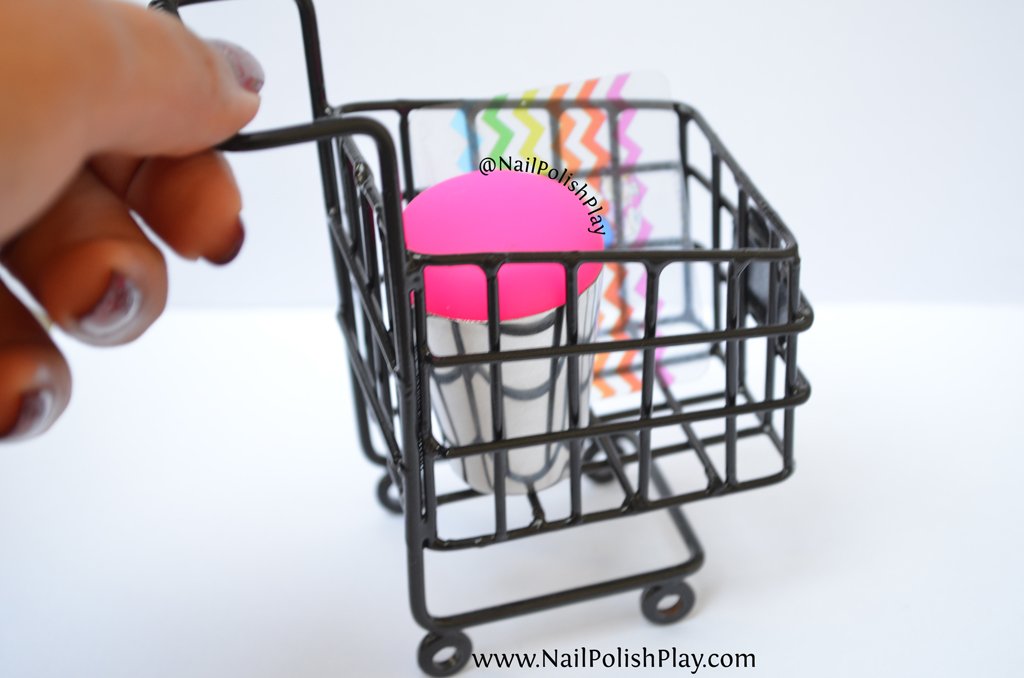
Stamper – New Jumbo stamper from FabUrNails ( psst…review coming soon)
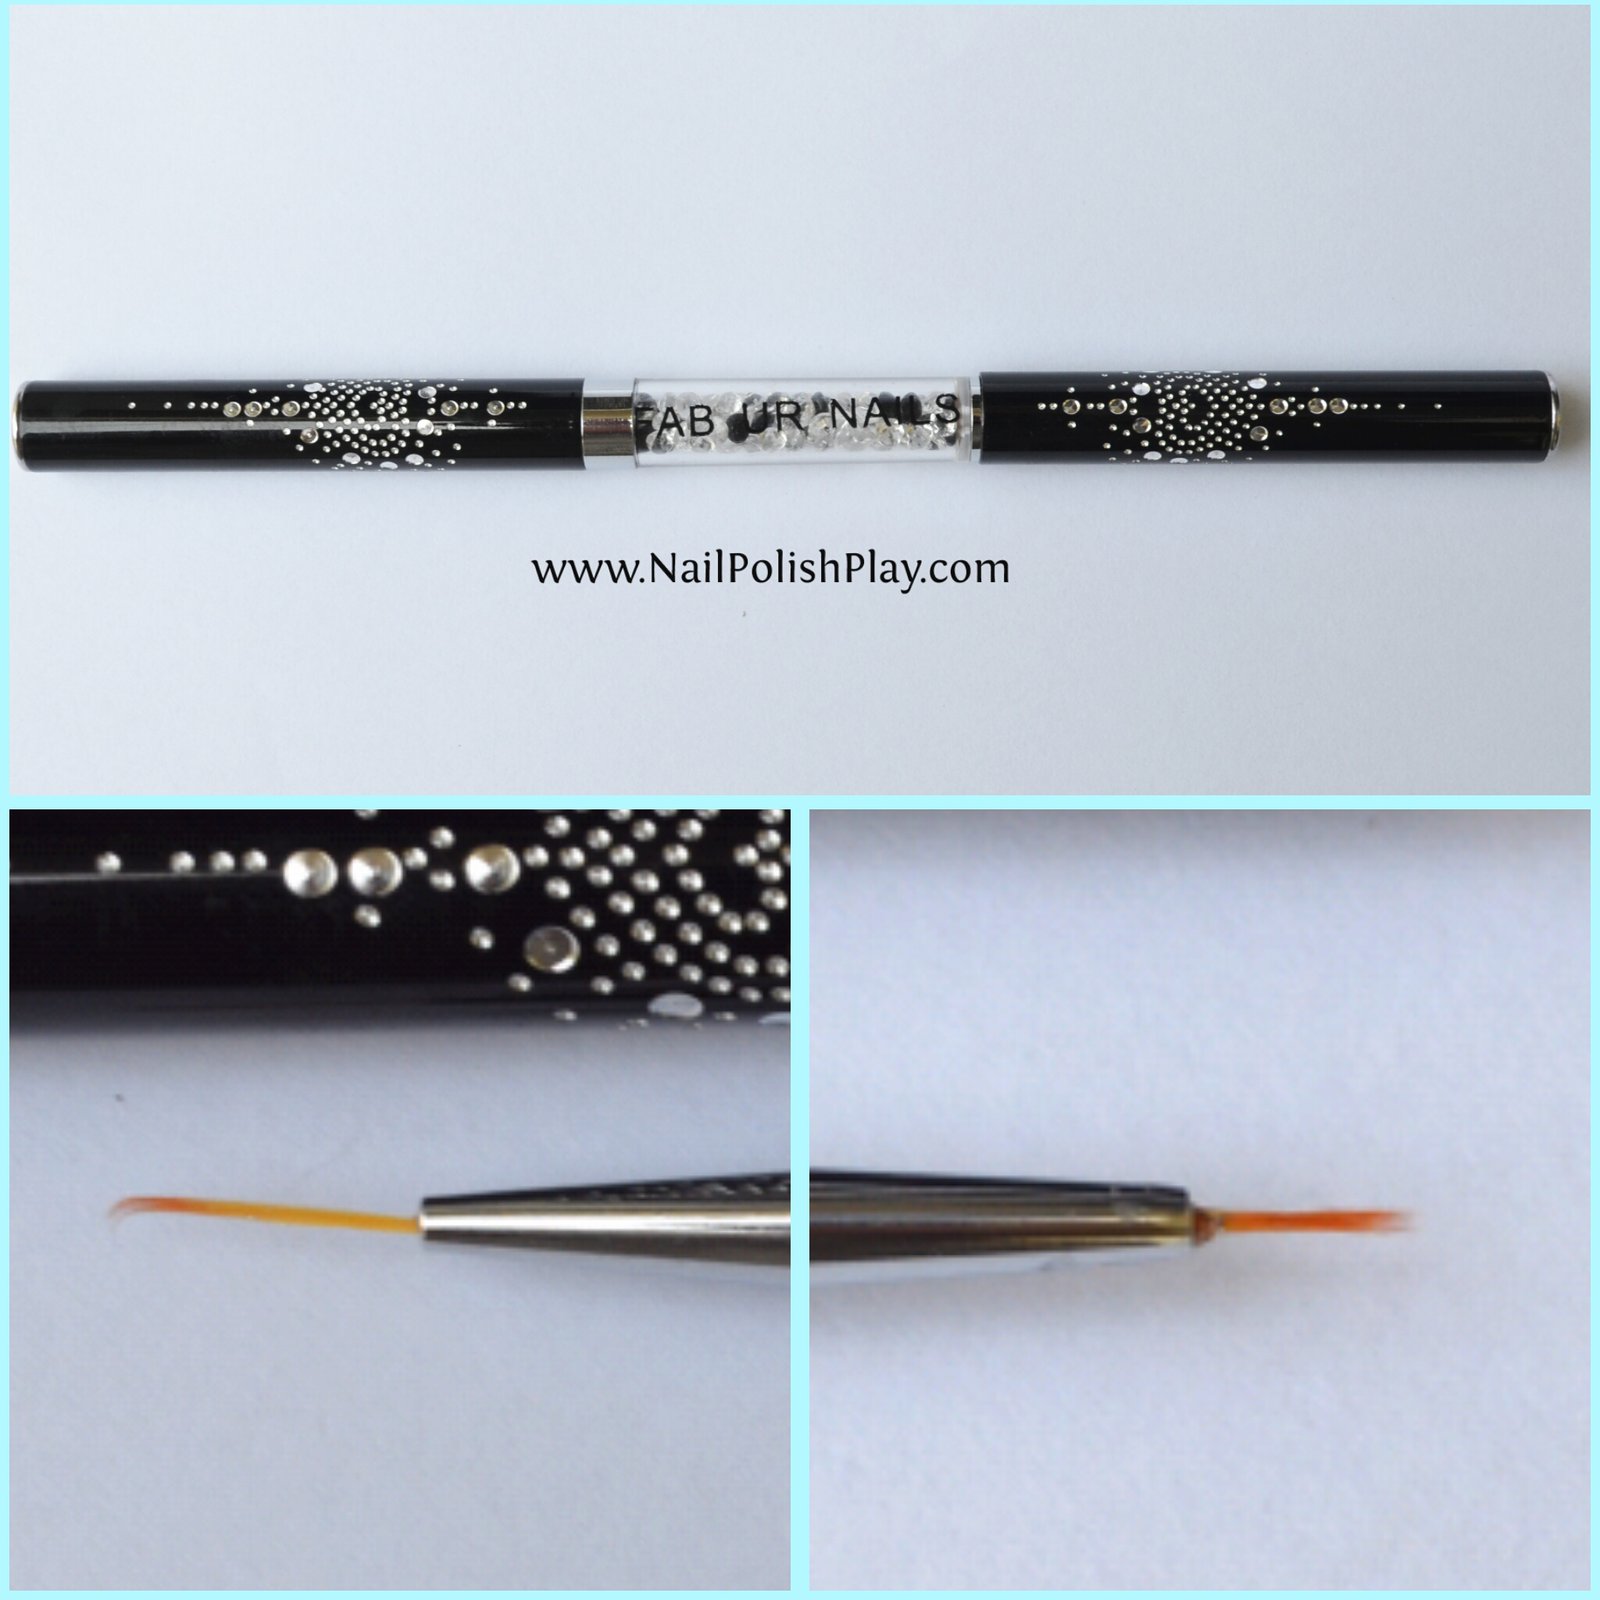
I also used the new sable double sided liner and striper brush from FabUrNails . I love the sparkly elements – the crystals, the reflective etching on the caps, excellent brush on the whole :
Here’s a pictorial with all the steps :
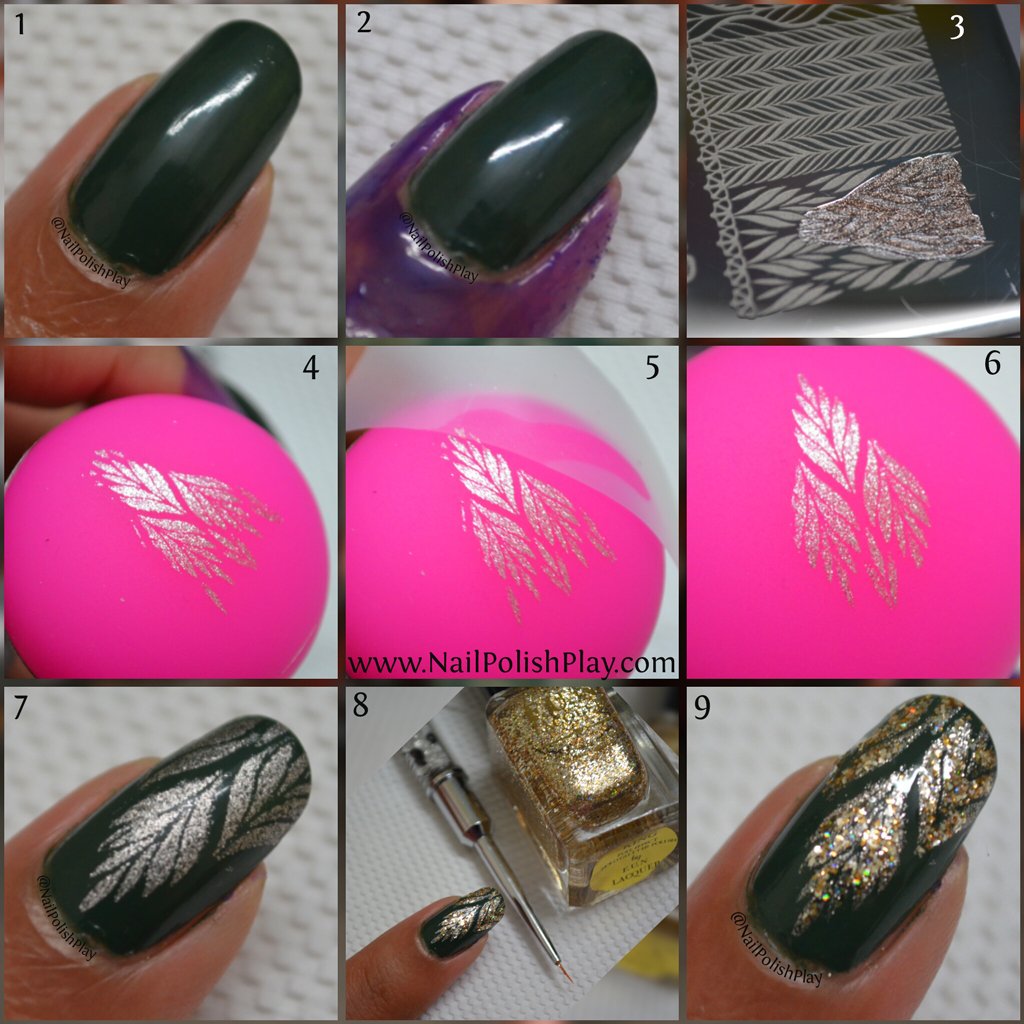
Steps:
Step 1 : Start with 2 coats of Revlon Balsam Fir.
Step 2 : Apply Liquid Latex to protect your cuticles and make it easier to cleanup after stamping.
Step 3 : Apply a gold foil stamping polish like so. I used Chambor No. 446. Plate used : Fairytale 5 from HeHe plates.
Step 4 through Step 6 : Pick up the image on your stamper and clean up the excess using scotch tape.
Step 7 : Stamp the design on the nail like so.
Step 8 : Use a thin detail brush and a flakie glitter polish and layer over the stamped design. I used F.U.N Lacquer King. It’s so crazy bling! It’s loaded with sterling silver flakies and gold micro holographic glitter AND spectraflair! It sparkles like no one’s business when mattified!
Step 9 : Add one coat of a quick dry glossy topcoat. I used my absolute favourite Glisten & Glow HKGirl topcoat.
Step 10 (Not Pictured) : Add one coat of matte topcoat to matte the design. I used Inglot matte topcoat.
Now let the blitz of pictures start, I have a ton of them to share as I simply couldn’t limit them to one or two. Here’s the matte version first :

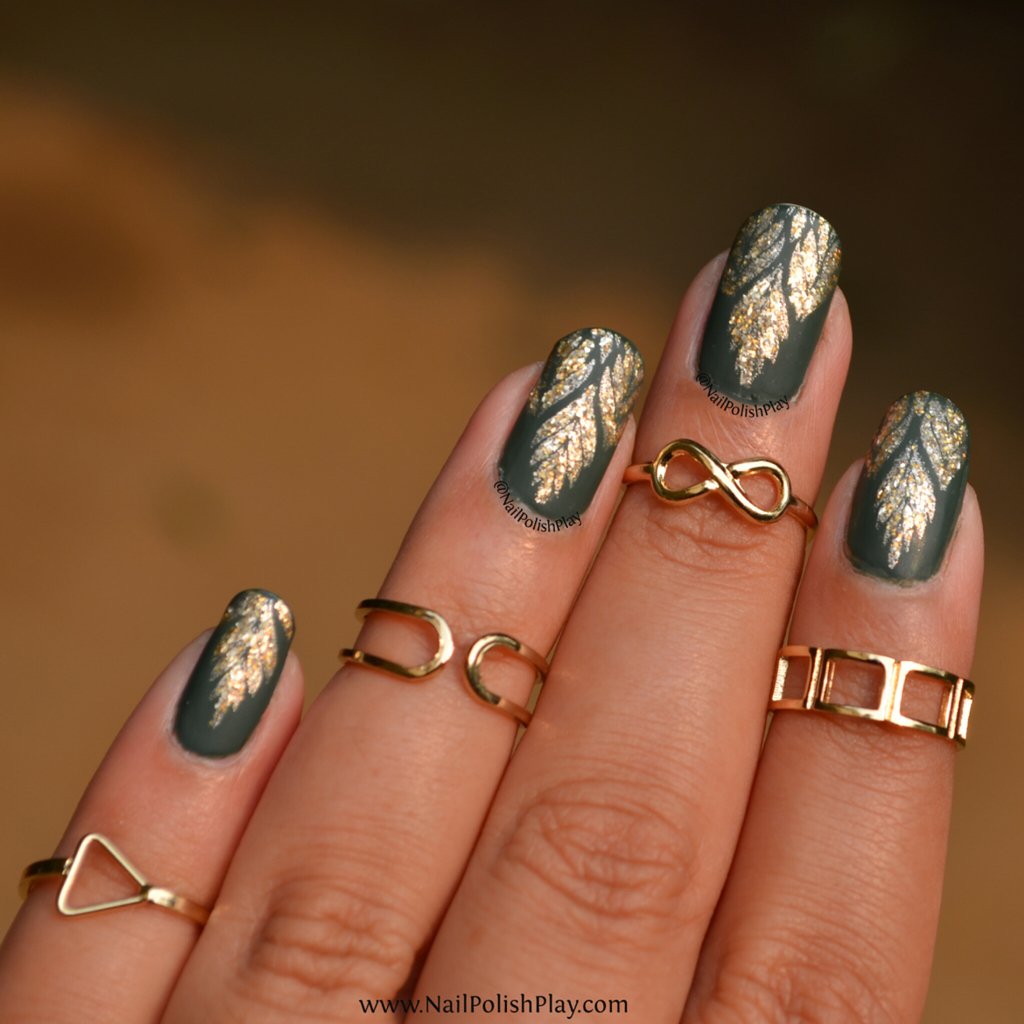
Taken outside in natural light :
I recently picked up some cute midi rings from H&M India. Just couldn’t resist clicking a pic with them too!
Taken outside in fading sunlight:

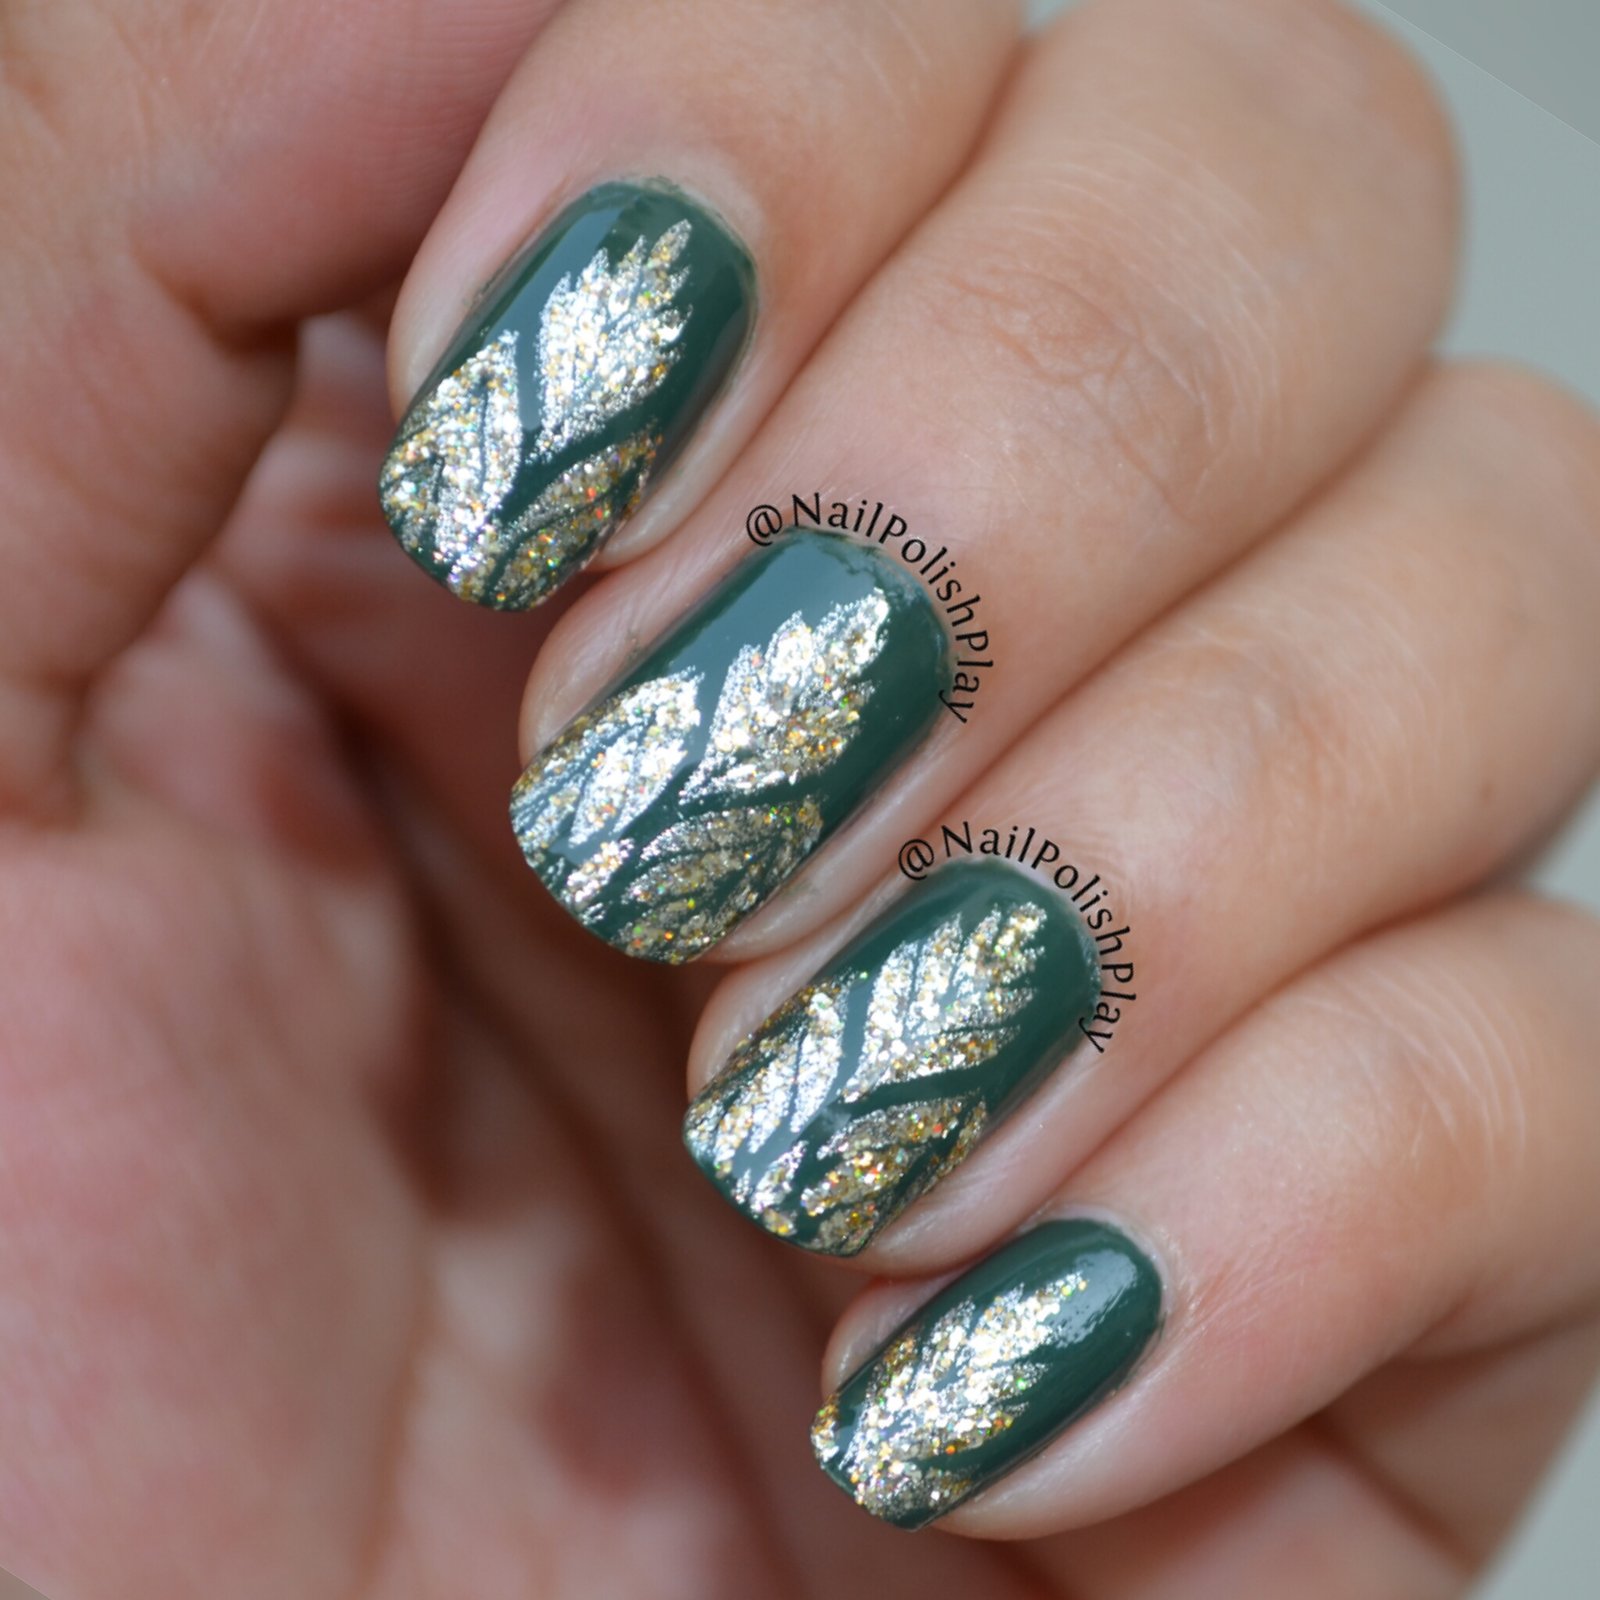
Now for the glossy look :
Natural light:

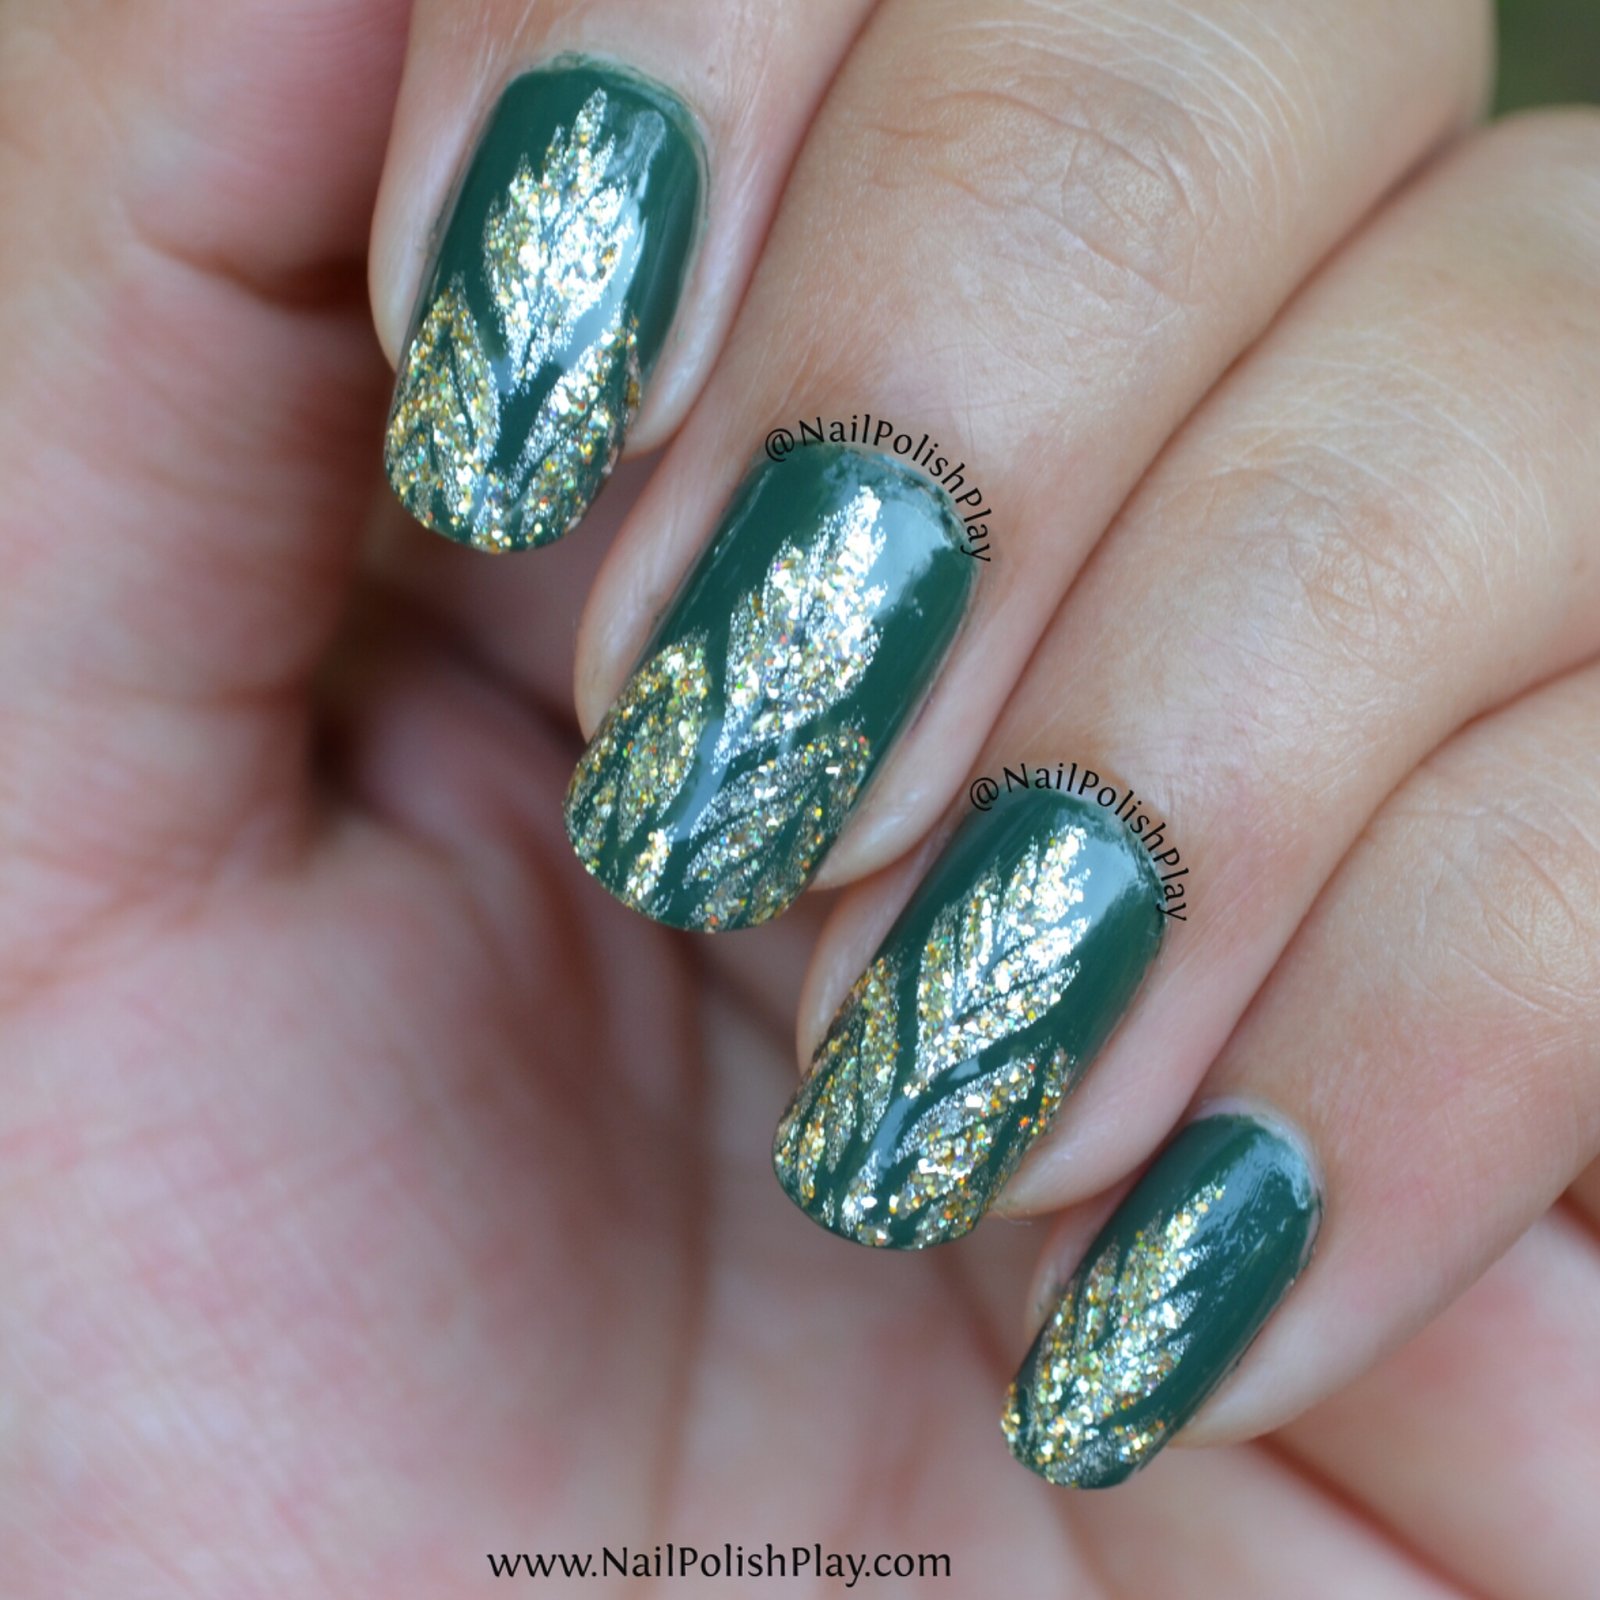
A closer look at the foil effect flakie glitter bling that is King! I just had to dab on a tiny amount using the detail side from the 2 sided brush from FabUrNails. I think the bling really amped up the mani.

With flash taken outside:
So what do you think? Which version do you prefer? Shiny or Matte?
Trackback 10