Hi guys,
Two posts in one day you ask? Well I do have a lot of catching up to do 😀 This is going to be a looong post with the neon watermarble first, a review of sorts for the Born Pretty Store 6 piece watermarble tool/ dotting tool all in one and followed up with some winter themed nail art (hint!). You’re welcome to skip all the text and just get right to the pictures if you like!
I was inspired to do a watermarble with these specific colours by a post I saw on my good friend Parul’s (Precious Pearl Makeup) instagram account – here.
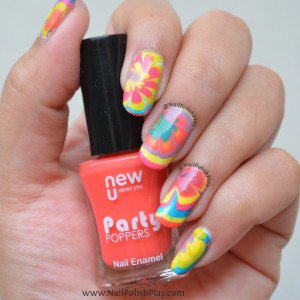
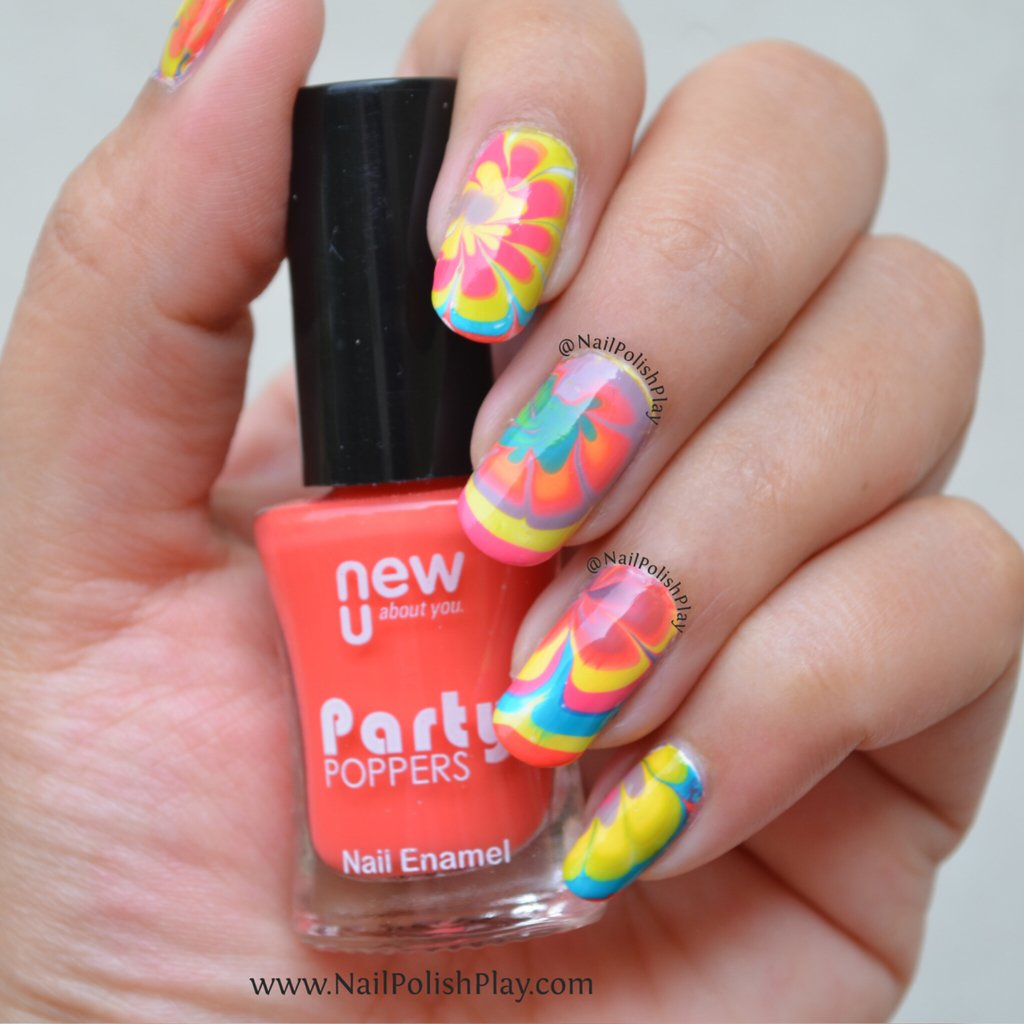
Here’s a look at the watermarble I was talking about:
Part 1 : The watermarble!

This is literally only the second time that I’ve attempted a watermarble so be kind! I was going for that floral petal pattern and I think I’ve somewhat achieved that to some reasonable degree.
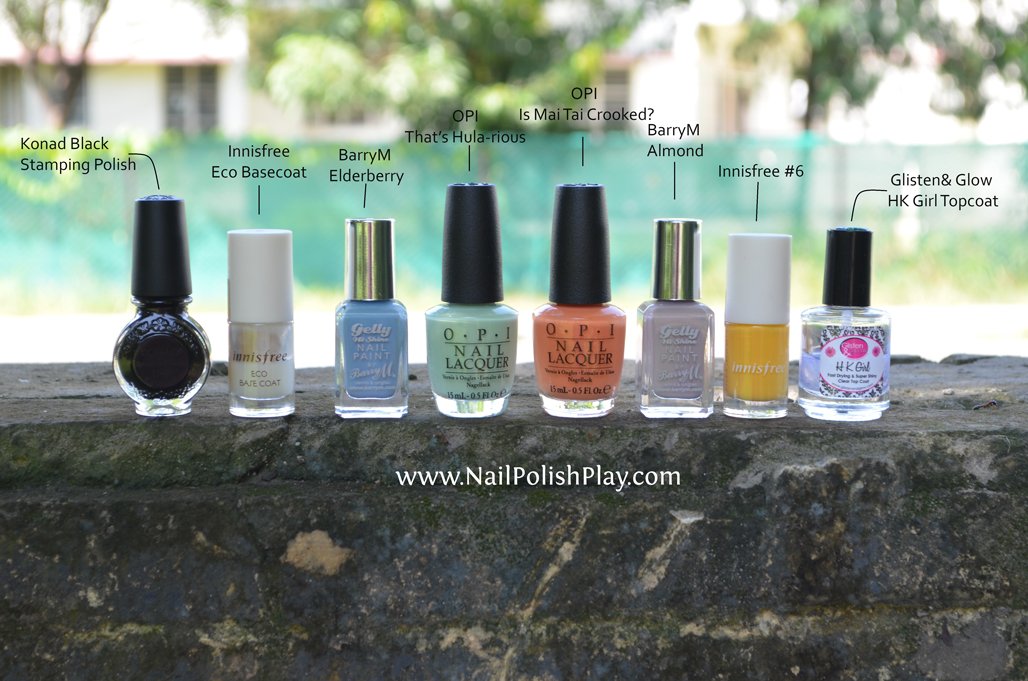
Here’s what I used:
The Basics :
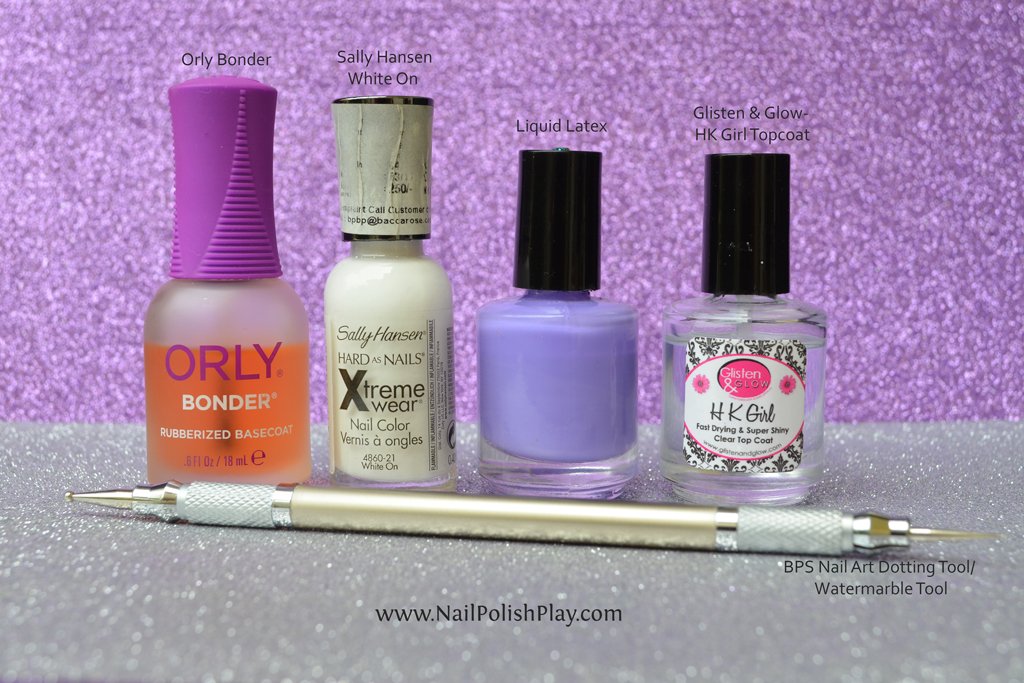
Basecoat – Orly Bonder
Sally Hansen – White On to make a white base for my watermarble
Liquid Latex for easy cleanup with everything! (watermarble to stamping)
Glisten & Glow – HK Girl Top Coat
6 pc Nail Art dotting tool/ watermarbeling tool from BornPrettyStore : I was really curious about this tool so picked it up with my own money. Here’s a closer look at the tool and a mini review!
Part 2 : The review!
Mini review of the Born Pretty Store 6 p.c. Nail Art Dotting Tool / Watermarble tool :
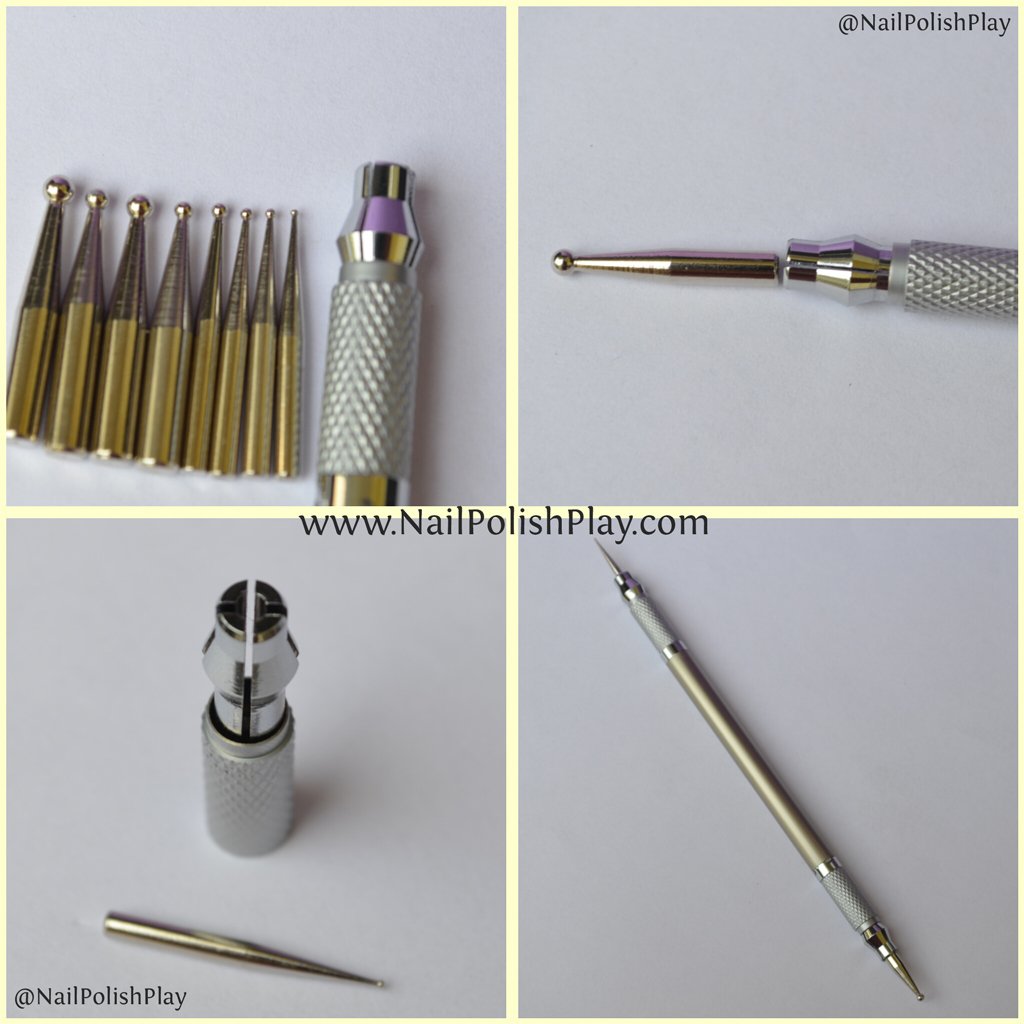
So this is a new offering from Born Pretty Store and promises to be an all in one! The product listing says it’s a 6 piece set, but as 2 are already attached to the tool itself, you actually get 8 nibs of different sizes from the largest to the smallest.
The smallest pin is what is being marketed as a watermarble tool. To be honest, I was a little disappointed that it had a tiny pinhead and not a complete pointy end similar to the pure colour watermarble tool. Though this doesn’t seem to affect the actual watermarble as much as I thought it would. You do need to clean the tips after every single drag which can be annoying. This is because polish builds up around that tiny tip and it can lead to a mess if it’s not cleaned. On the other hand, this is true of any tool you use for your watermarble, so it’s not something that’s unique to this tool as such.
Now, if you look at the rest of the fitments, I’m really impressed. It has dotting tool heads of all possible sizes and everything can be accommodated inside the barrel of this tool. It’s very neat and everything is very compact. If I’m going to travel, all I’ll ever need for most kinds of nail art is this tool.
It’s made from good quality materials and all the different pieces fit perfectly. It’s not very finicky to use and it really would’ve been perfect in my book if BPS had only given it a proper needle tip for the watermarble tool. So on the whole I’d give this a 4 out of 5 🙂
You can purchase this tool here, and use my code NPPQ10 to take 10% off on this and any other full priced items on BornPrettyStore!
Now, back to the watermarble itself. All polishes used by me are from NewU. As you may know if you follow me on instagram, these marble like a dream! They’re also very pocket friendly so you don’t need to feel guilty about dropping polish in water! Here are the colours I used:
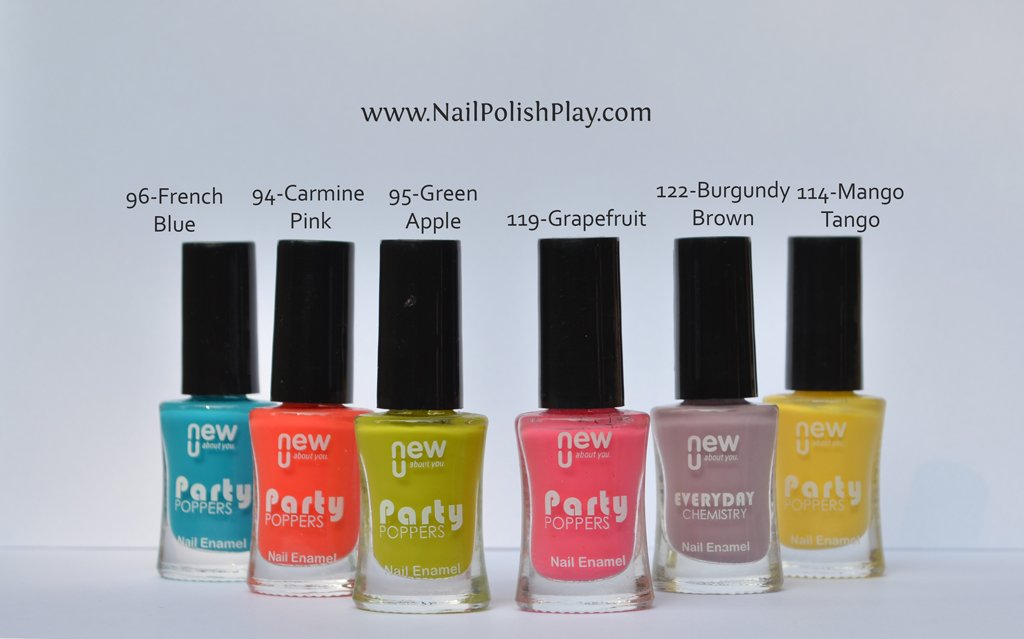
No. 95 – Green Apple ( more chartreuse I should say)
No. 122 -Burgandy Brown (clearly neither burgundy nor brown, but I don’t make the names ha ha! P.s.- Yes, I know it’s ‘Burgundy’, but it’s spelt Burgandy on the bottle)
Procedure:
The process is quite simple , I applied white nail polish on my nails to make the neon(ish) colours pop. Then I generously coated everything with liquid latex. I seriously wish I could liquid latex everything on my table every time I have to do a watermarble as somehow polish always ends up where it shouldn’t! Then I dropped drops of polish one at a time to make a nice (somewhat) bullseye.
Then leaving the first two rings alone ( they will be dry by now) and starting from the third ring I used my tool to draw a line inwards to make the petal pattern. Then I chose an okay spot and dunked my finger in, waited a few seconds and used a cotton swab to clear up the leftover polish from around my nails. I did not remove the liquid latex barrier immediately. This is because the polish is still wet and you risk damaging the design itself. So I finished another nail and then removed the latex barrier from the earlier nail. I then used my clean up brush and acetone to deal with any stragglers left behind.
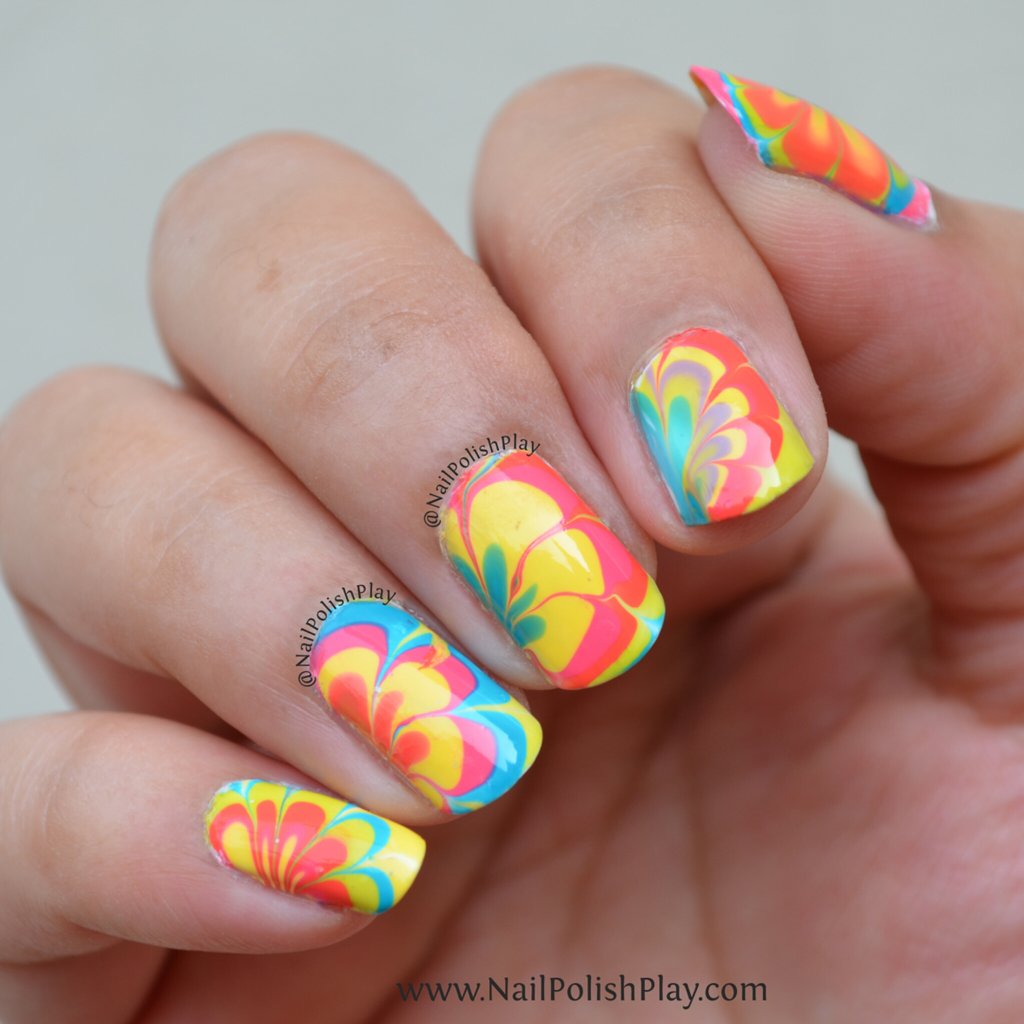
This is the finished result:
There’s still room for improvement I know, hopefully I’ll get there soon.
I also did a watermarble design on my right hand, and like before it turned out better on this one!
If only my index nail was not broken 🙁
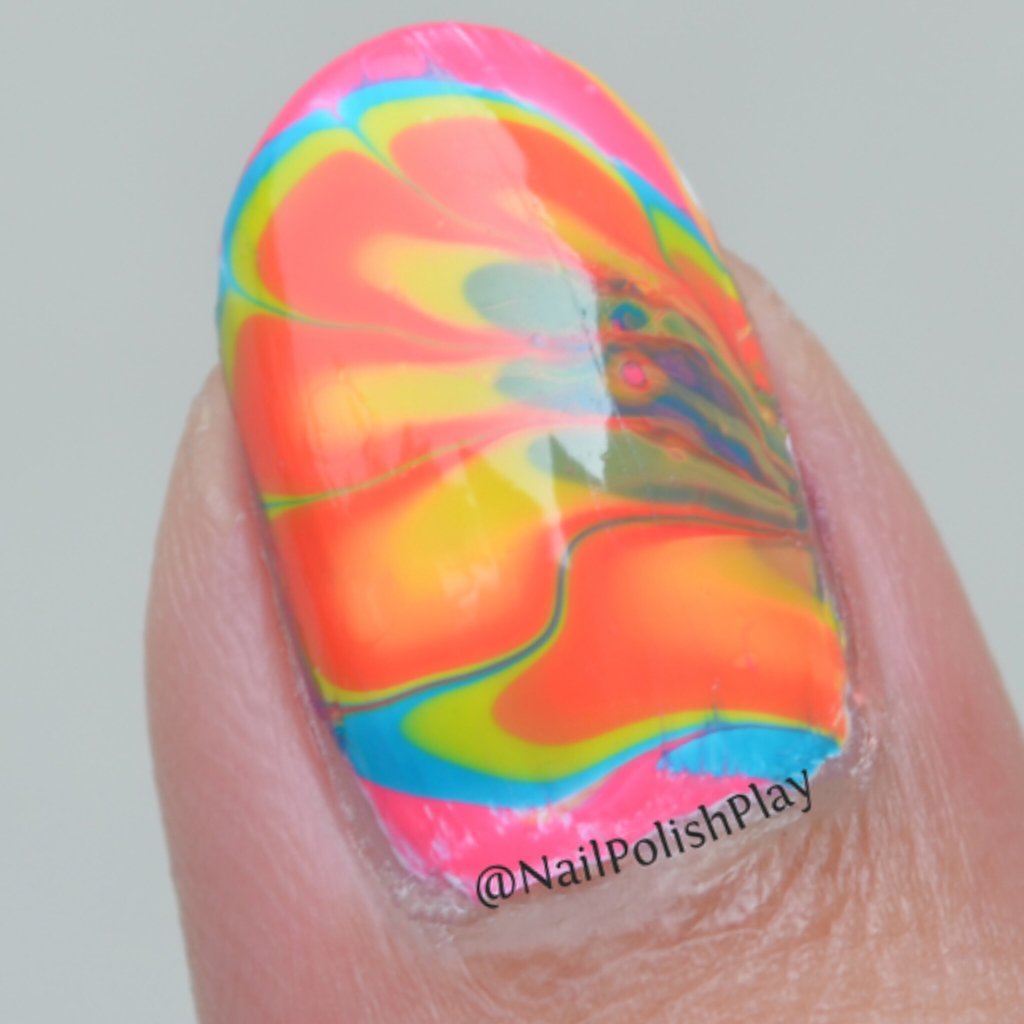
Random closeup of my right hand thumb, looks sort of like an alien blood orange 😀 :
Part 3 : The design!
Moving on to the next part , I am participating in a couple of challenges on Instagram this month – one is a nail art competition by the stamping company HeHe plates and the other is the “Weekly Nail Art Challenge” (or #wnac2015) hosted by MissBellaTracey (@missbellatracey on instagram), Lacquerstyle (@kgrdnr on instagram) and Simplynailogical. I decided to submit this next design for both prompts as there’s nothing in the rules anywhere saying I can’t 😀
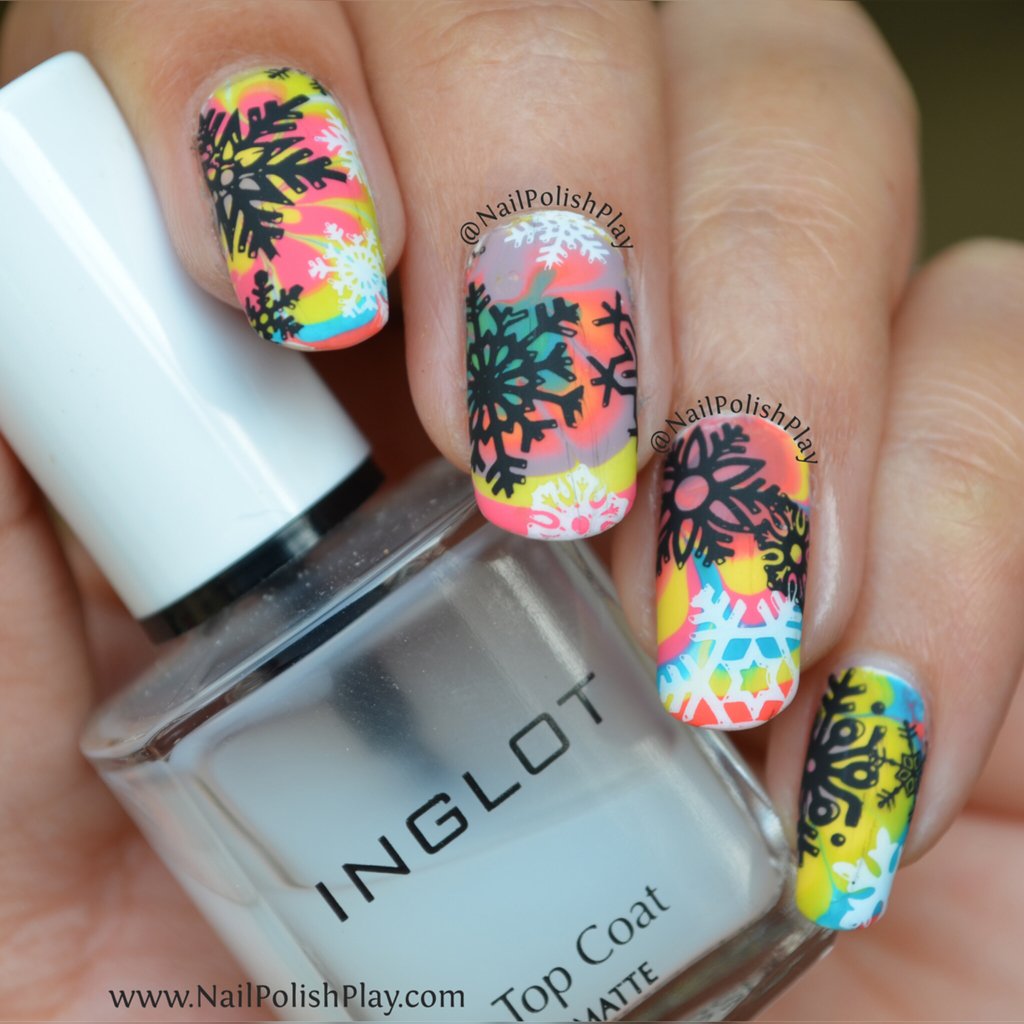
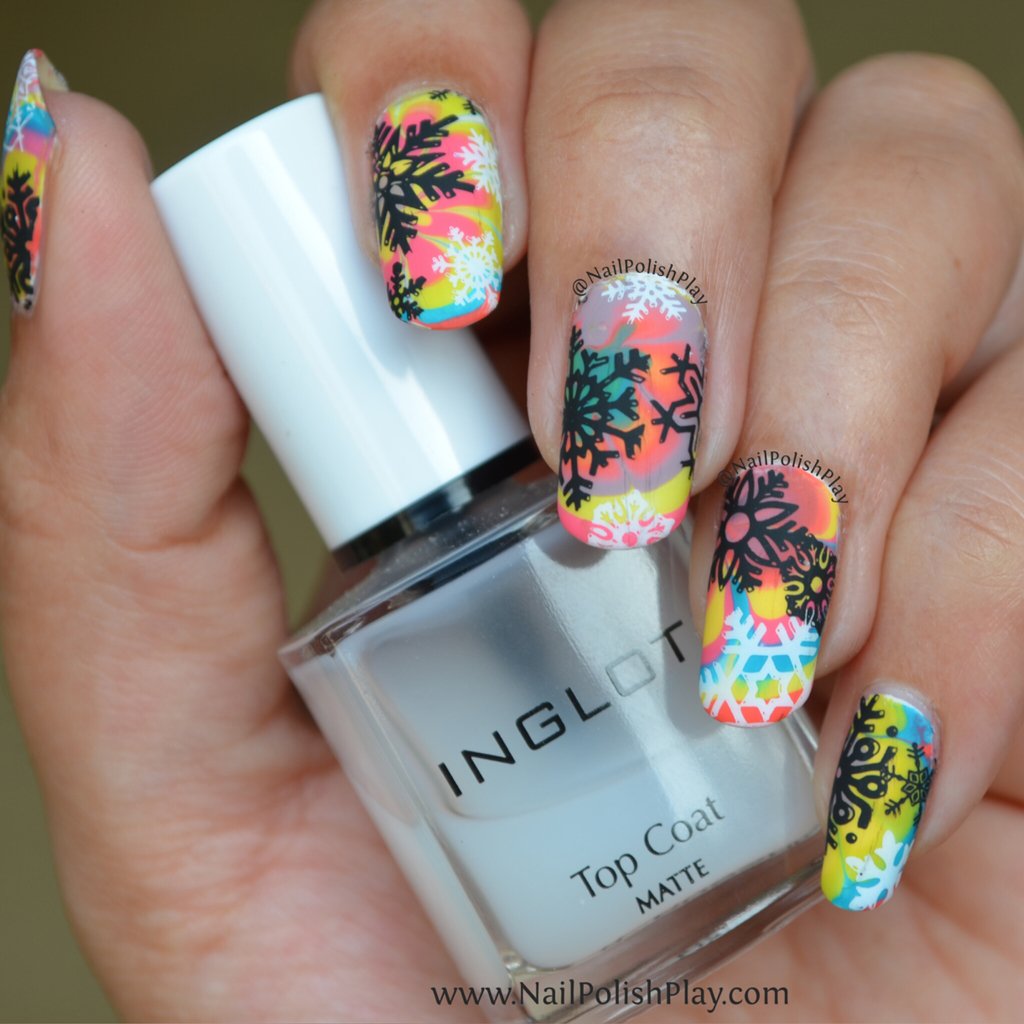
I decided to go with a slightly unusual choice of design and stamped some snowflakes on my super bright watermarble. I honestly wasn’t sure if I’d even like the end result,but surprisingly I do.
Here’s what I used to create the stamped design:
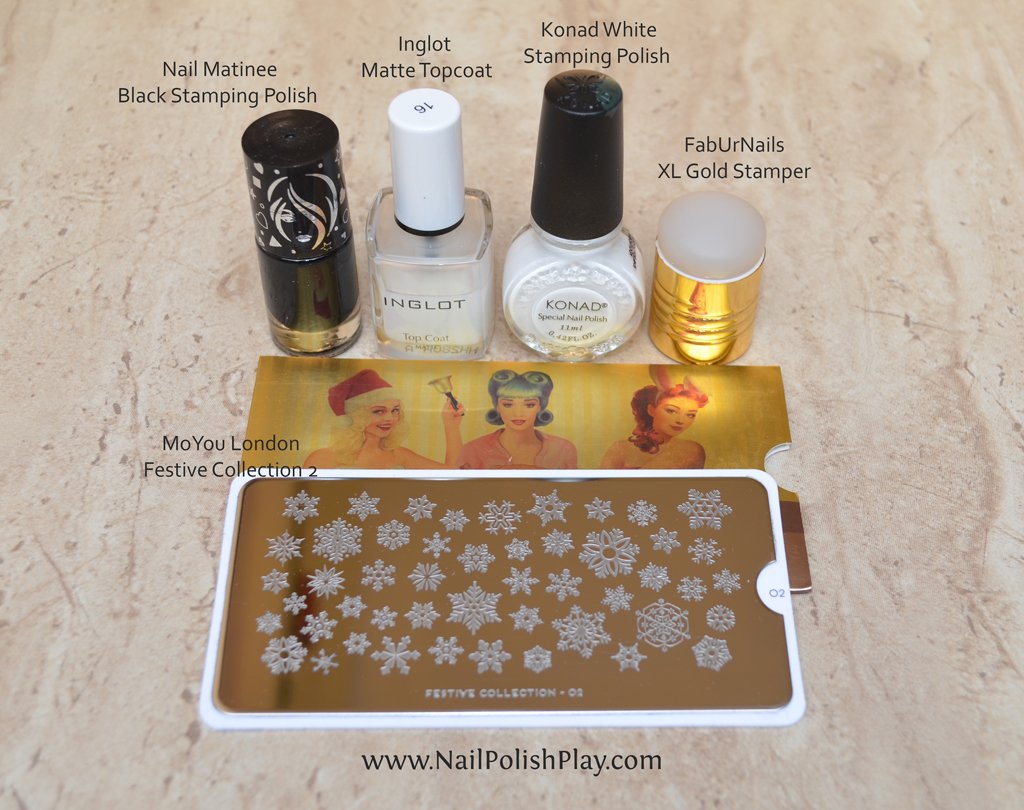
Black Stamping Polish – Nail Matinee brand – This is an indie brand from India and you can contact Nisha ( the creator) on Facebook
I did face some minor issues (polish was drying a little too fast) with this particular batch of polish, but I’ve been assured by Nisha that the current batch doesn’t have this issue.
Matte Topcoat – Inglot – I swear by this topcoat as it makes everything perfectly matte in one coat. No fiddling with multiple coats trying to matte your manicure. I bought this from the Inglot showroom in New Delhi so unfortunately I don’t have a link for it online.
XL Gold stamper from FabUrNails
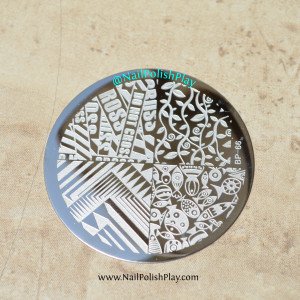
Festive Plate 2 – MoYou London
I randomly picked out snowflakes in black and white stamping polish and placed them on my marbled nails. I then sealed it with glossy topcoat first and waited for everything to dry ( which hardly took any time as I’m a fast dry topcoat addict :D). Why glossy topcoat you ask? Well, matte topcoats (at least the one I have) drag the stamped design, make a mess and ruin your manicure. I have just painstakingly made a watermarbled design! No way am I going to risk making a mess!
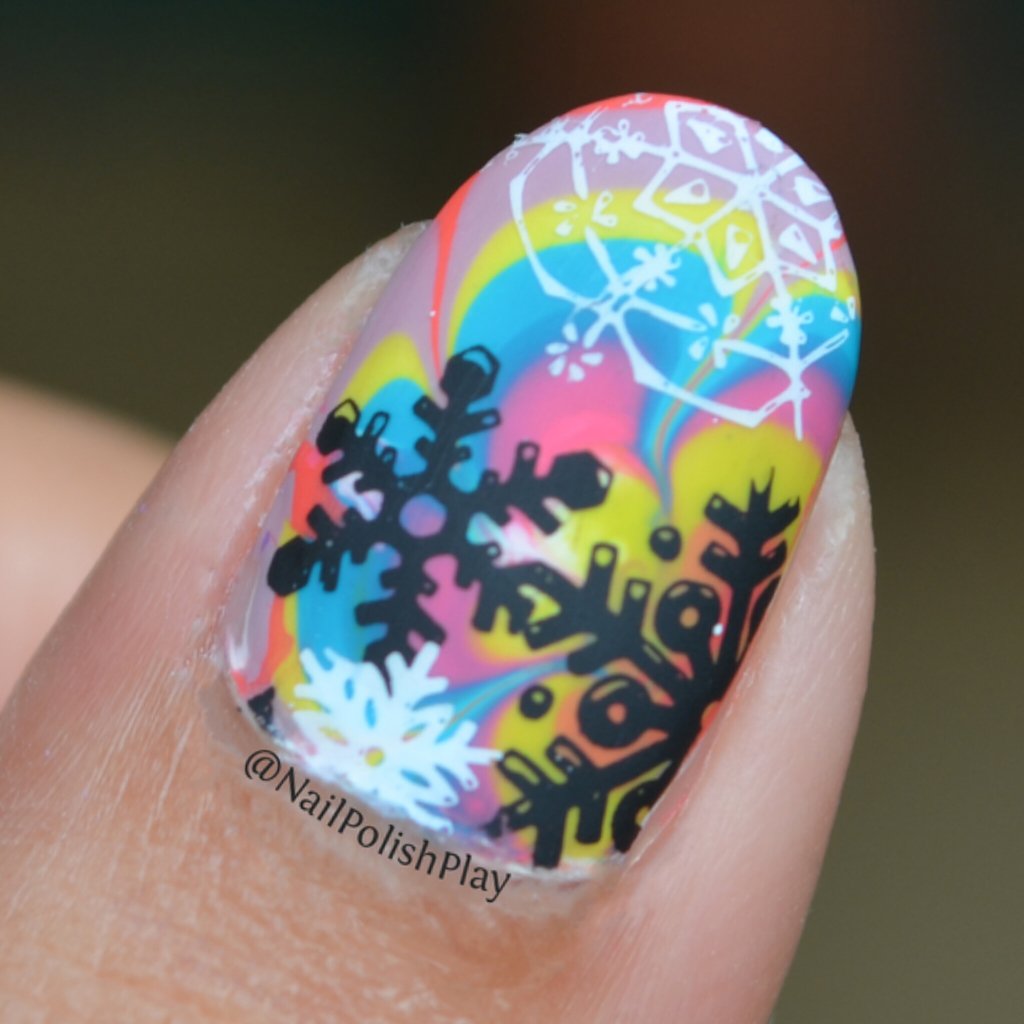
Once dry, I added one coat of the matte topcoat to mattify my design. I have heard reviews of matte polish not lasting long but I must disagree. I’ve already had this design on my nail for a week and a half as I type and it’s still as fresh as the day I painted it!
Glossy version first:

Looks good, but I feel like something is missing..
And another glossy one:

Now for the matte magic:
Woah! <3 I personally love the matte look! It’s as if the design became more alive somehow!
Here’s more matteness:

Random closeup of dwarf thumb on my left hand ( when will both hands have perfect length nails 🙁 )
Phew! That was a long post! Kudos if you’ve read this till the end!
What did you think? Matte or glossy? Like the snowflakes on such a crazy bright background? No? Why not? Let me know!
See you next post!